
Ash Mid-Century Modern Kitchen: Before, During, and After
T H E D E S I G N P R O C E S S:
M I D - C E N T U R Y M O D E R N K I T C H E N
Every design process begins with the initial consultation. We ask lots of questions about your goals, budget, how you live in the space, your needs and wants, preferred materials, and much more in an effort to gather information to inform the design process. Click here for more on interior design consultations.
This fabulous couple wanted create a mid-century modern kitchen by opening the space up to the living and dining rooms and facilitate better flow between spaces for living and entertaining (post pandemic!). They wanted to refinish the hardwood floors, and update the seafoam green cabinets with a modernized mid-century aesthetic.
We began, like we do with all of our projects, by creating a design plan that included as much of their wishlist as possible as we like to show our clients the potential in their spaces. We knew we wanted walnut cabinets, white cabinets, funky tile, brass accents, more storage, an open concept, and a mid-century modern feel so we began by presenting three initial design concepts (below) that showcased these elements. Through this first presentation with the clients we were able to determine which of these elements were the most important to them and which ones could be eliminated.


The next step was preliminary quoting. We took the preferred concepts, numbers two and three, and requested preliminary quotes from our suppliers and trades. Both concepts came in over the clients’ preferred budget but we knew with some revisions we would be able to satisfy the design intent within the available resources. We find that this exercise is helpful as it leads to necessary final decision making and allows clients to gain an understanding of the costs involved with renovating.
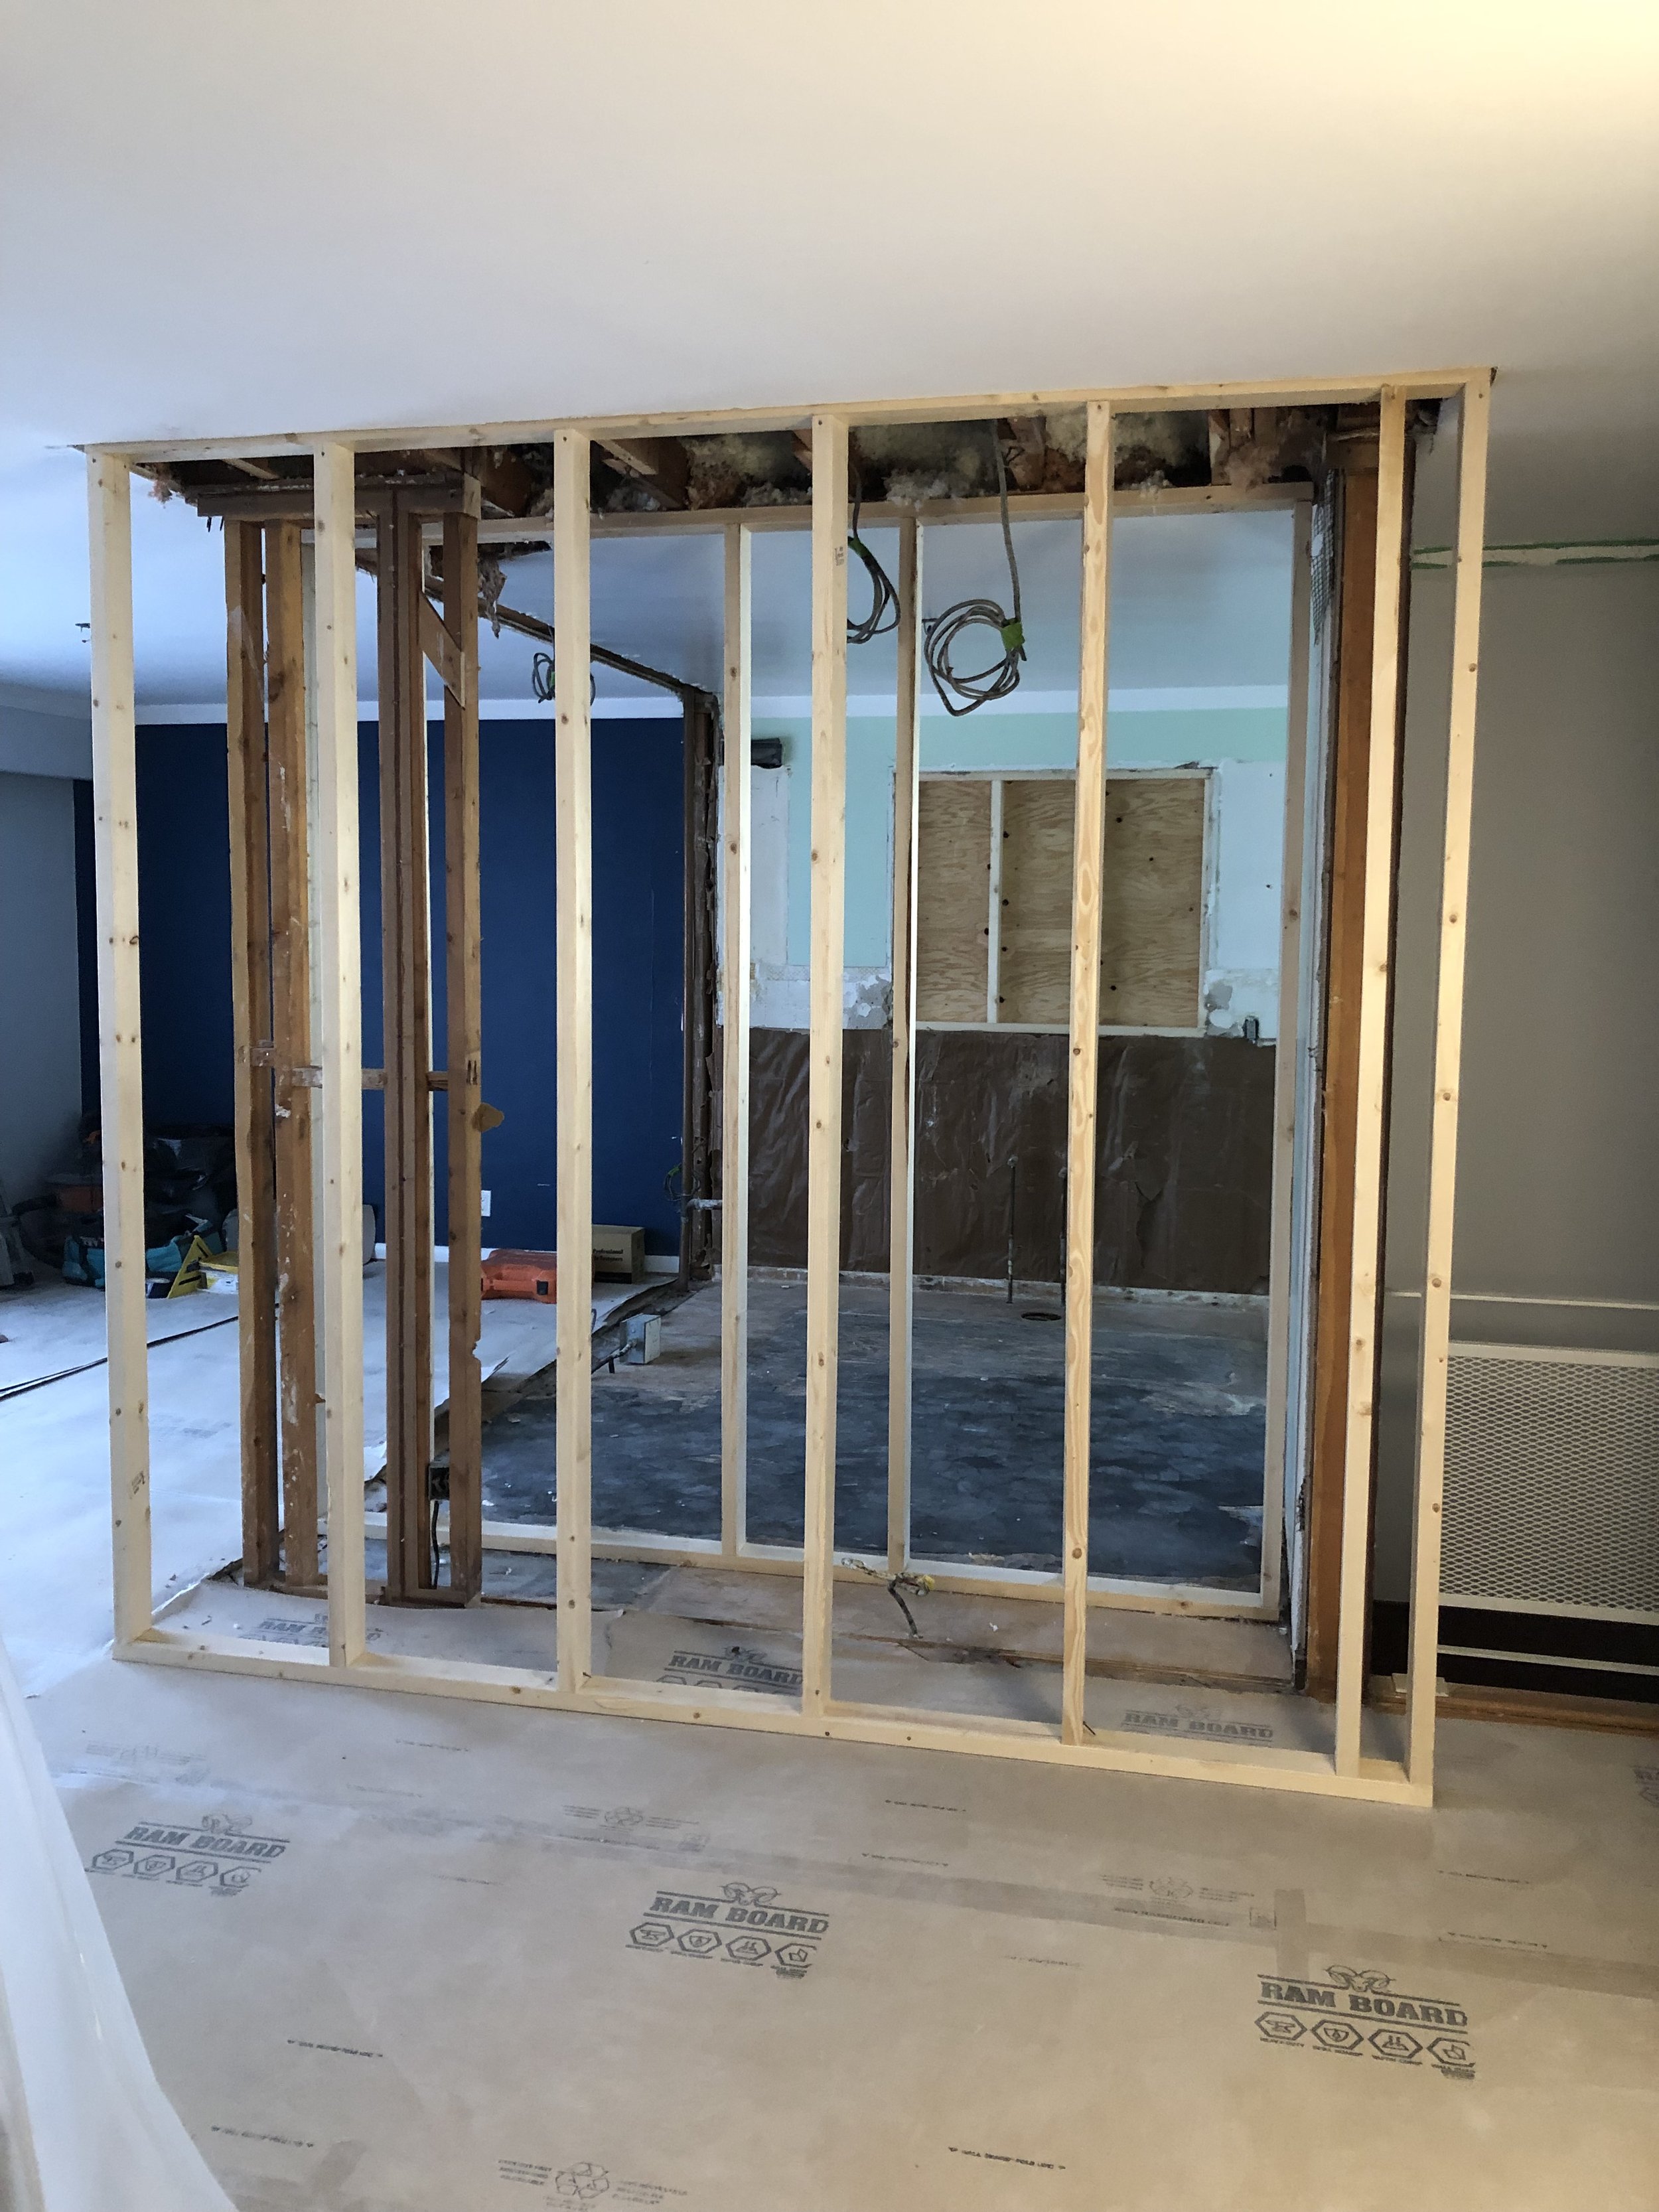
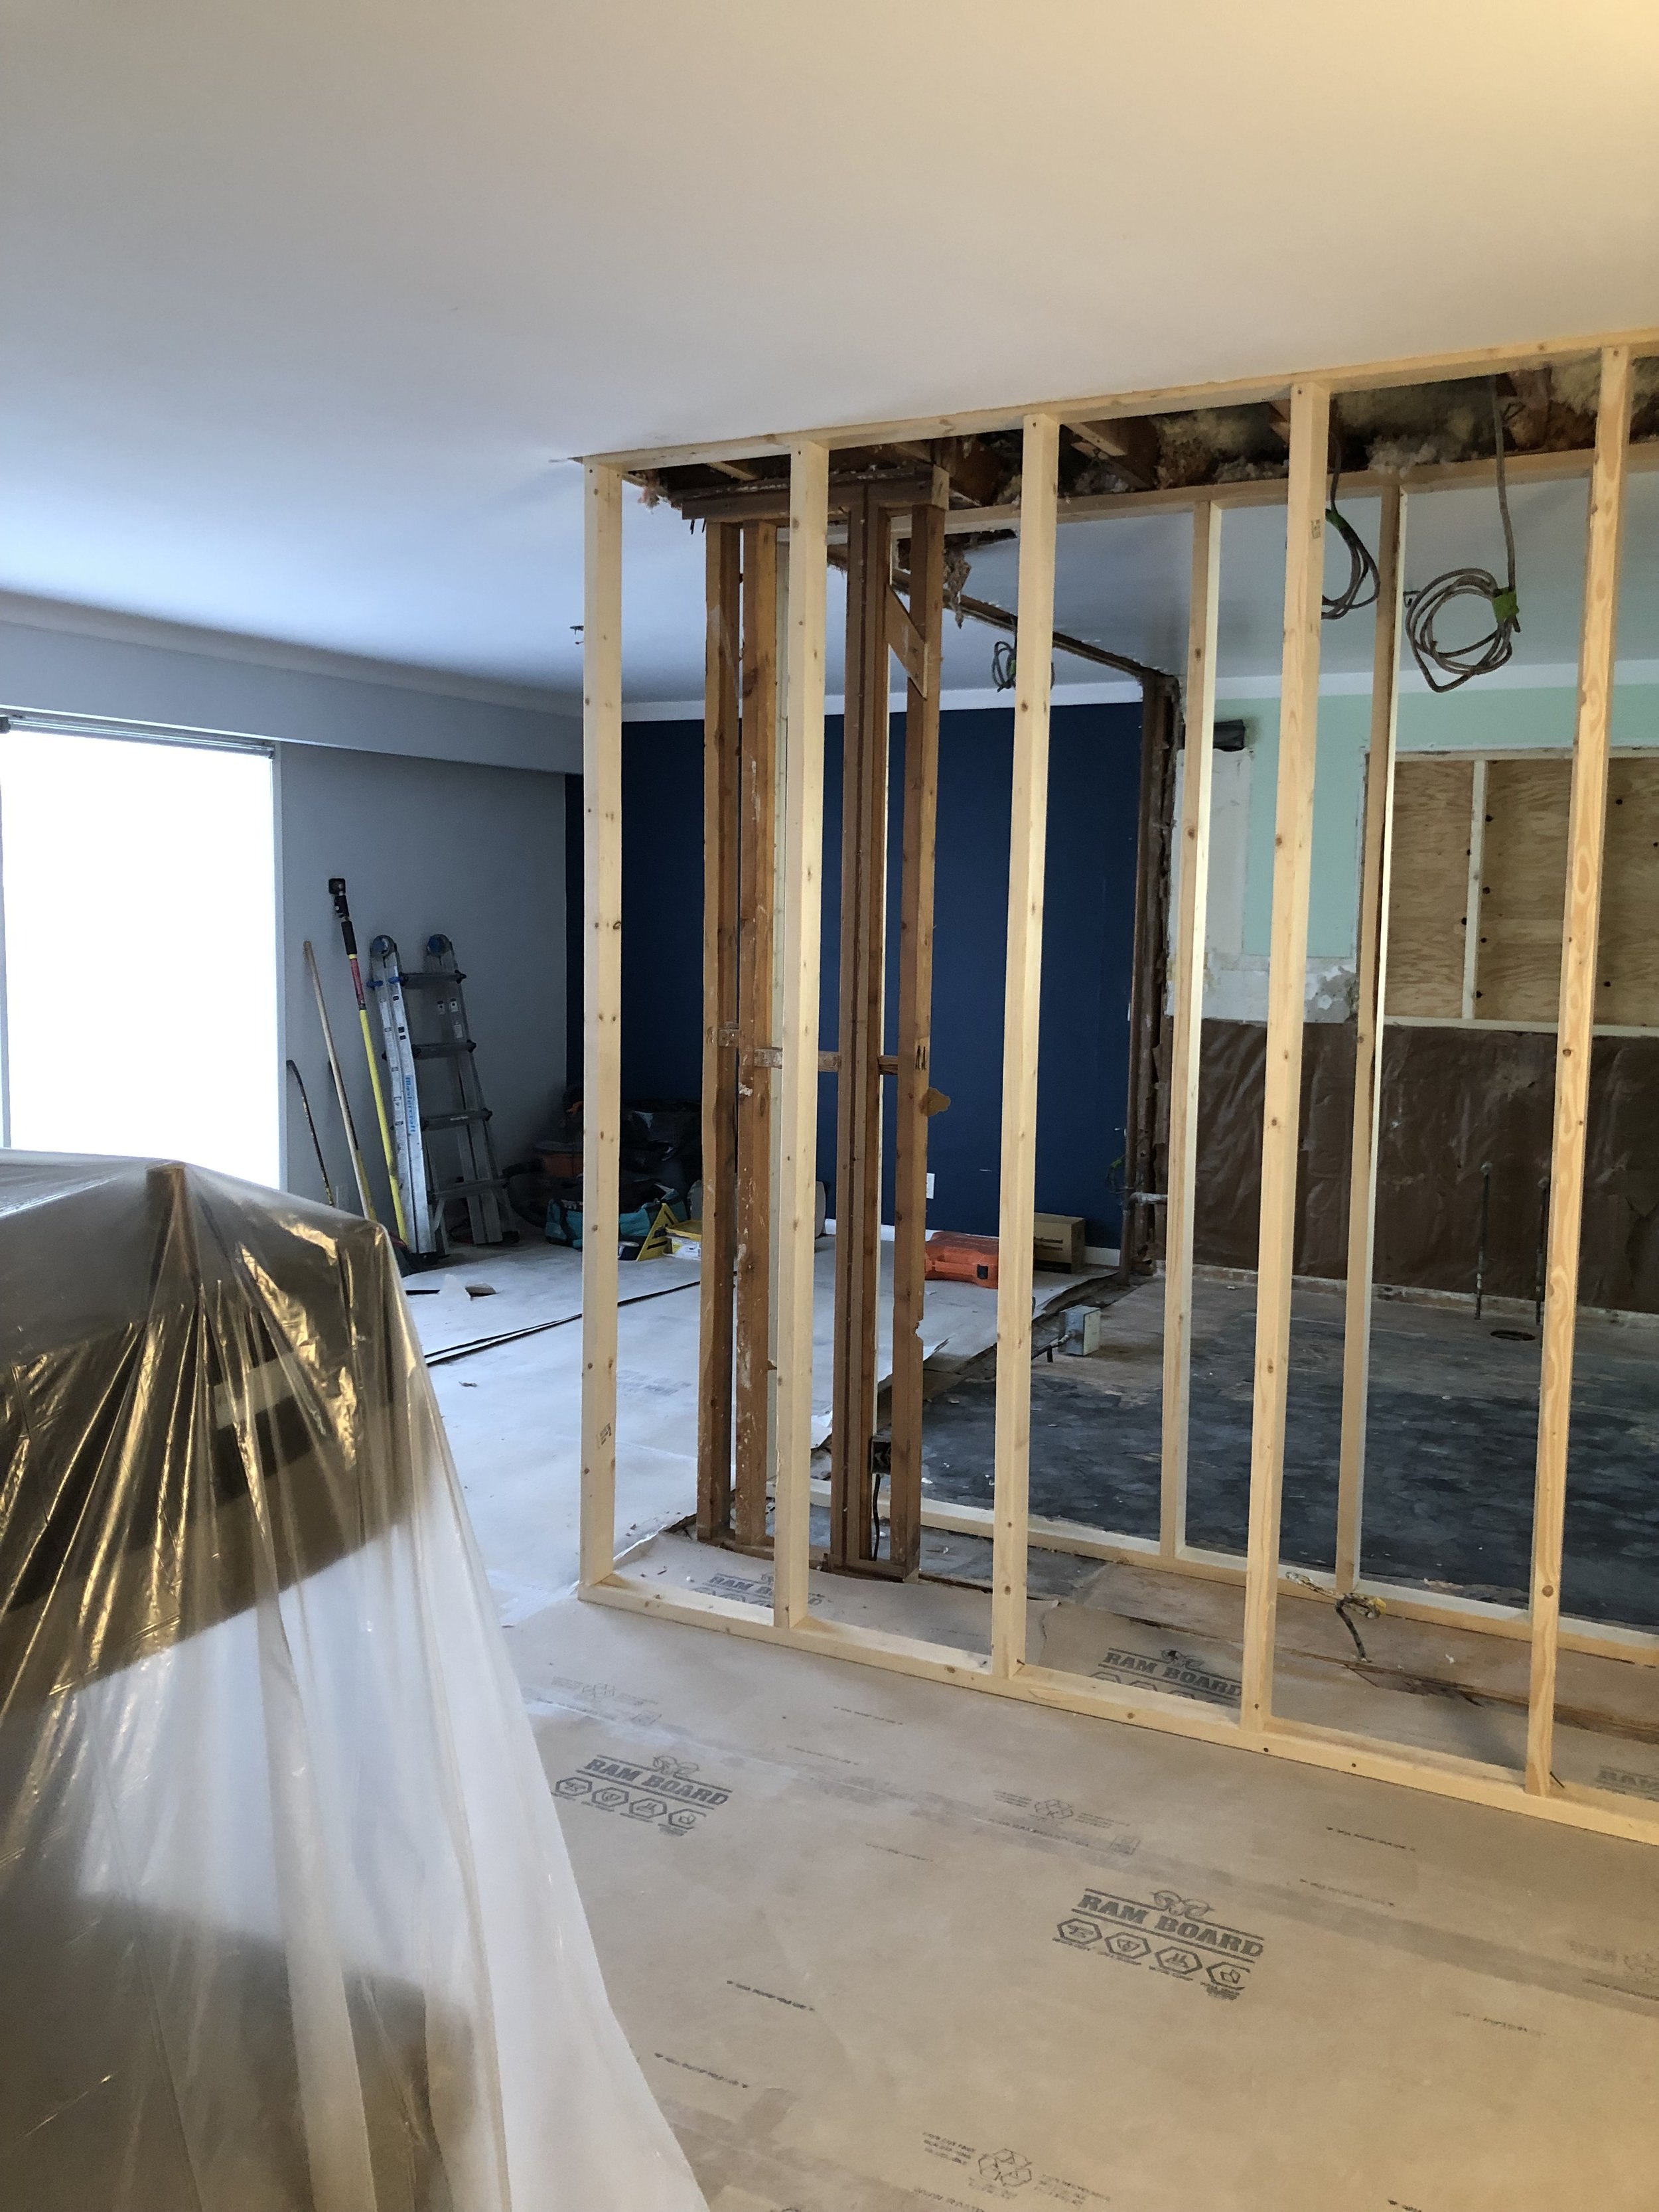
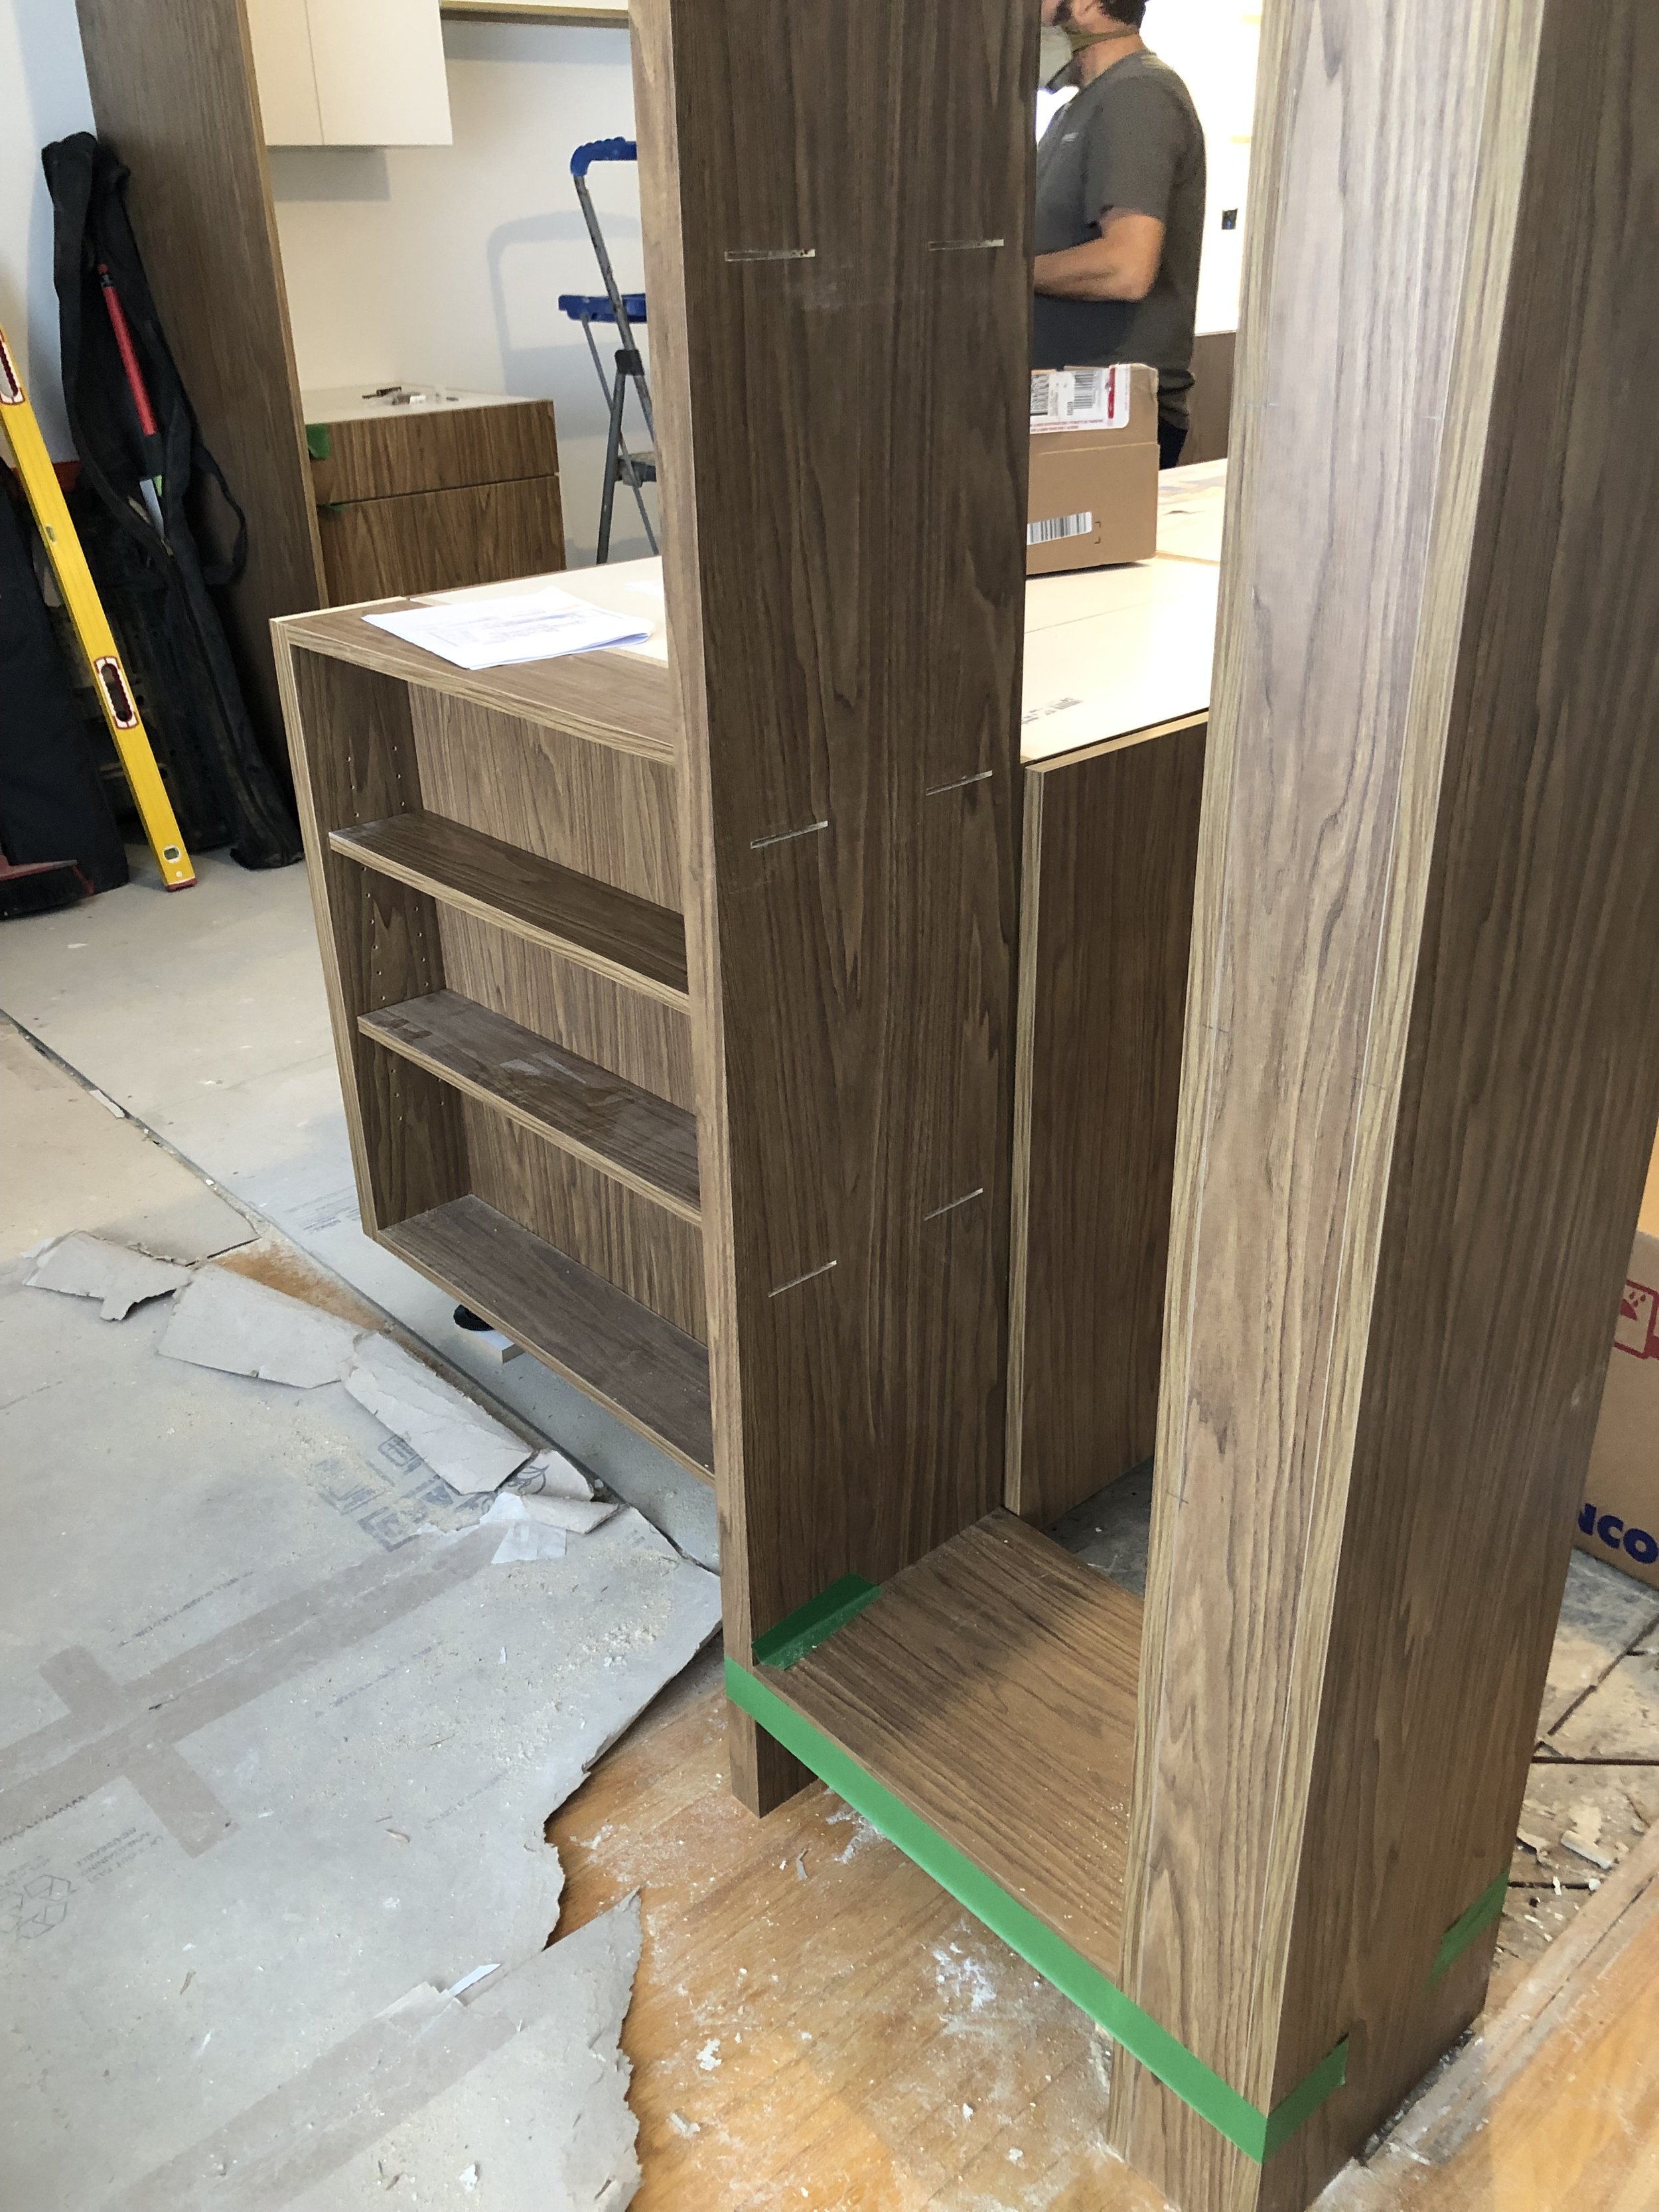
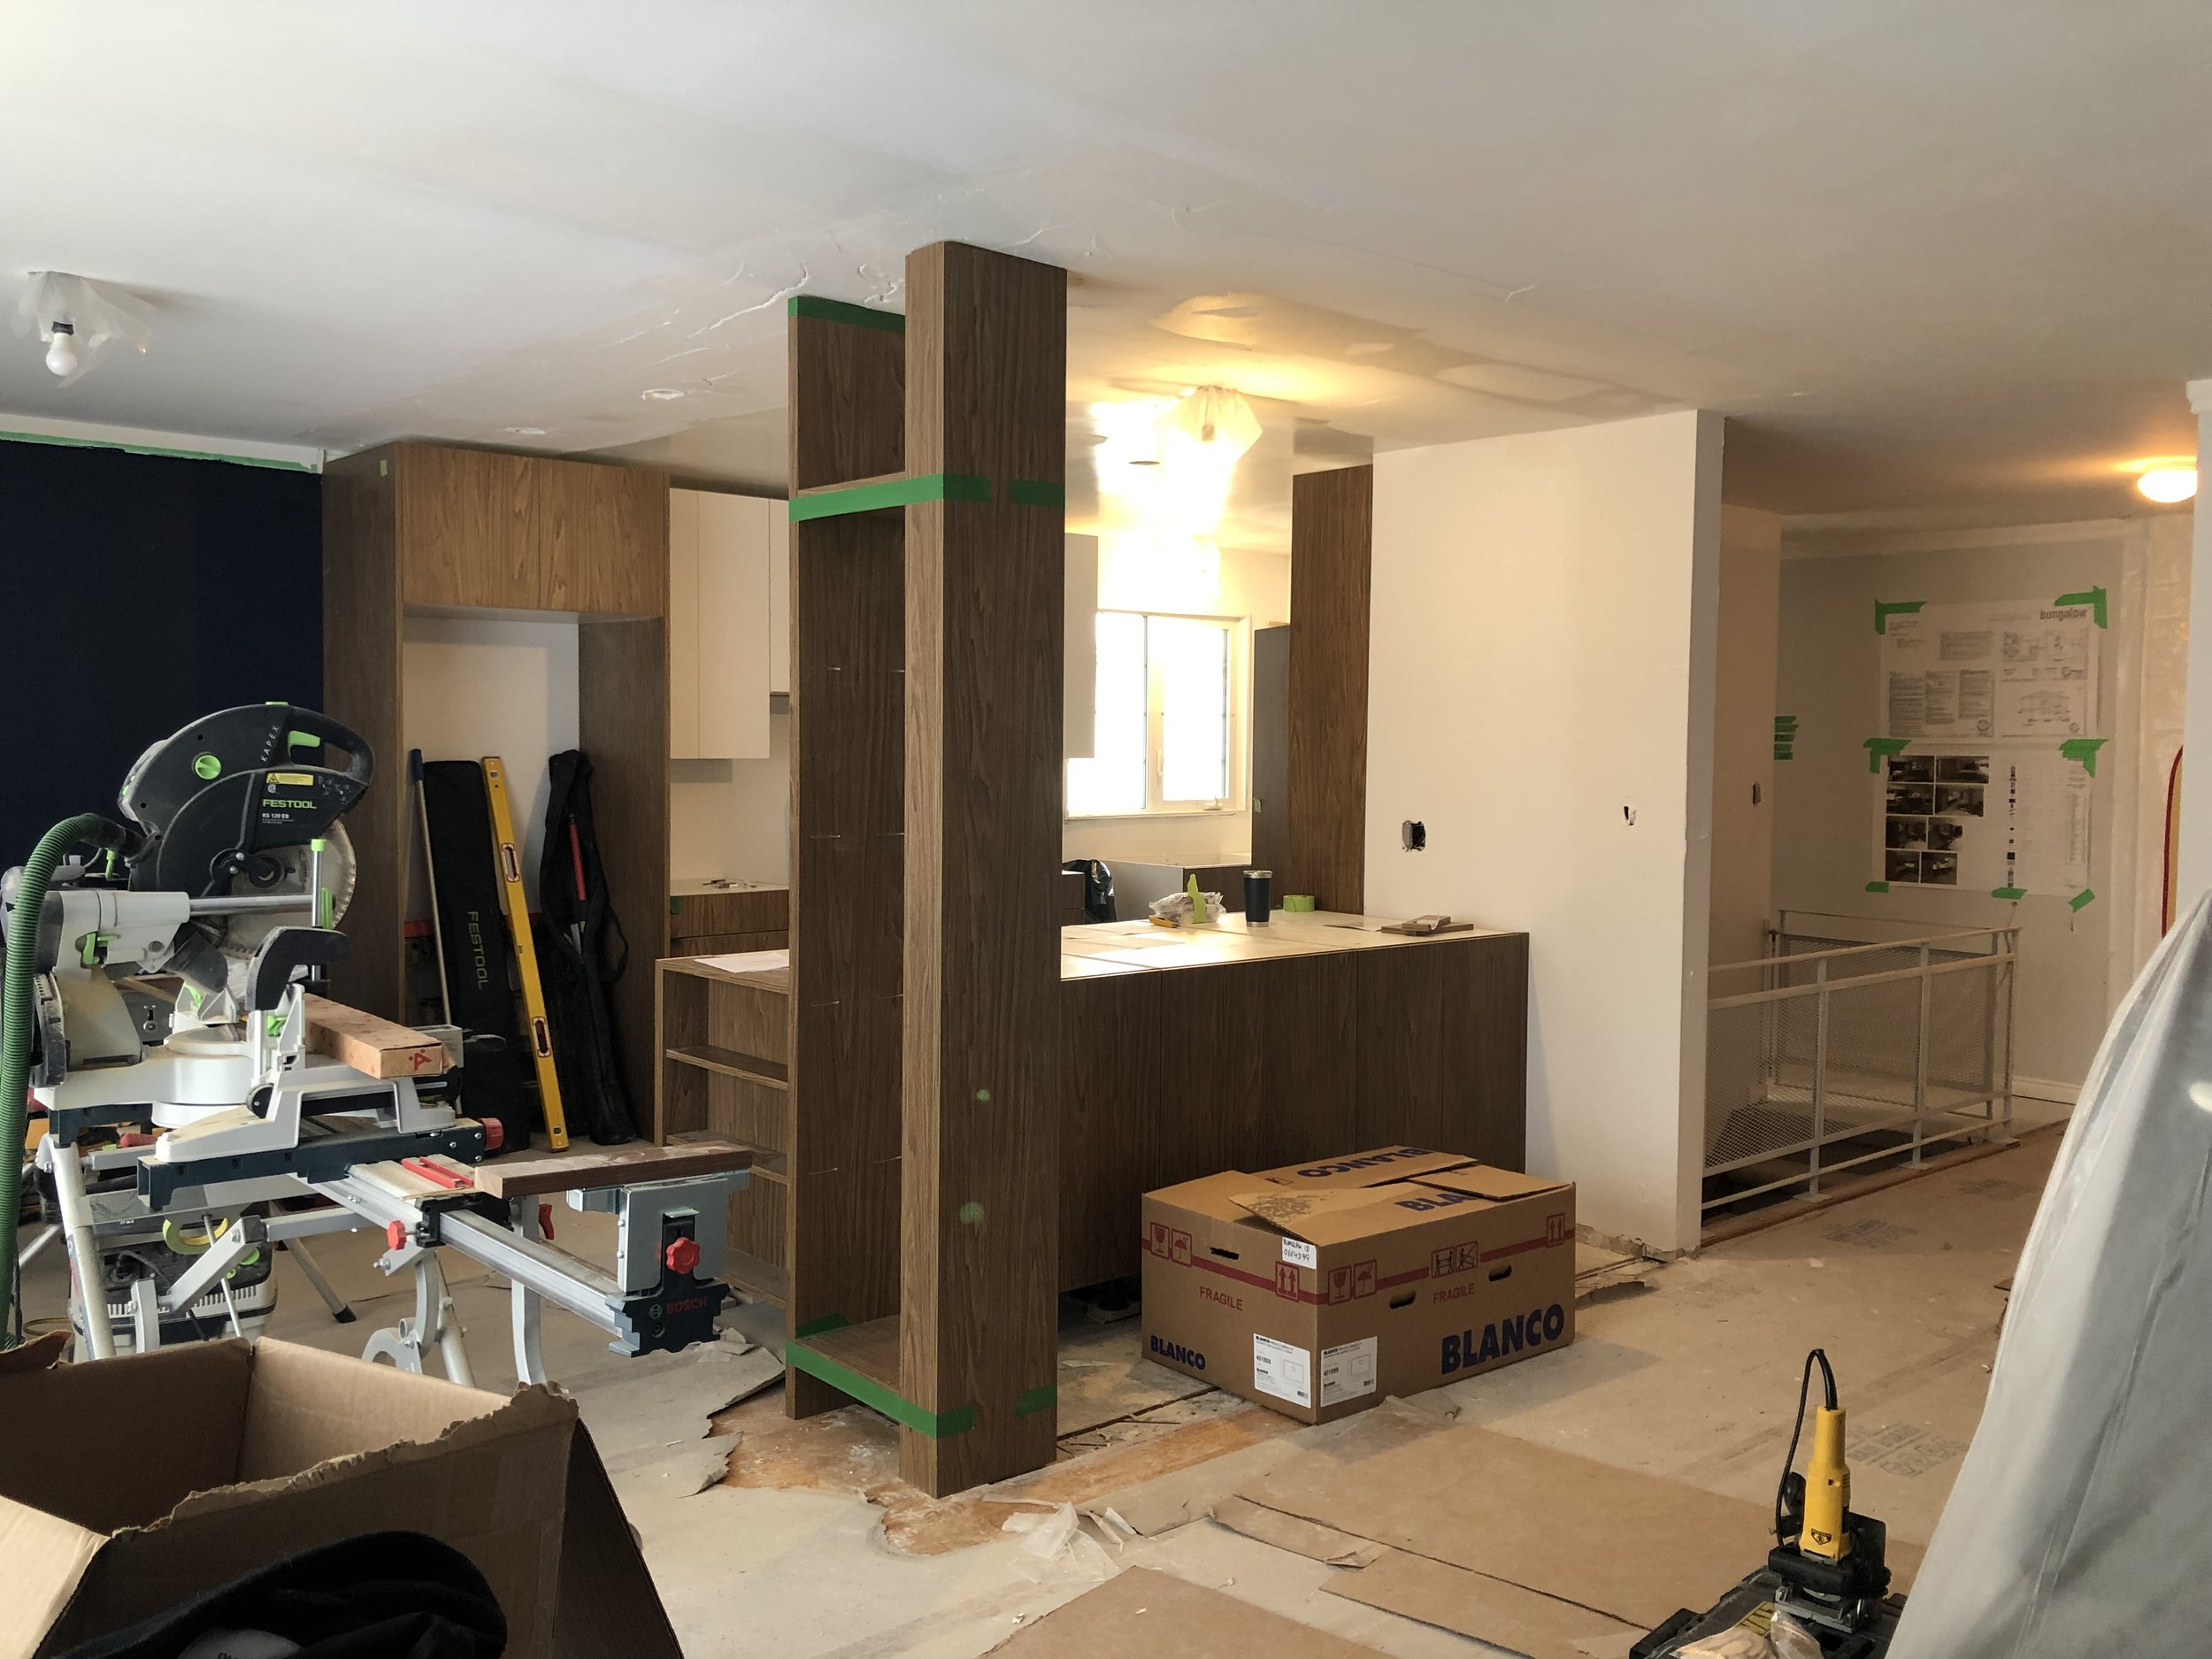
With the initial quotes in hand we took a look at the design plans and made some adjustments. Instead of installing a larger flush beam to carry the load where we took out a bearing wall, we went with a smaller flush beam and a post. We wrapped the post in walnut and made it into a floor to ceiling shelf that ended up becoming the centrepiece of the space. We kept the walls around the stairs intact, eliminated the slat walls and the cabinets that continued into the dining room, and switched out a couple of materials to bring the project down to a comfortable budget for the homeowners. Check out the final materials here.
The design process is a collaborative one that takes some back and forth. It may take a few rounds of design and quoting to get the project to where it feels good for everyone involved. At the end of the day, we appreciate clients who trust the design process, understand that the first round of quoting is just the beginning, and trust that we will sculpt the project into one that they will love.


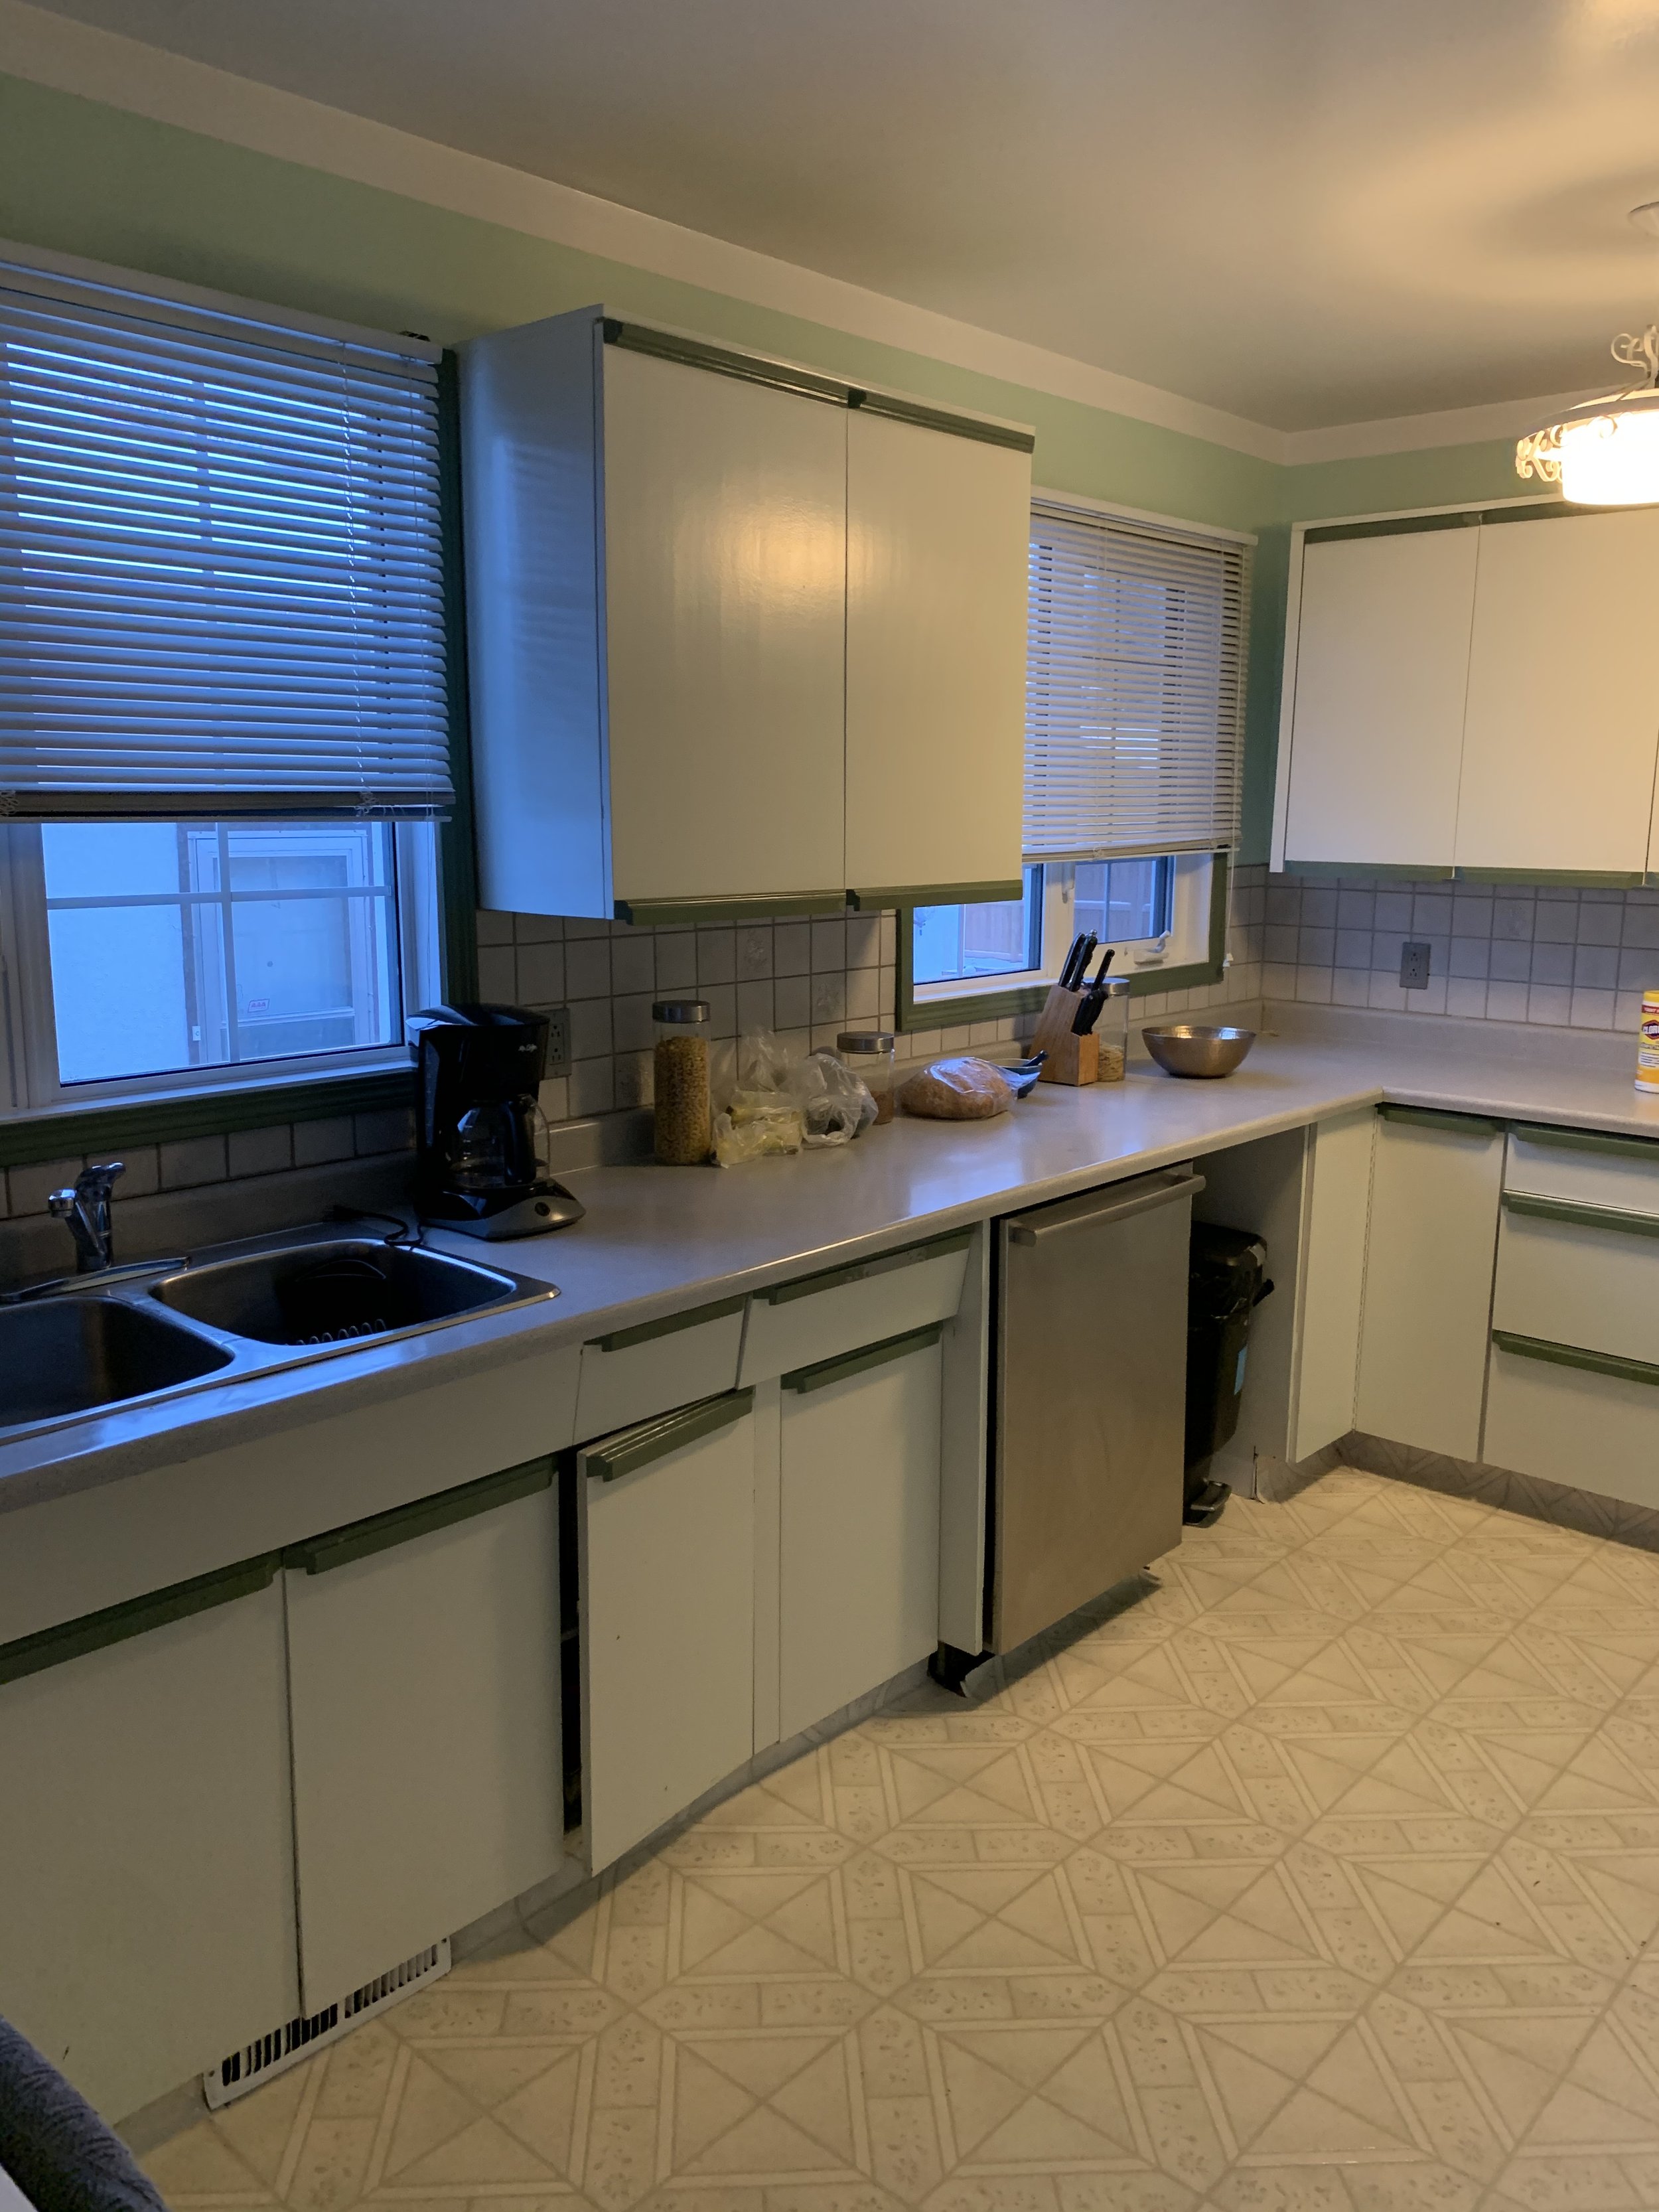
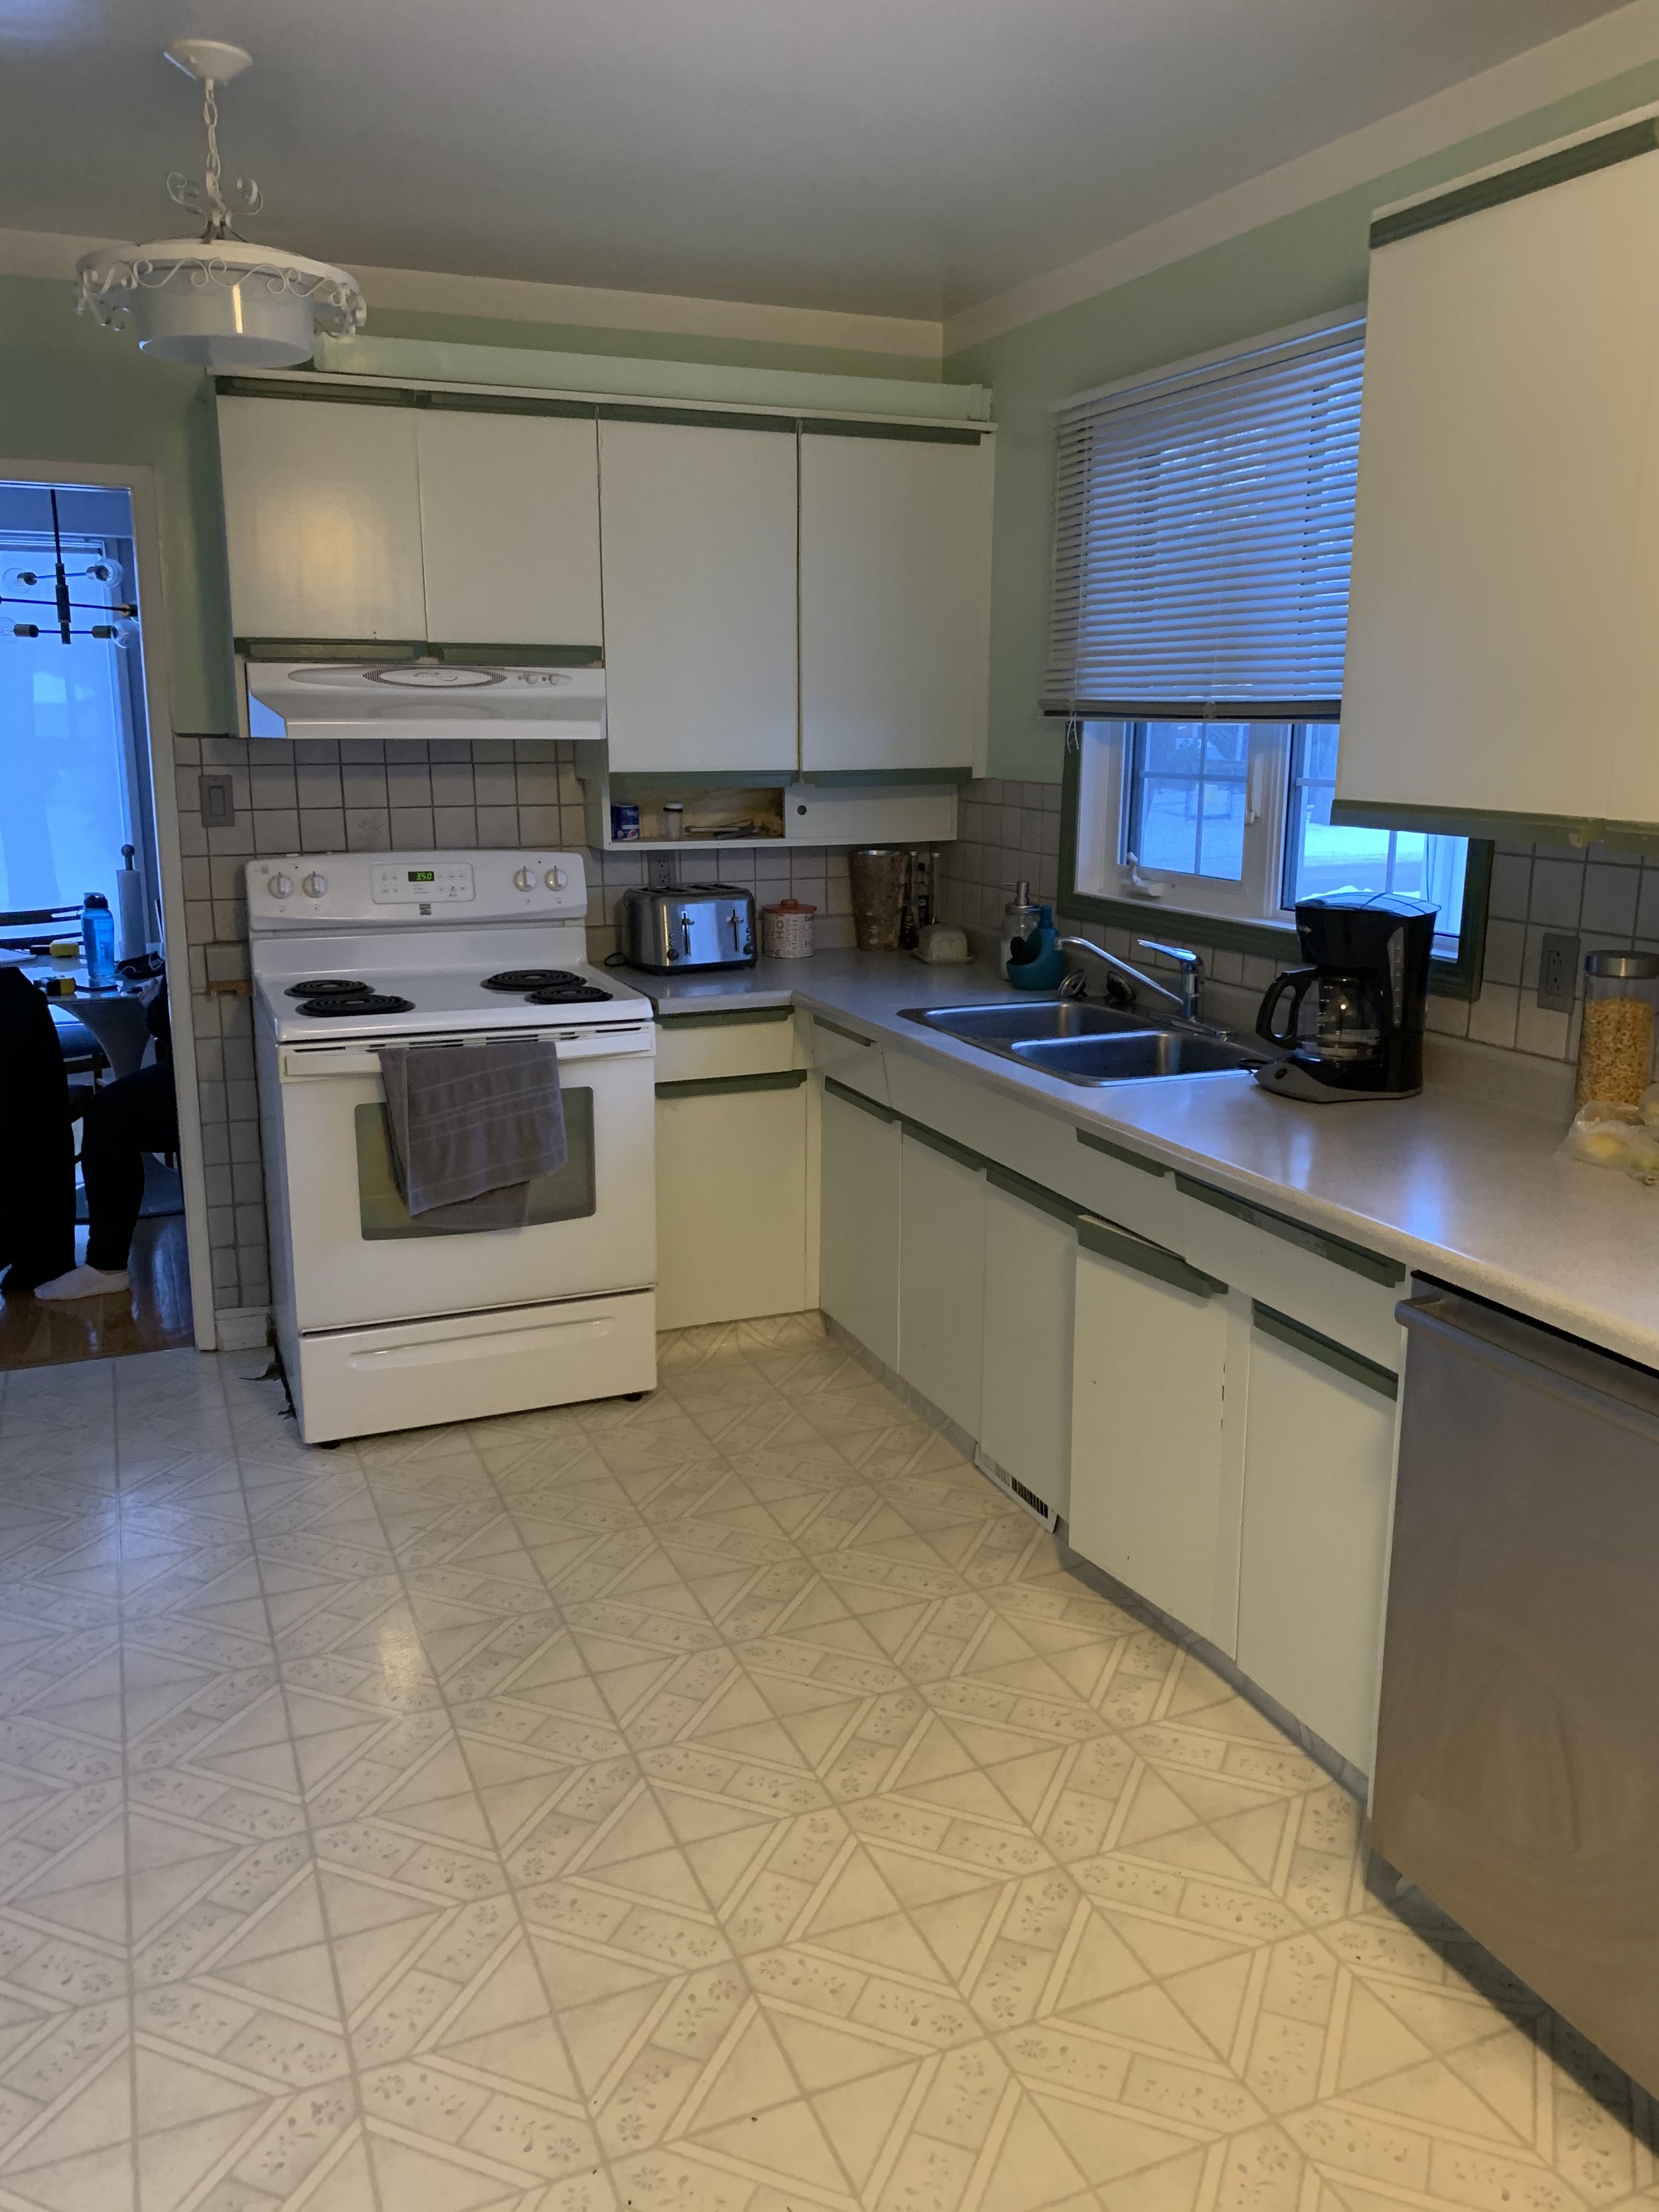
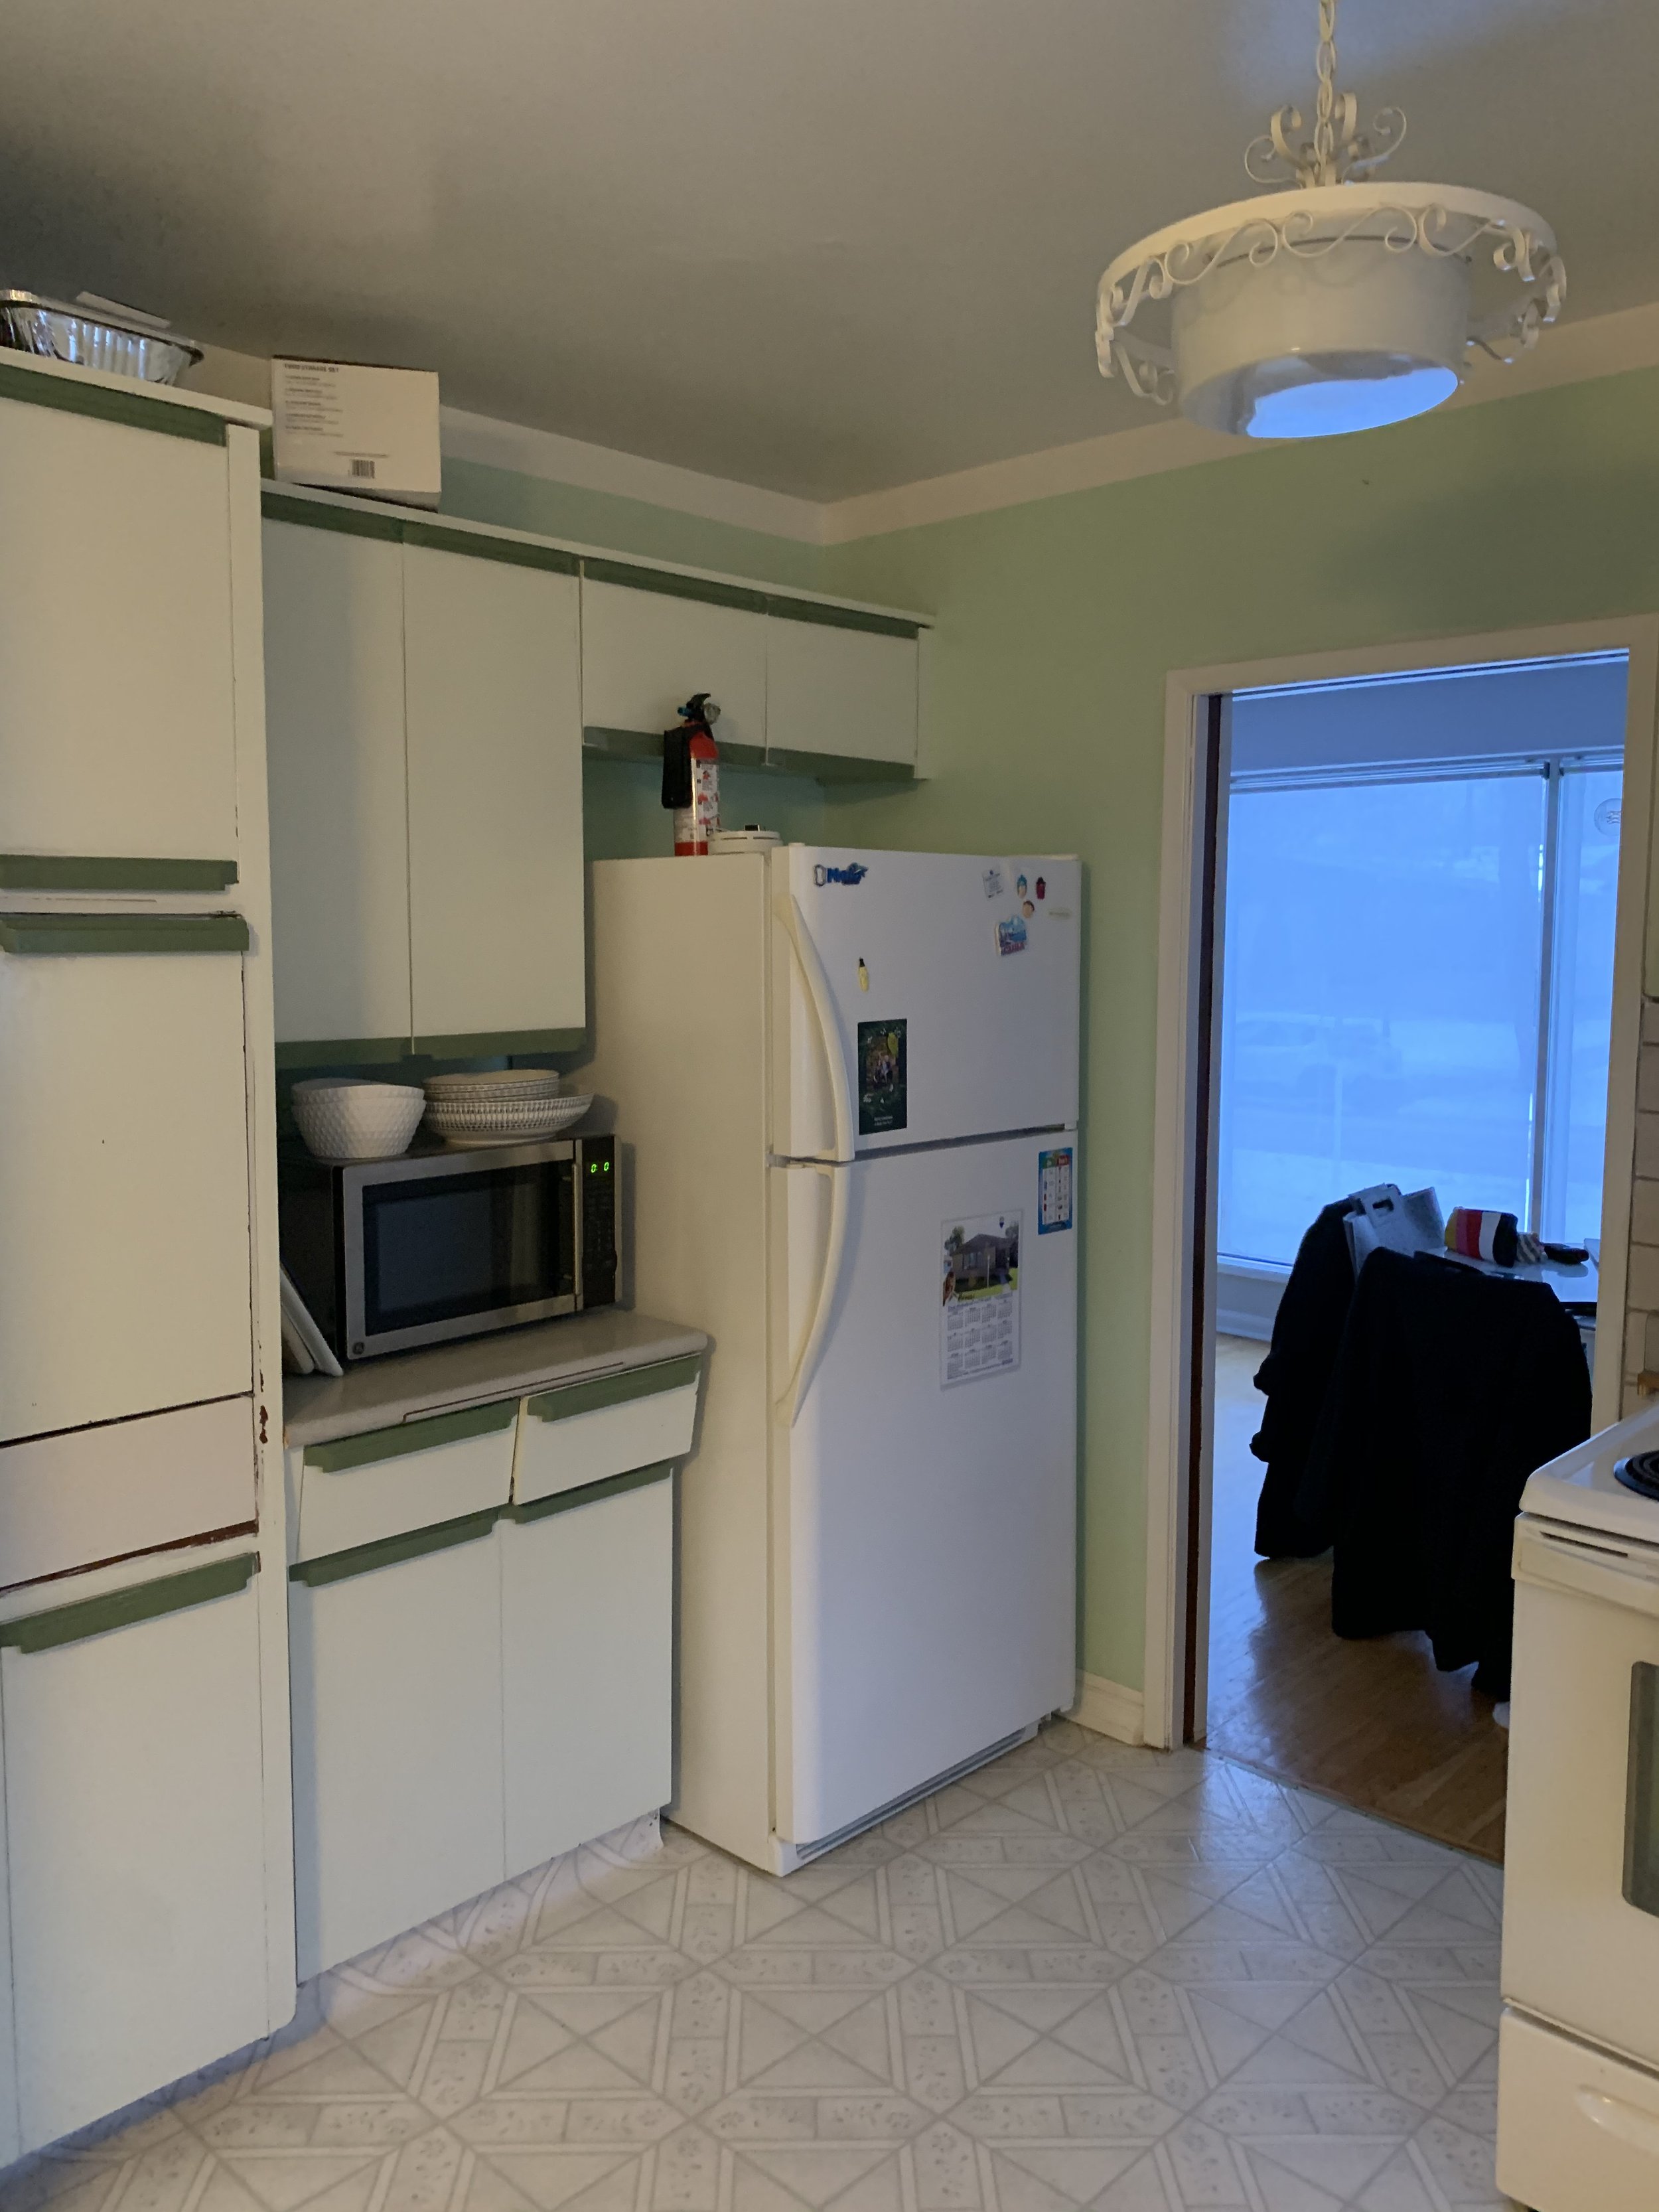
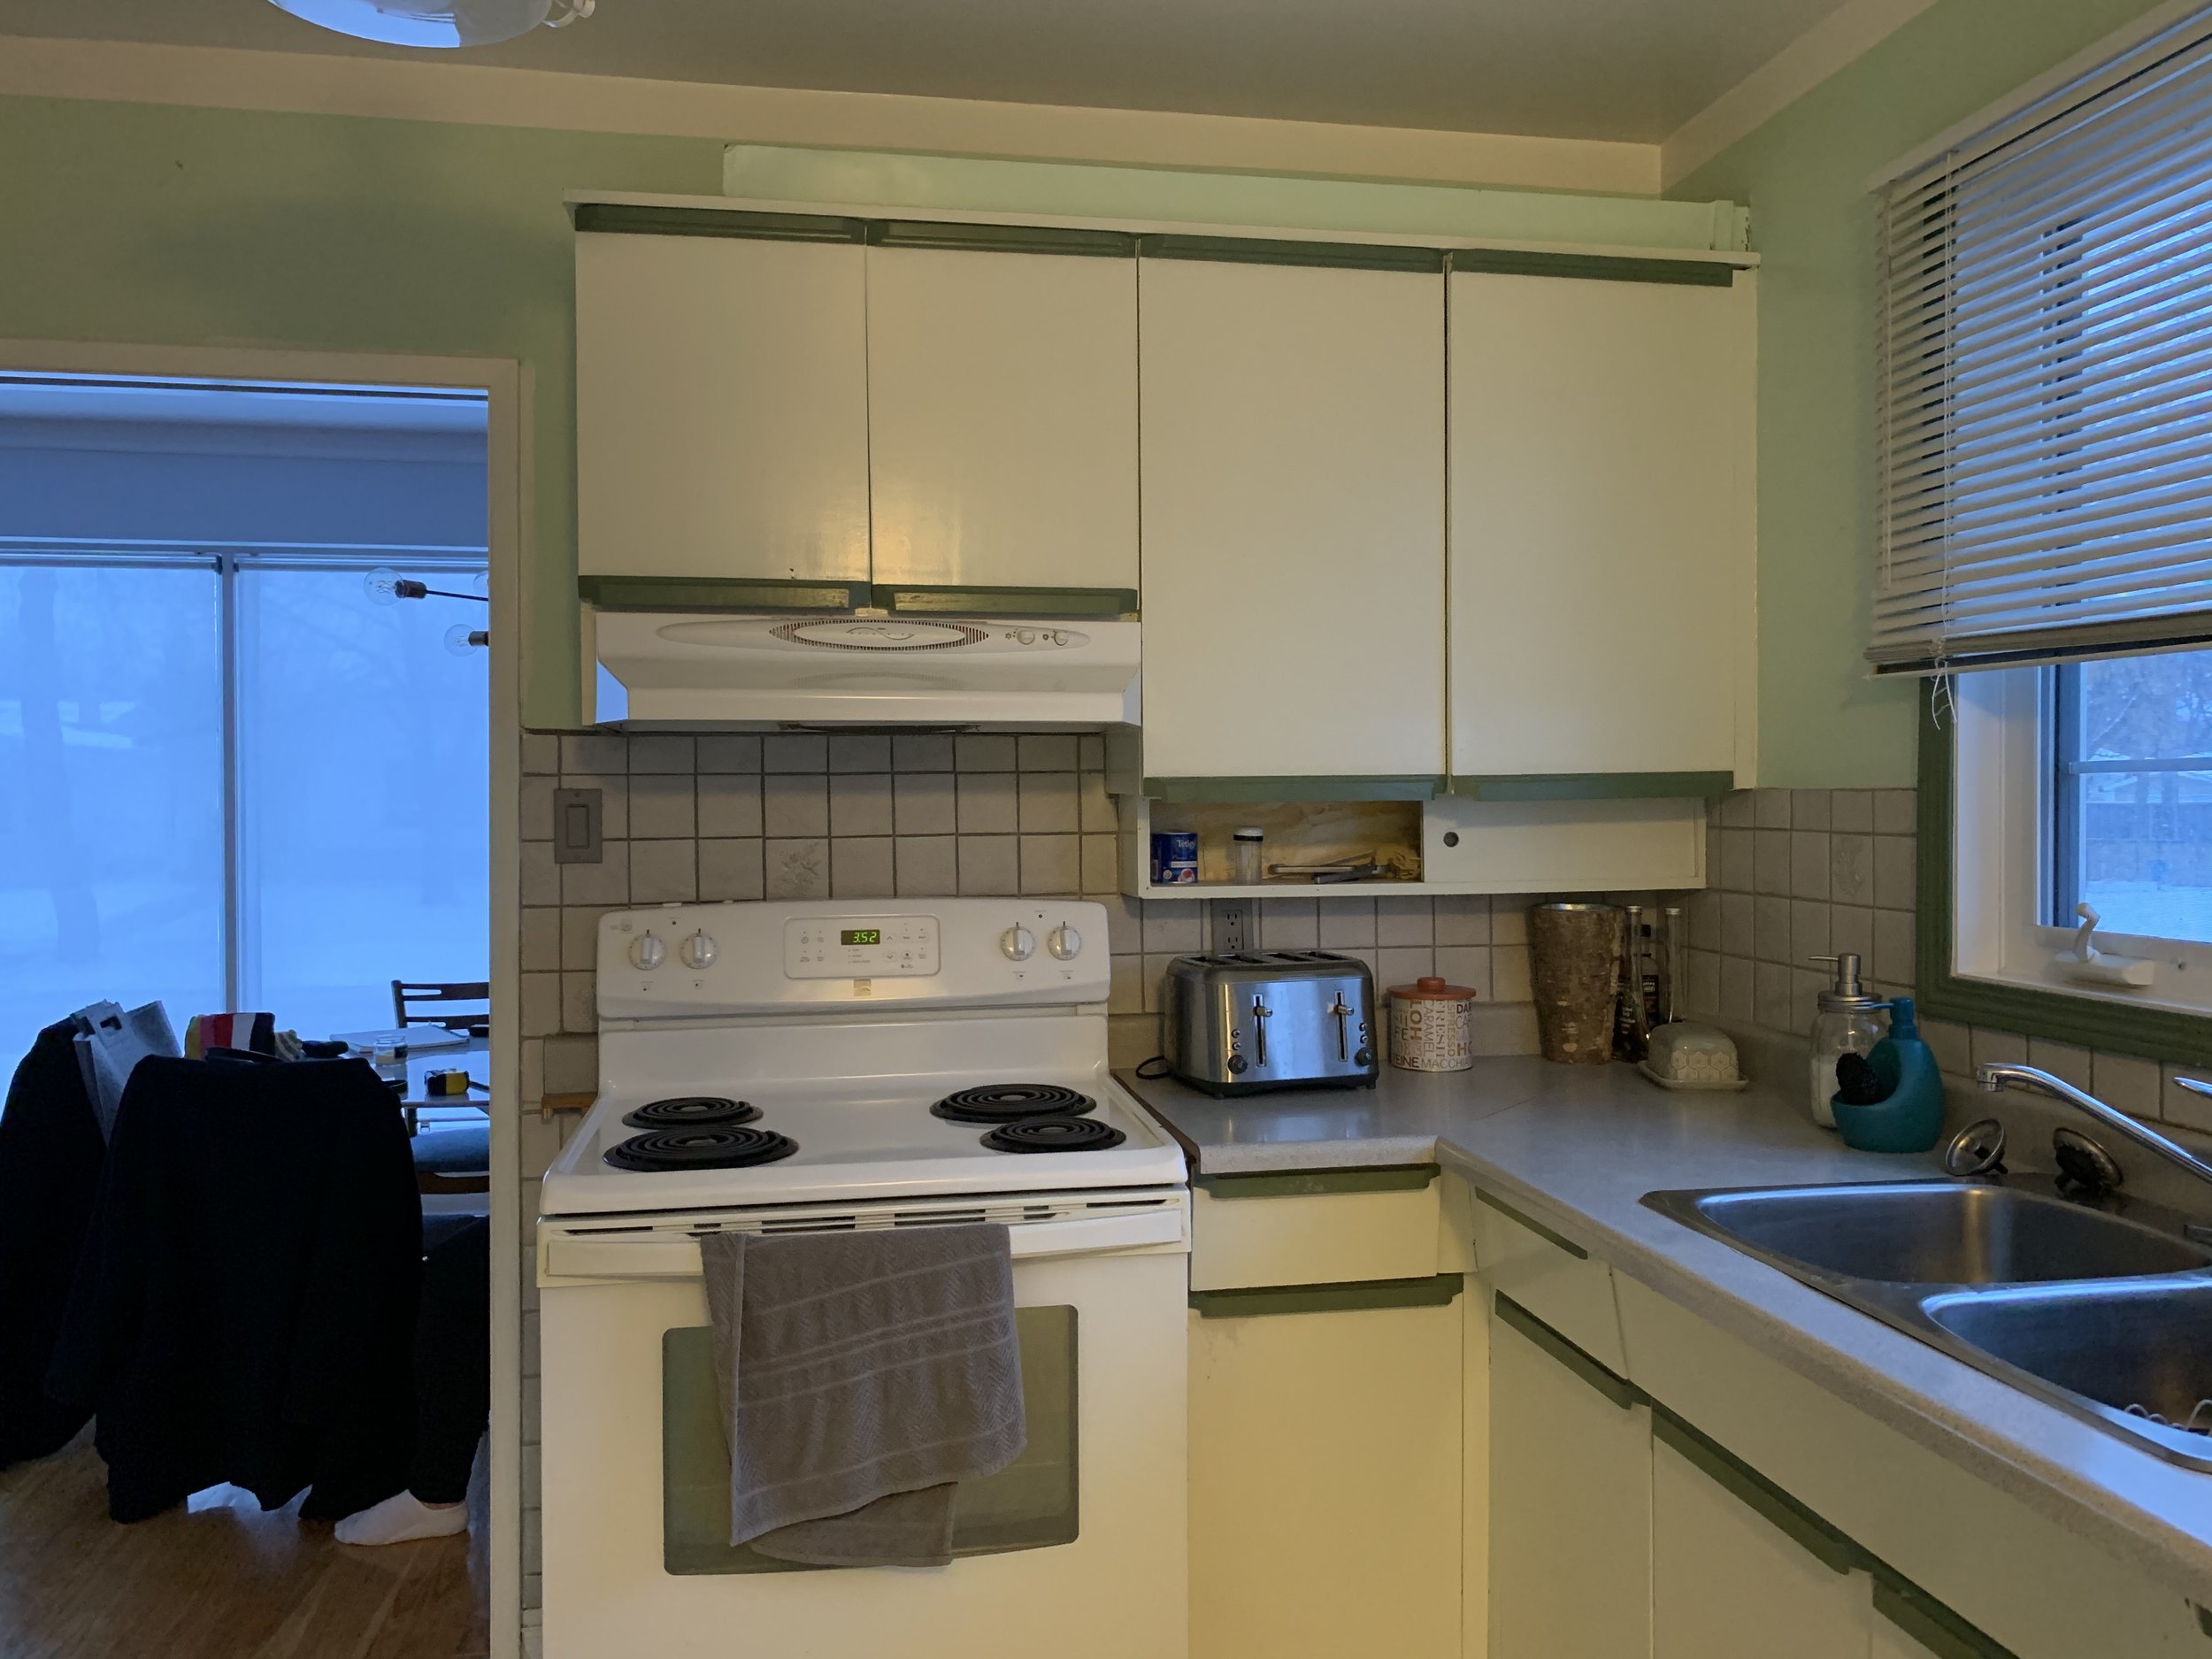
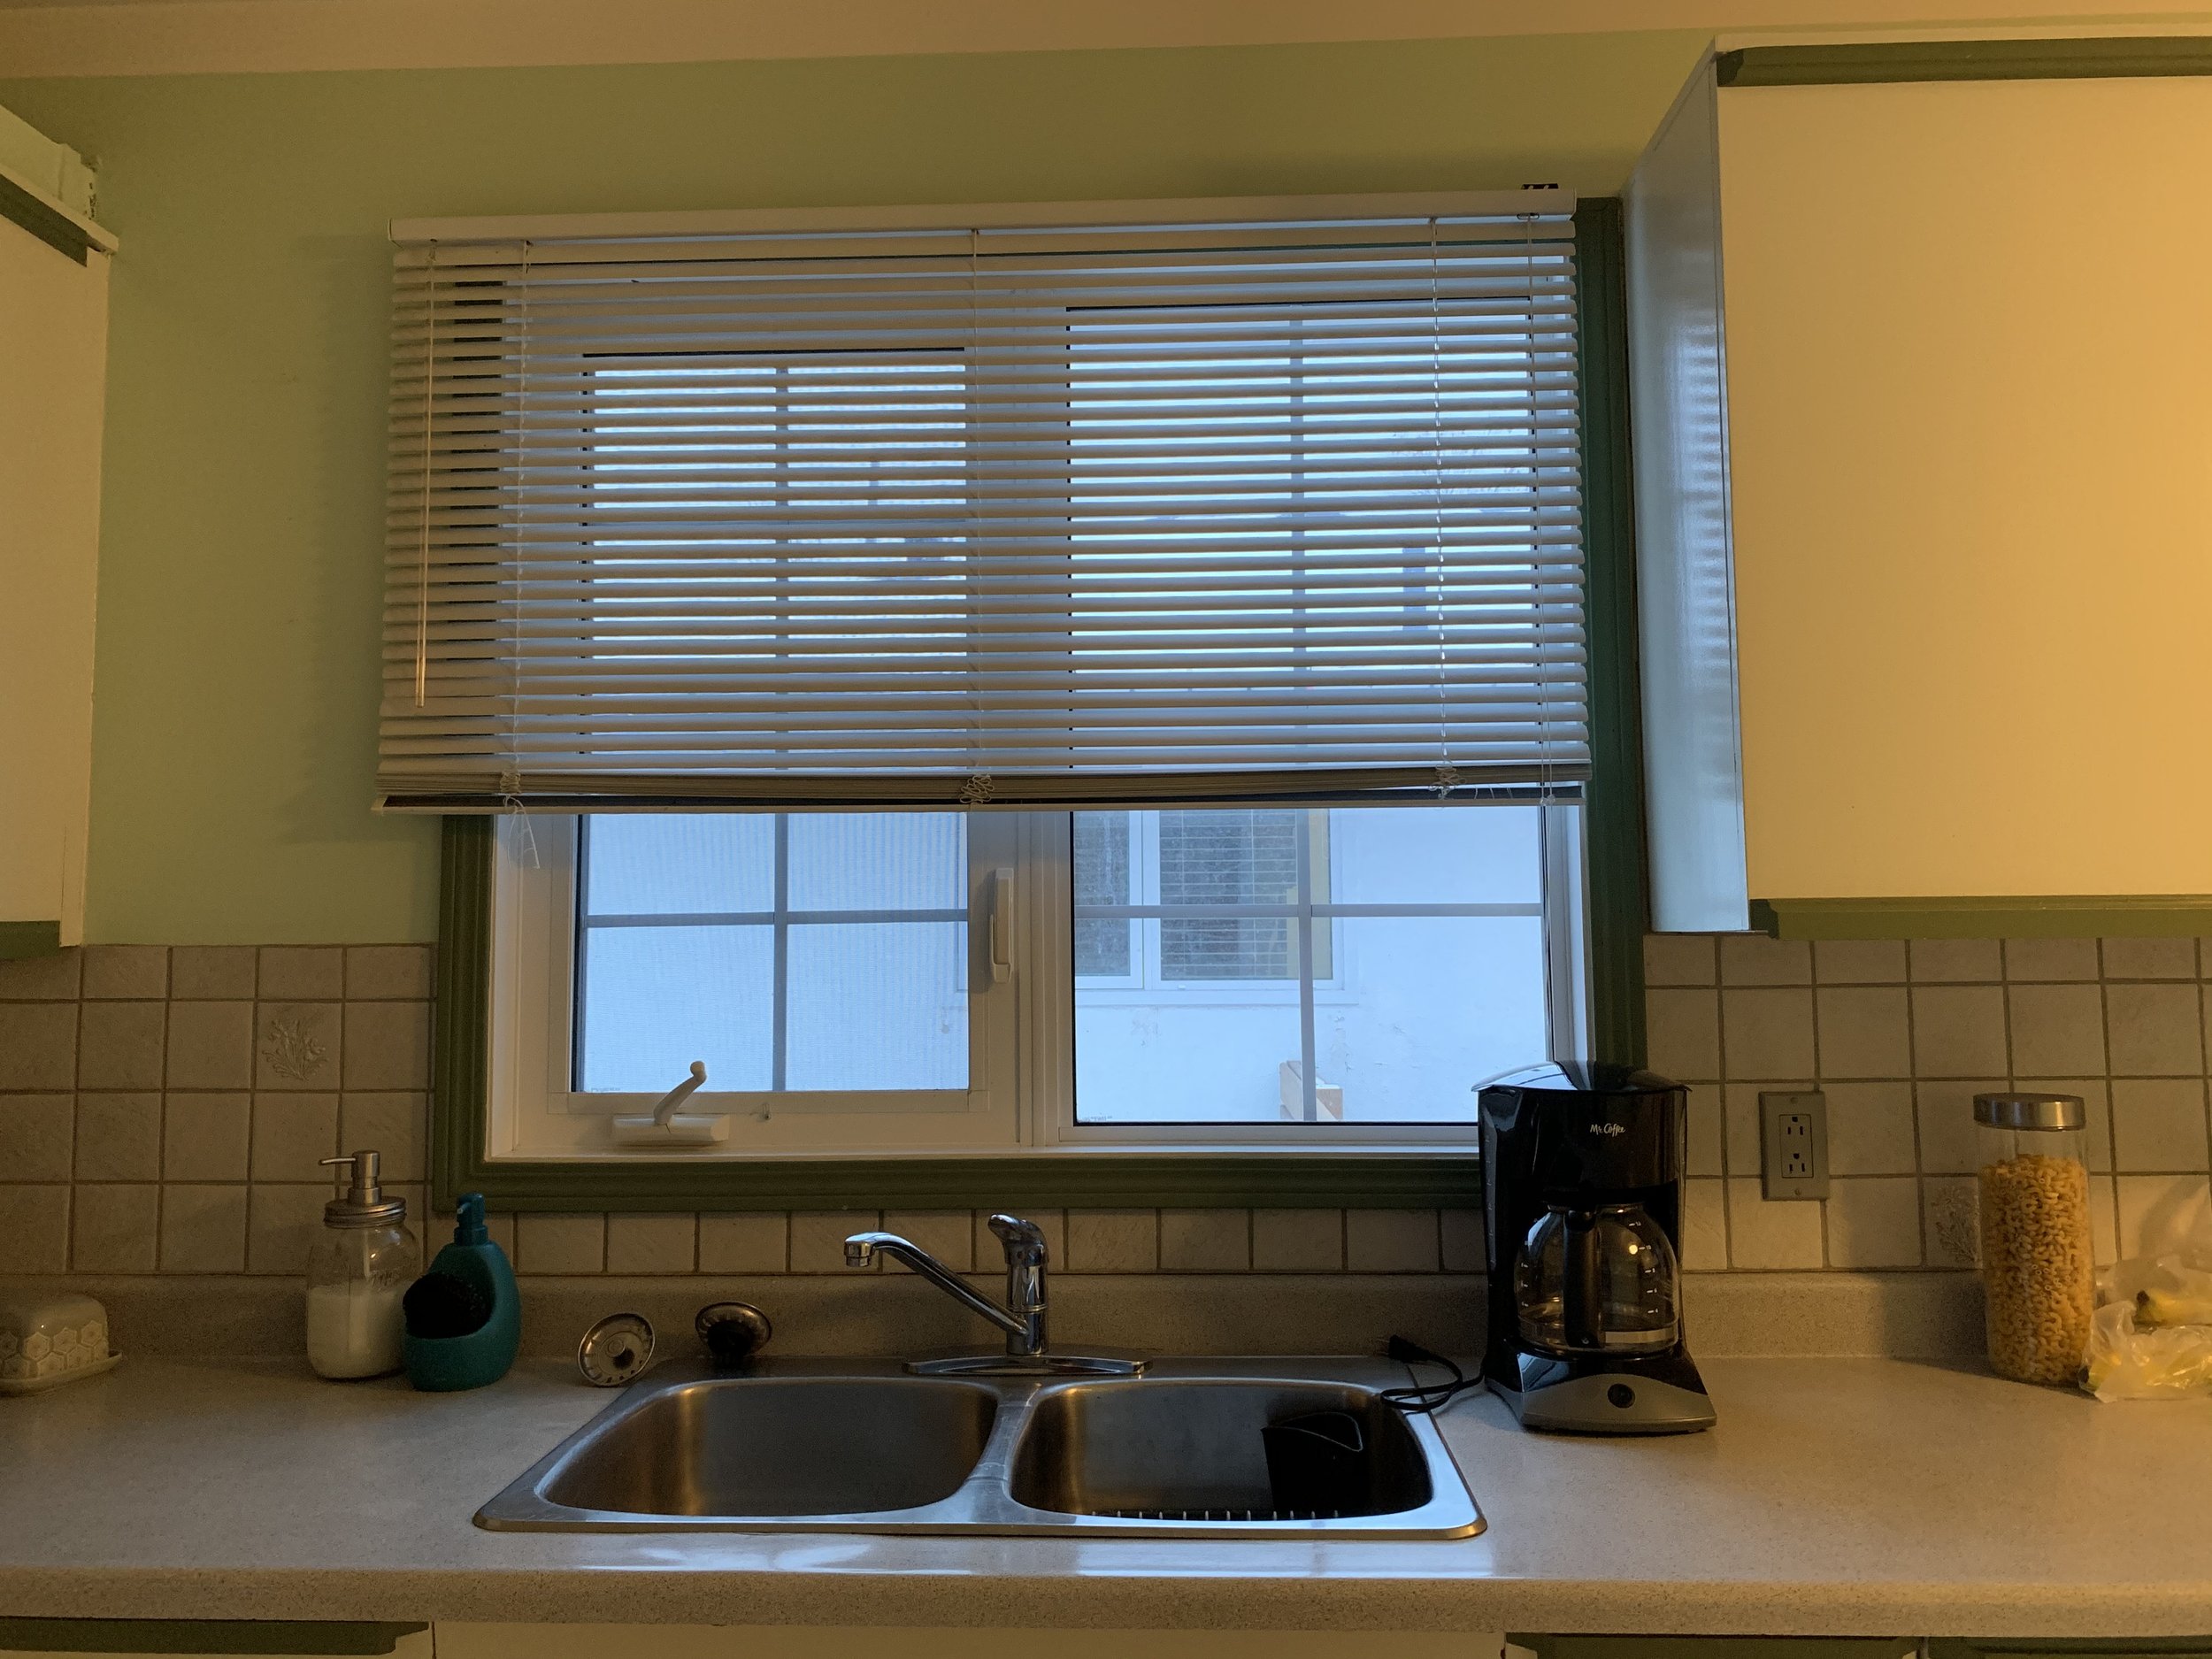
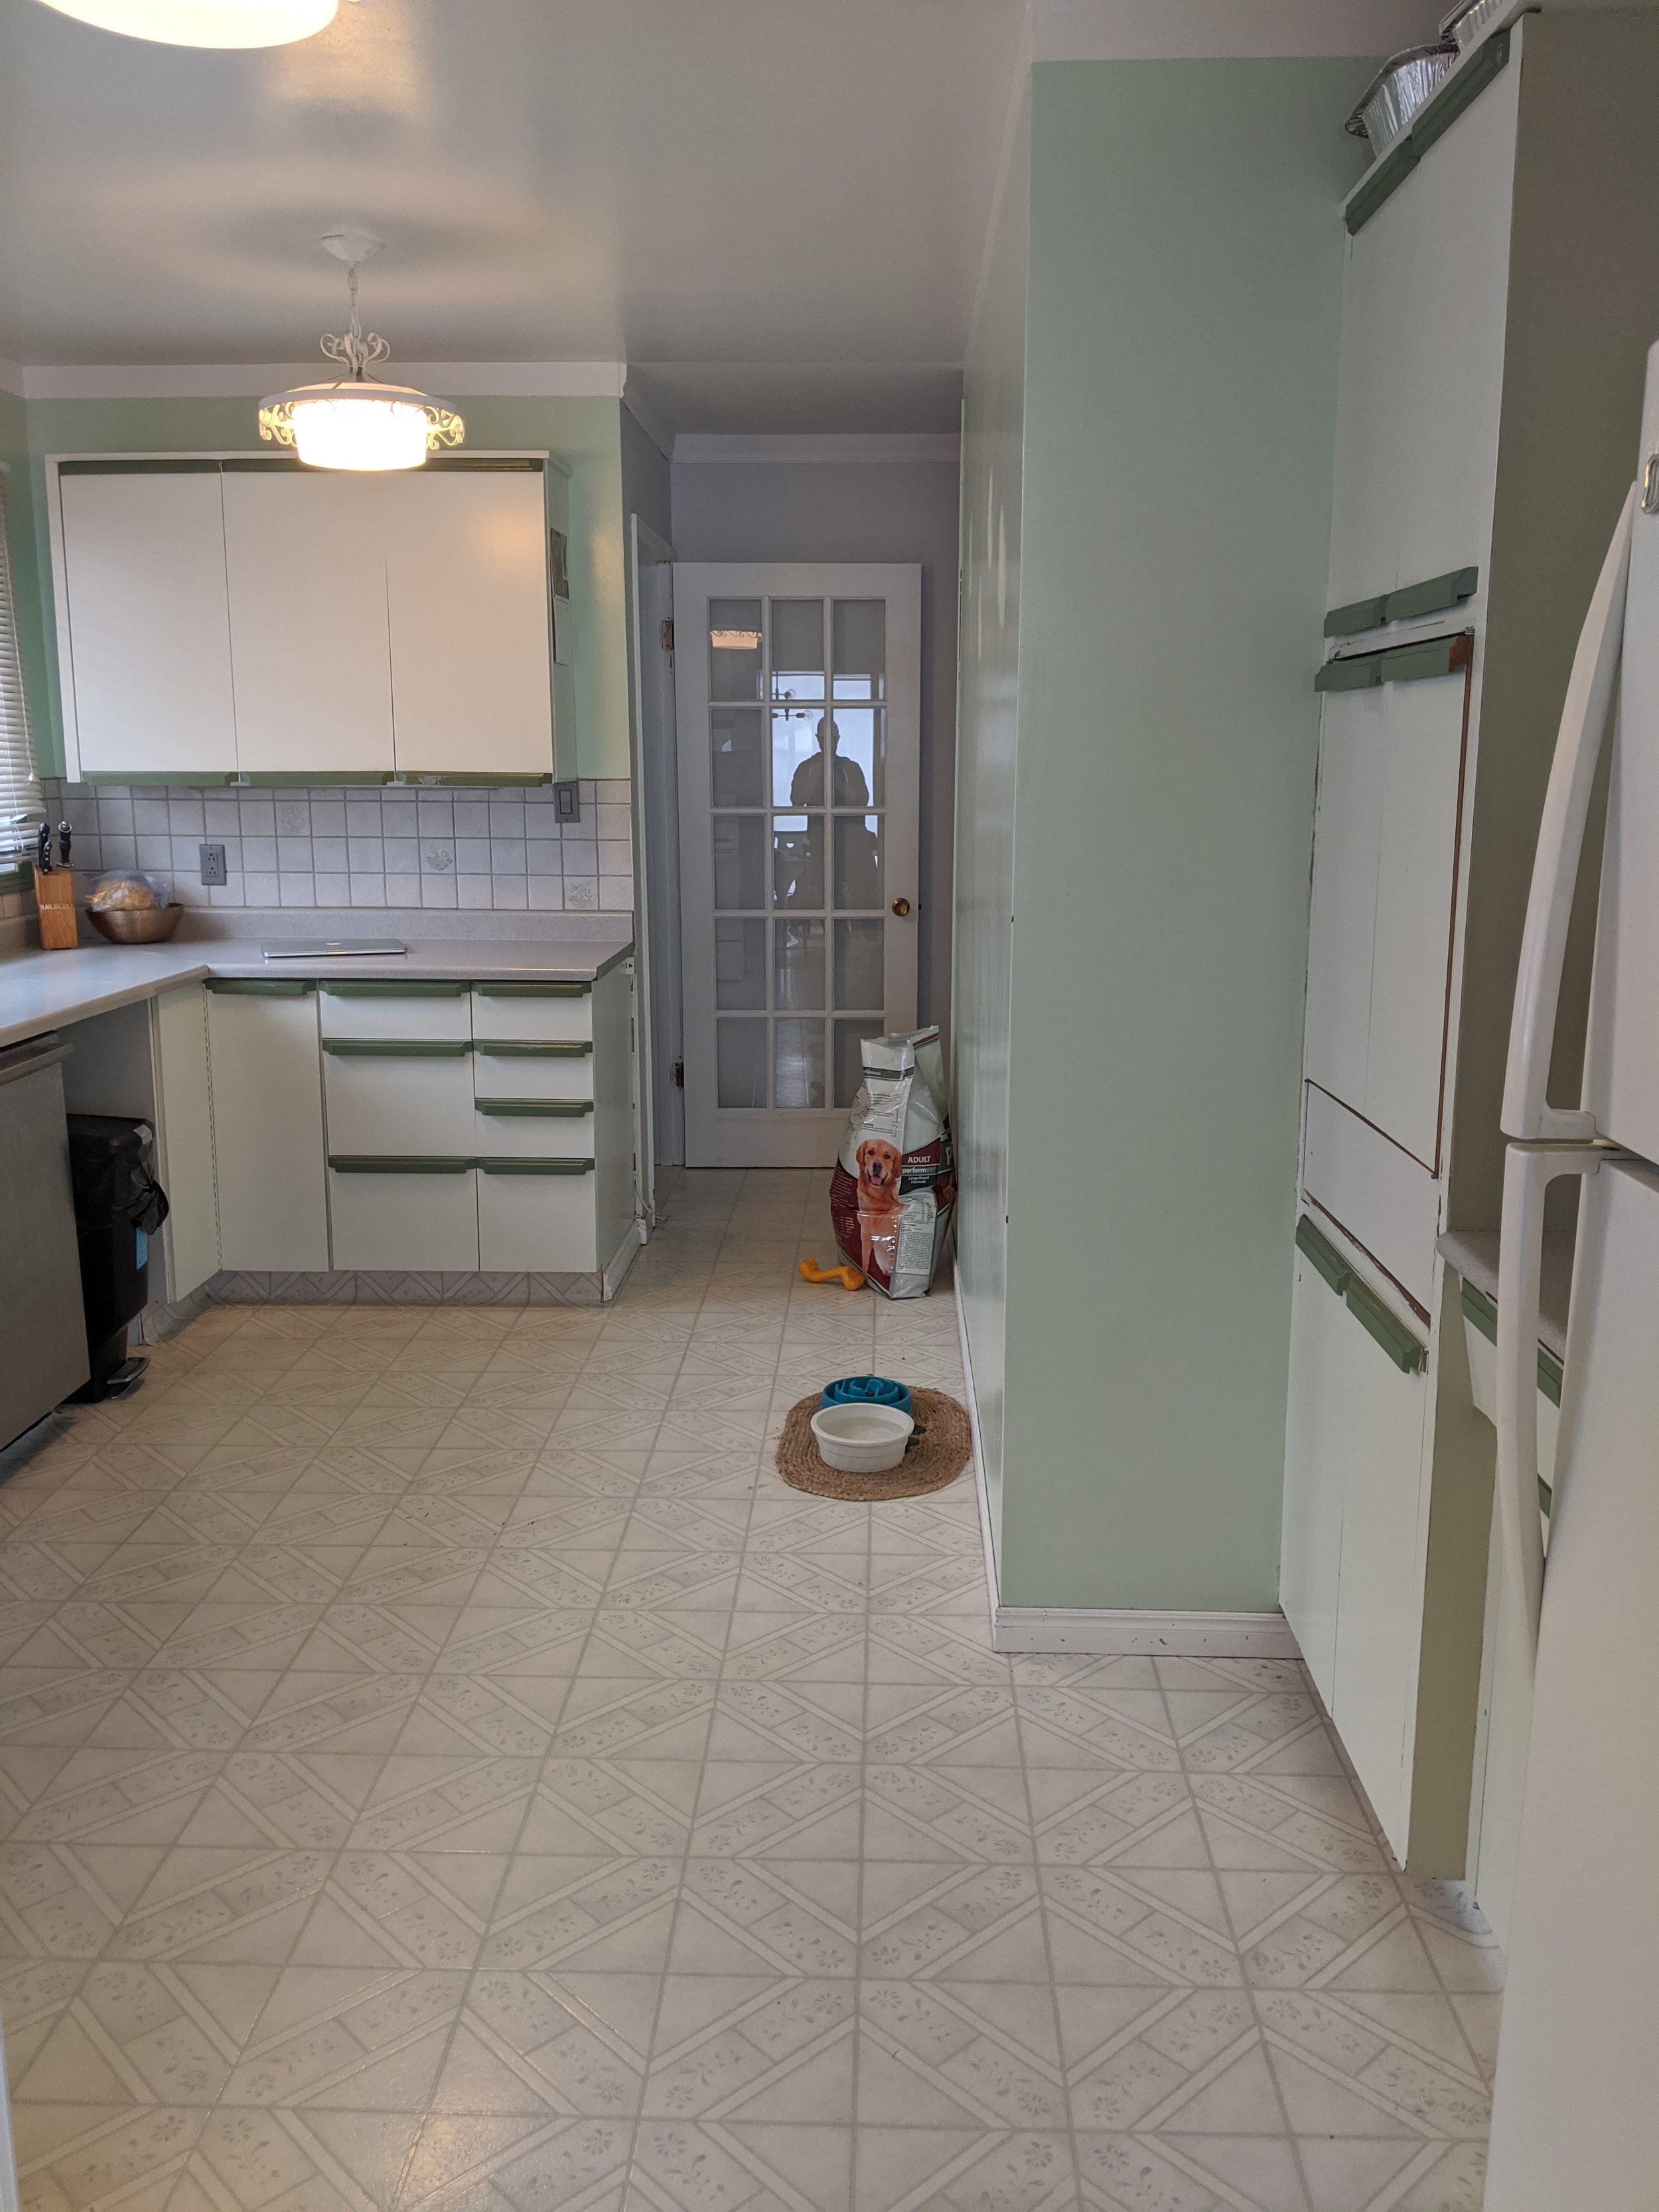
B E F O R E
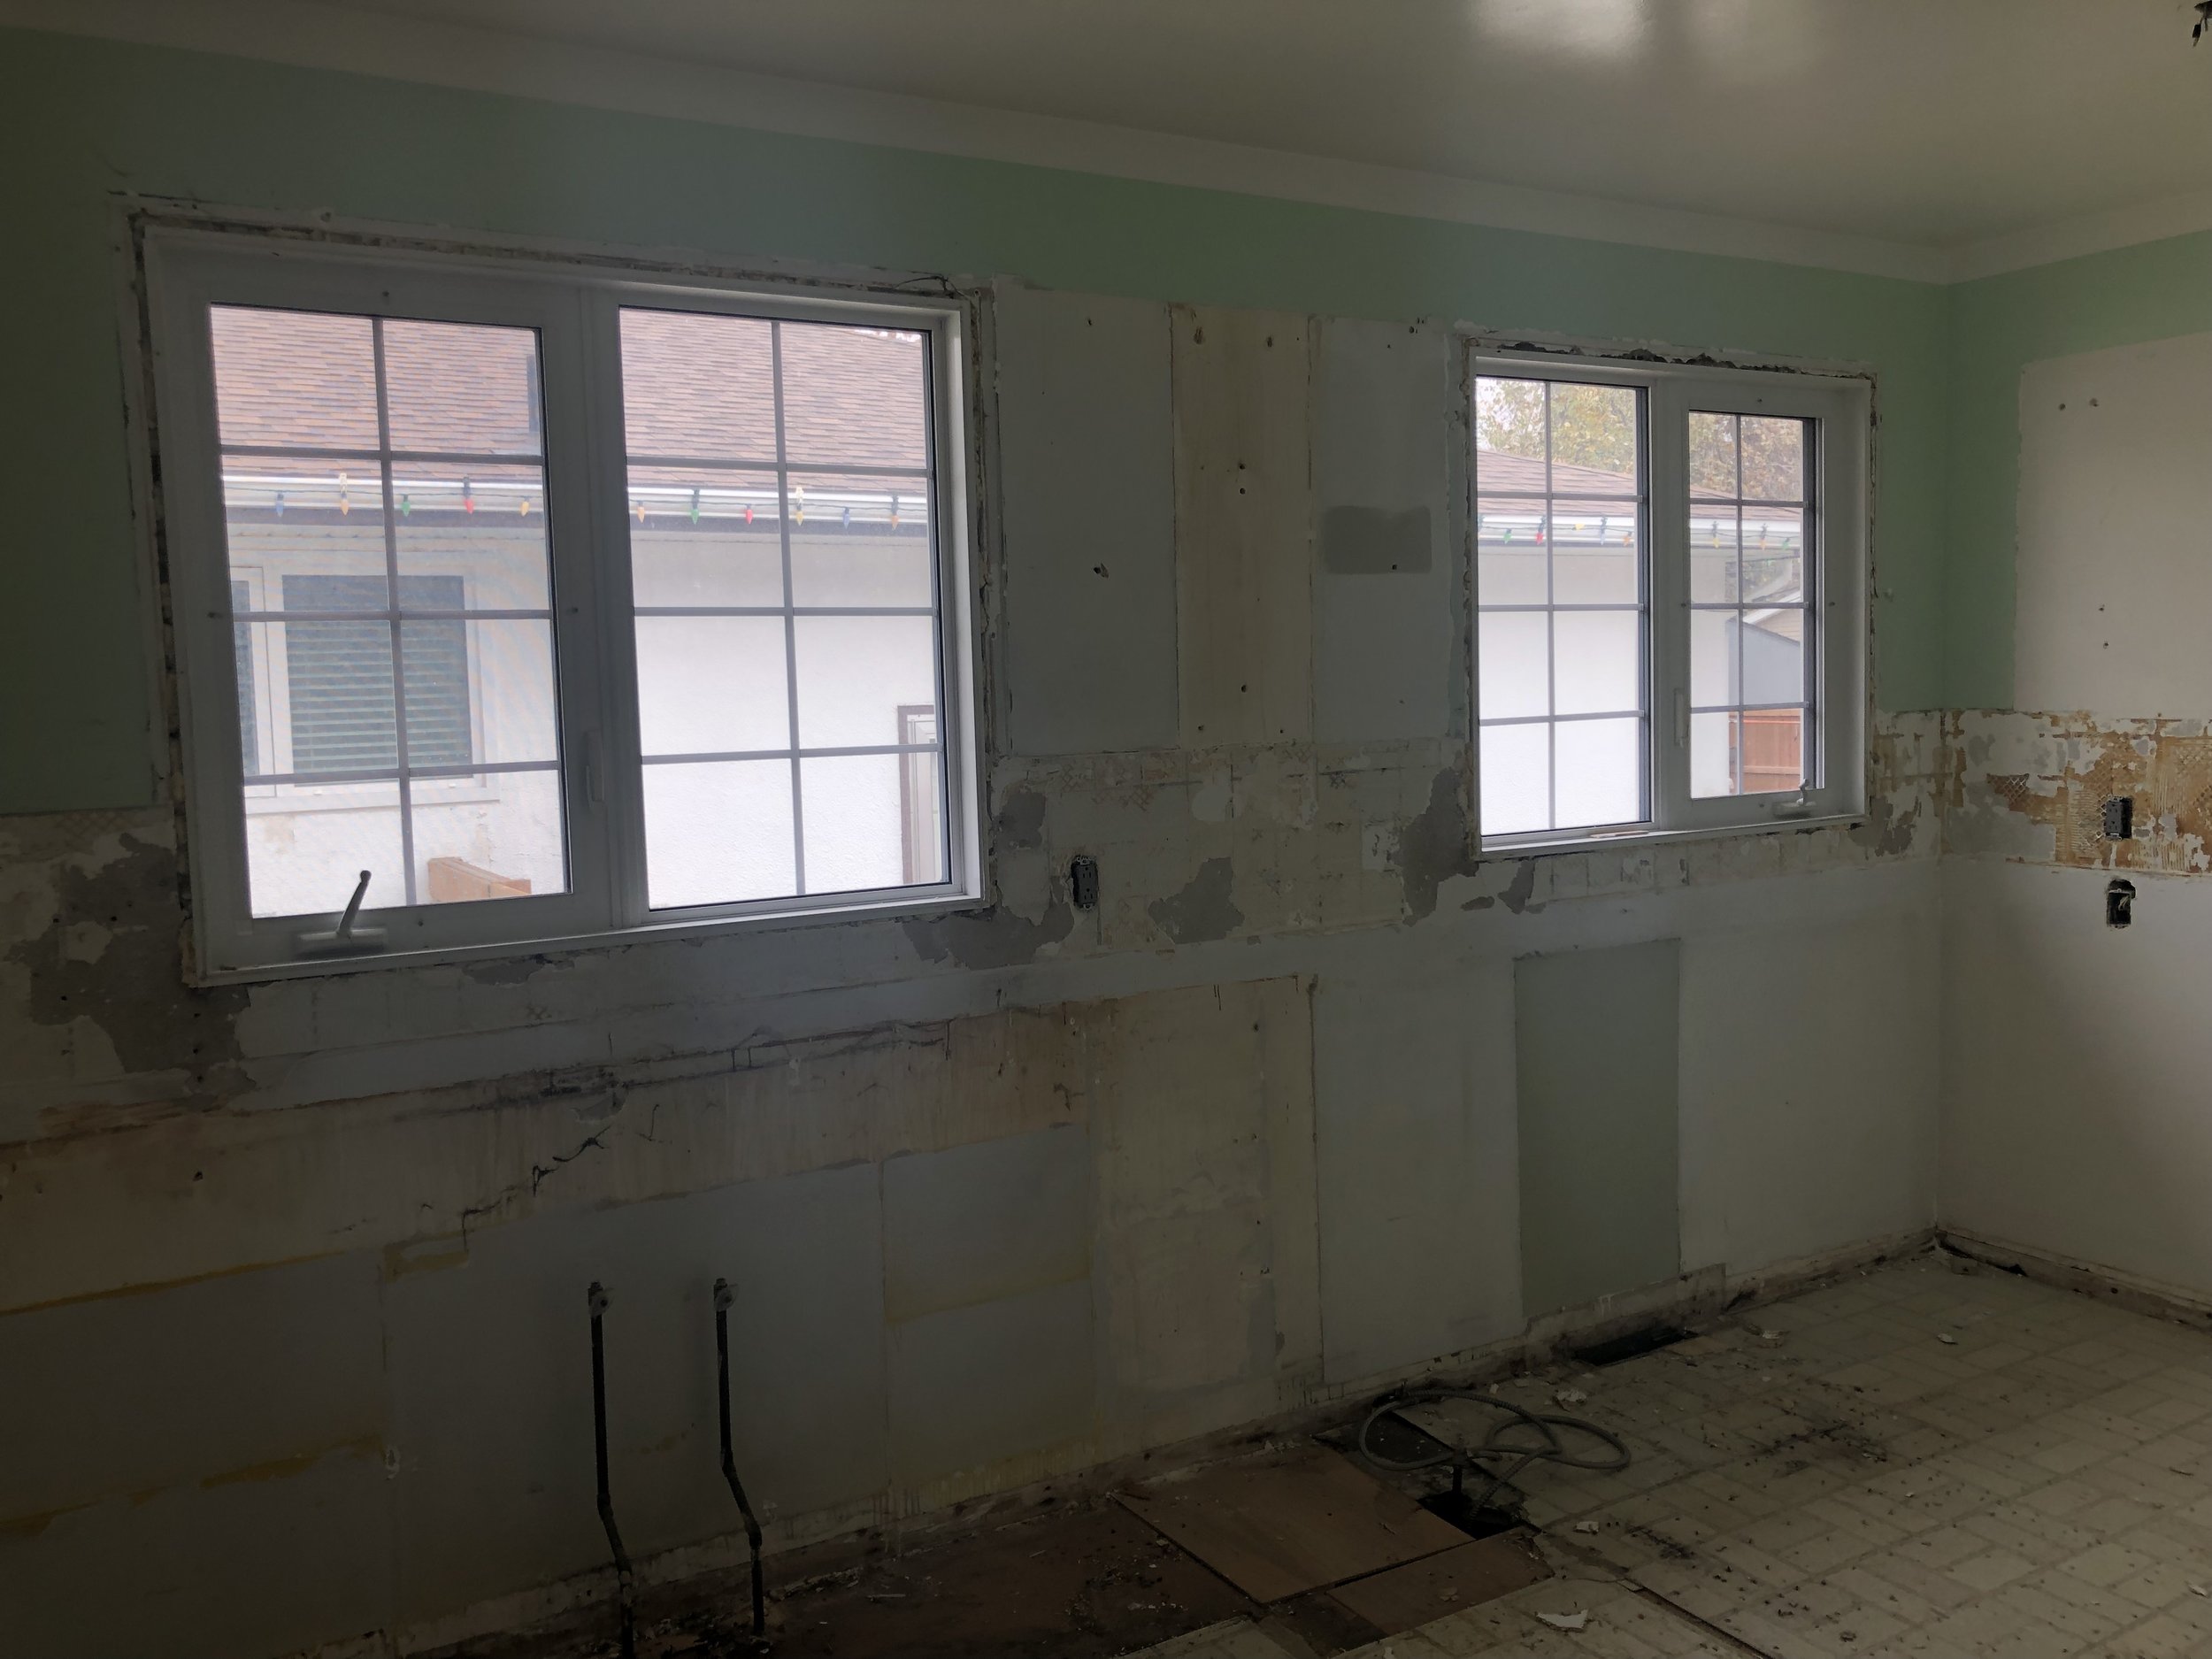
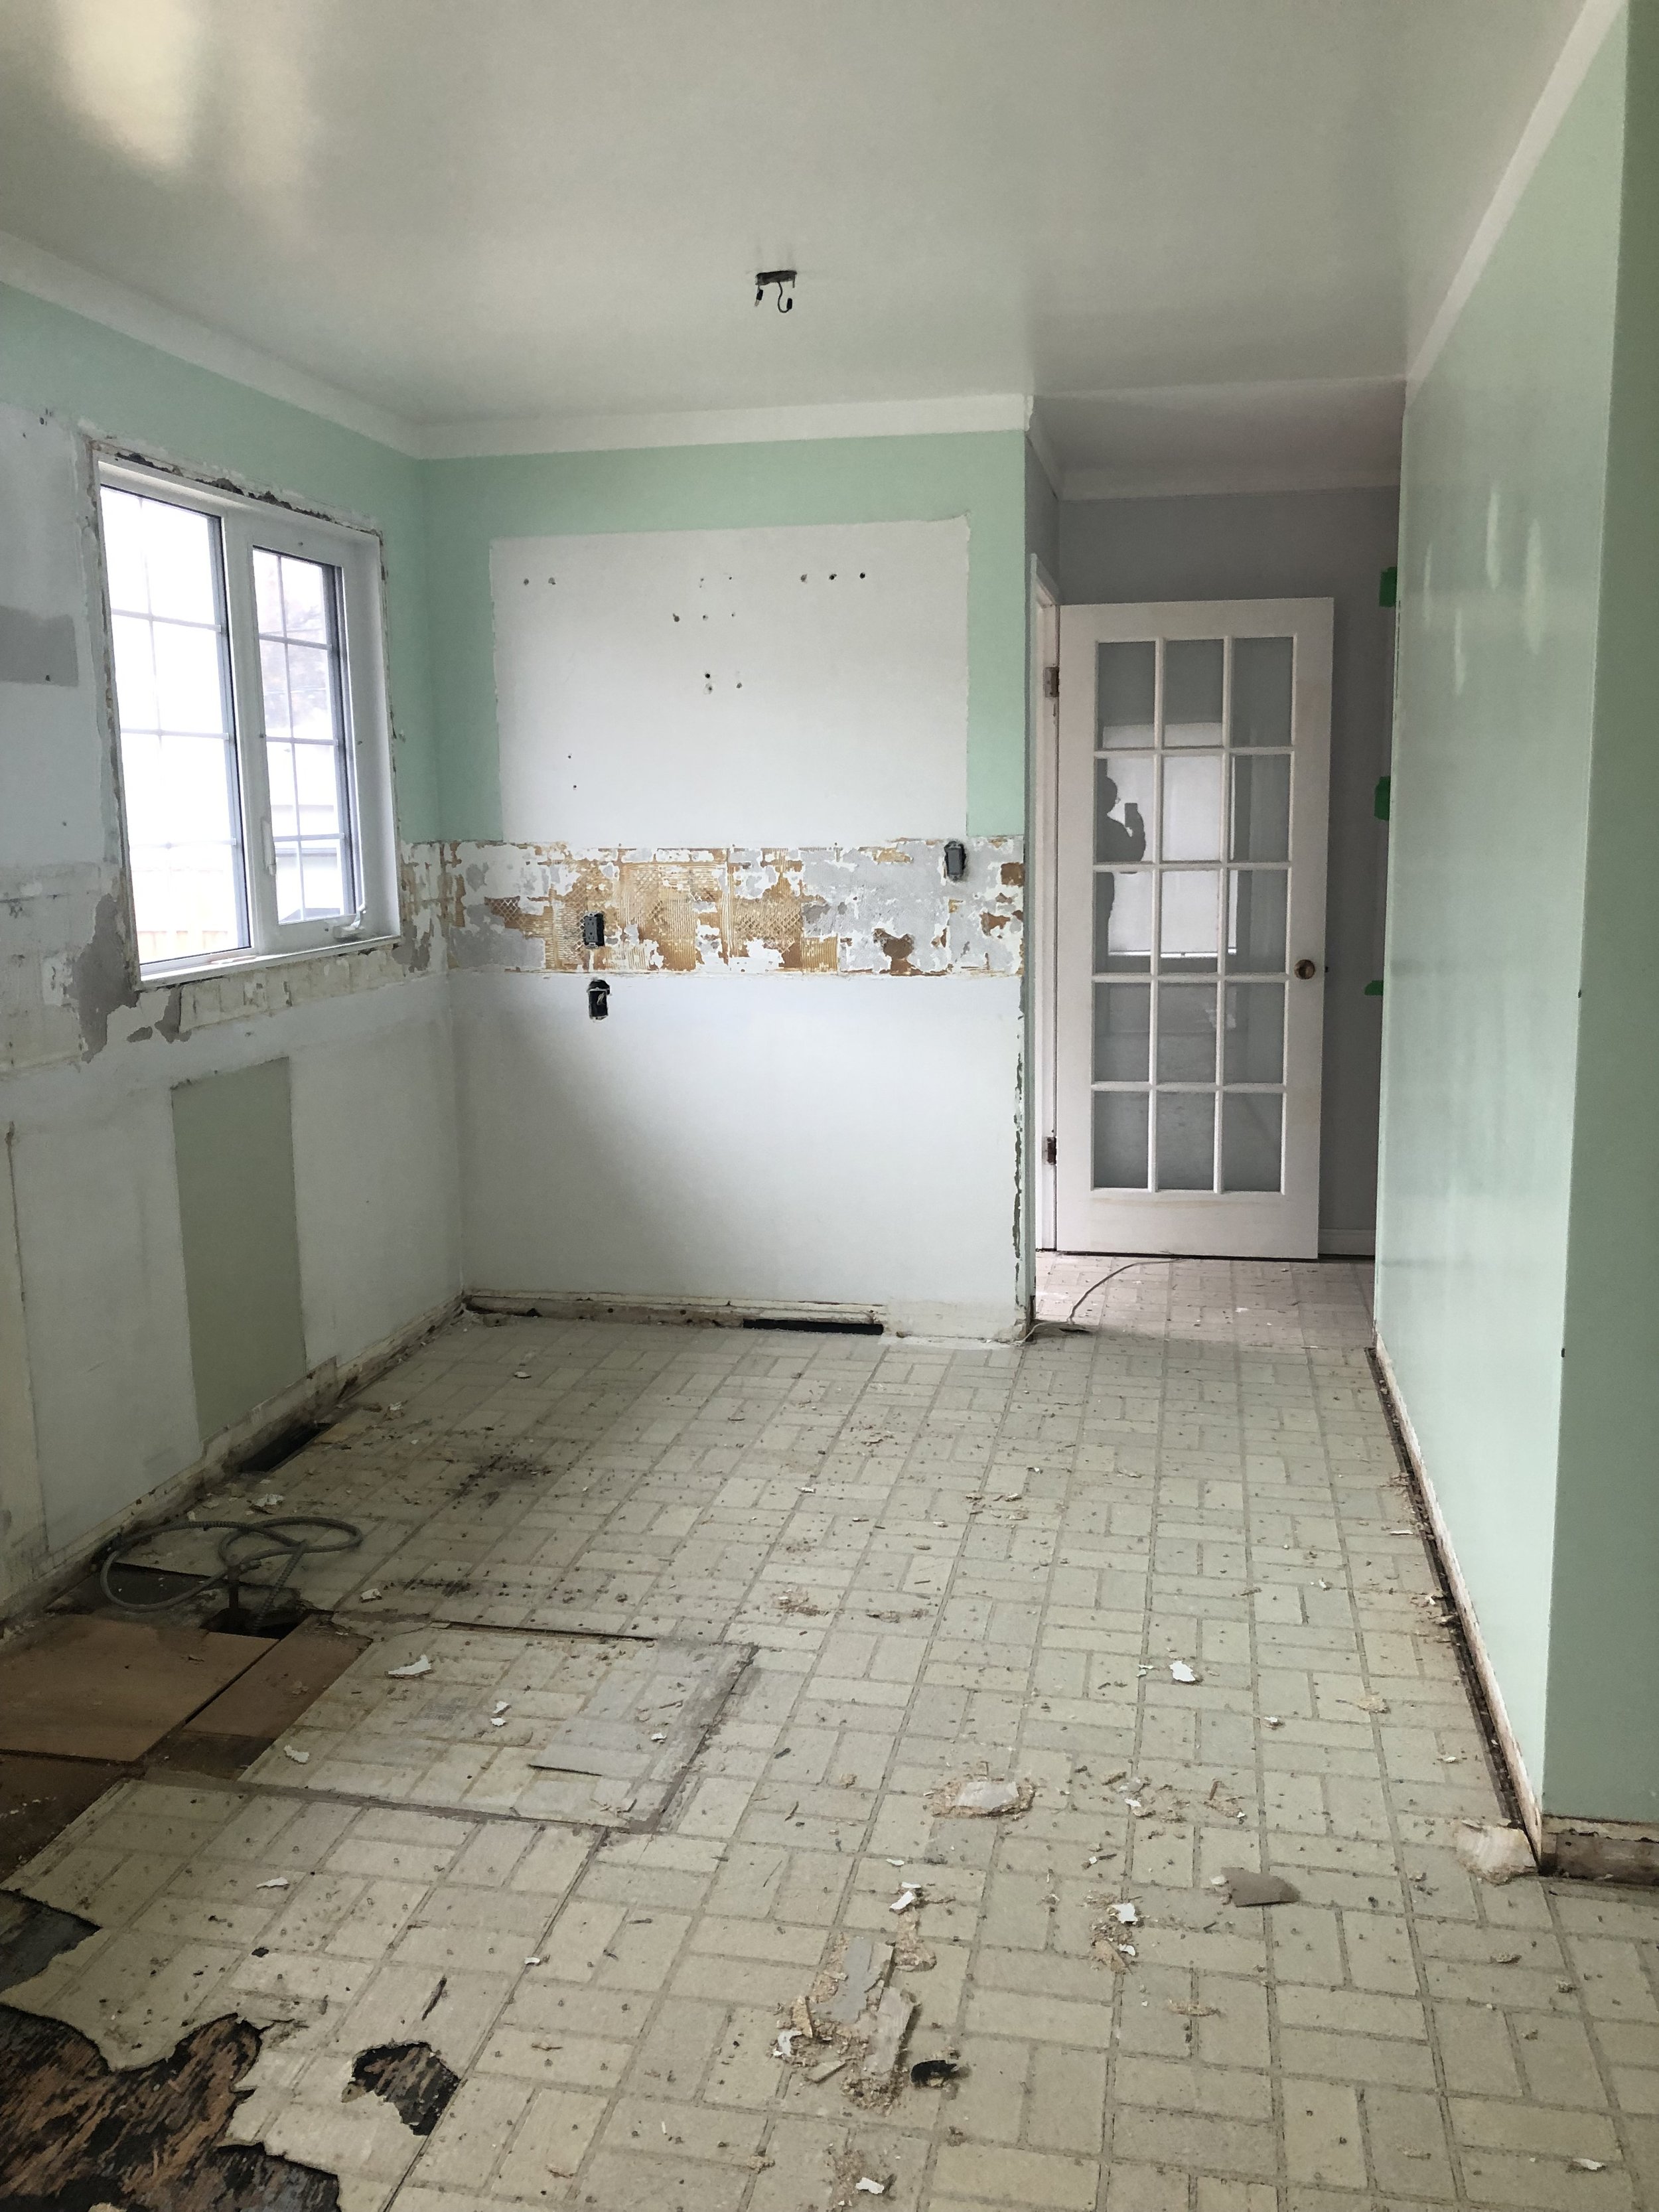
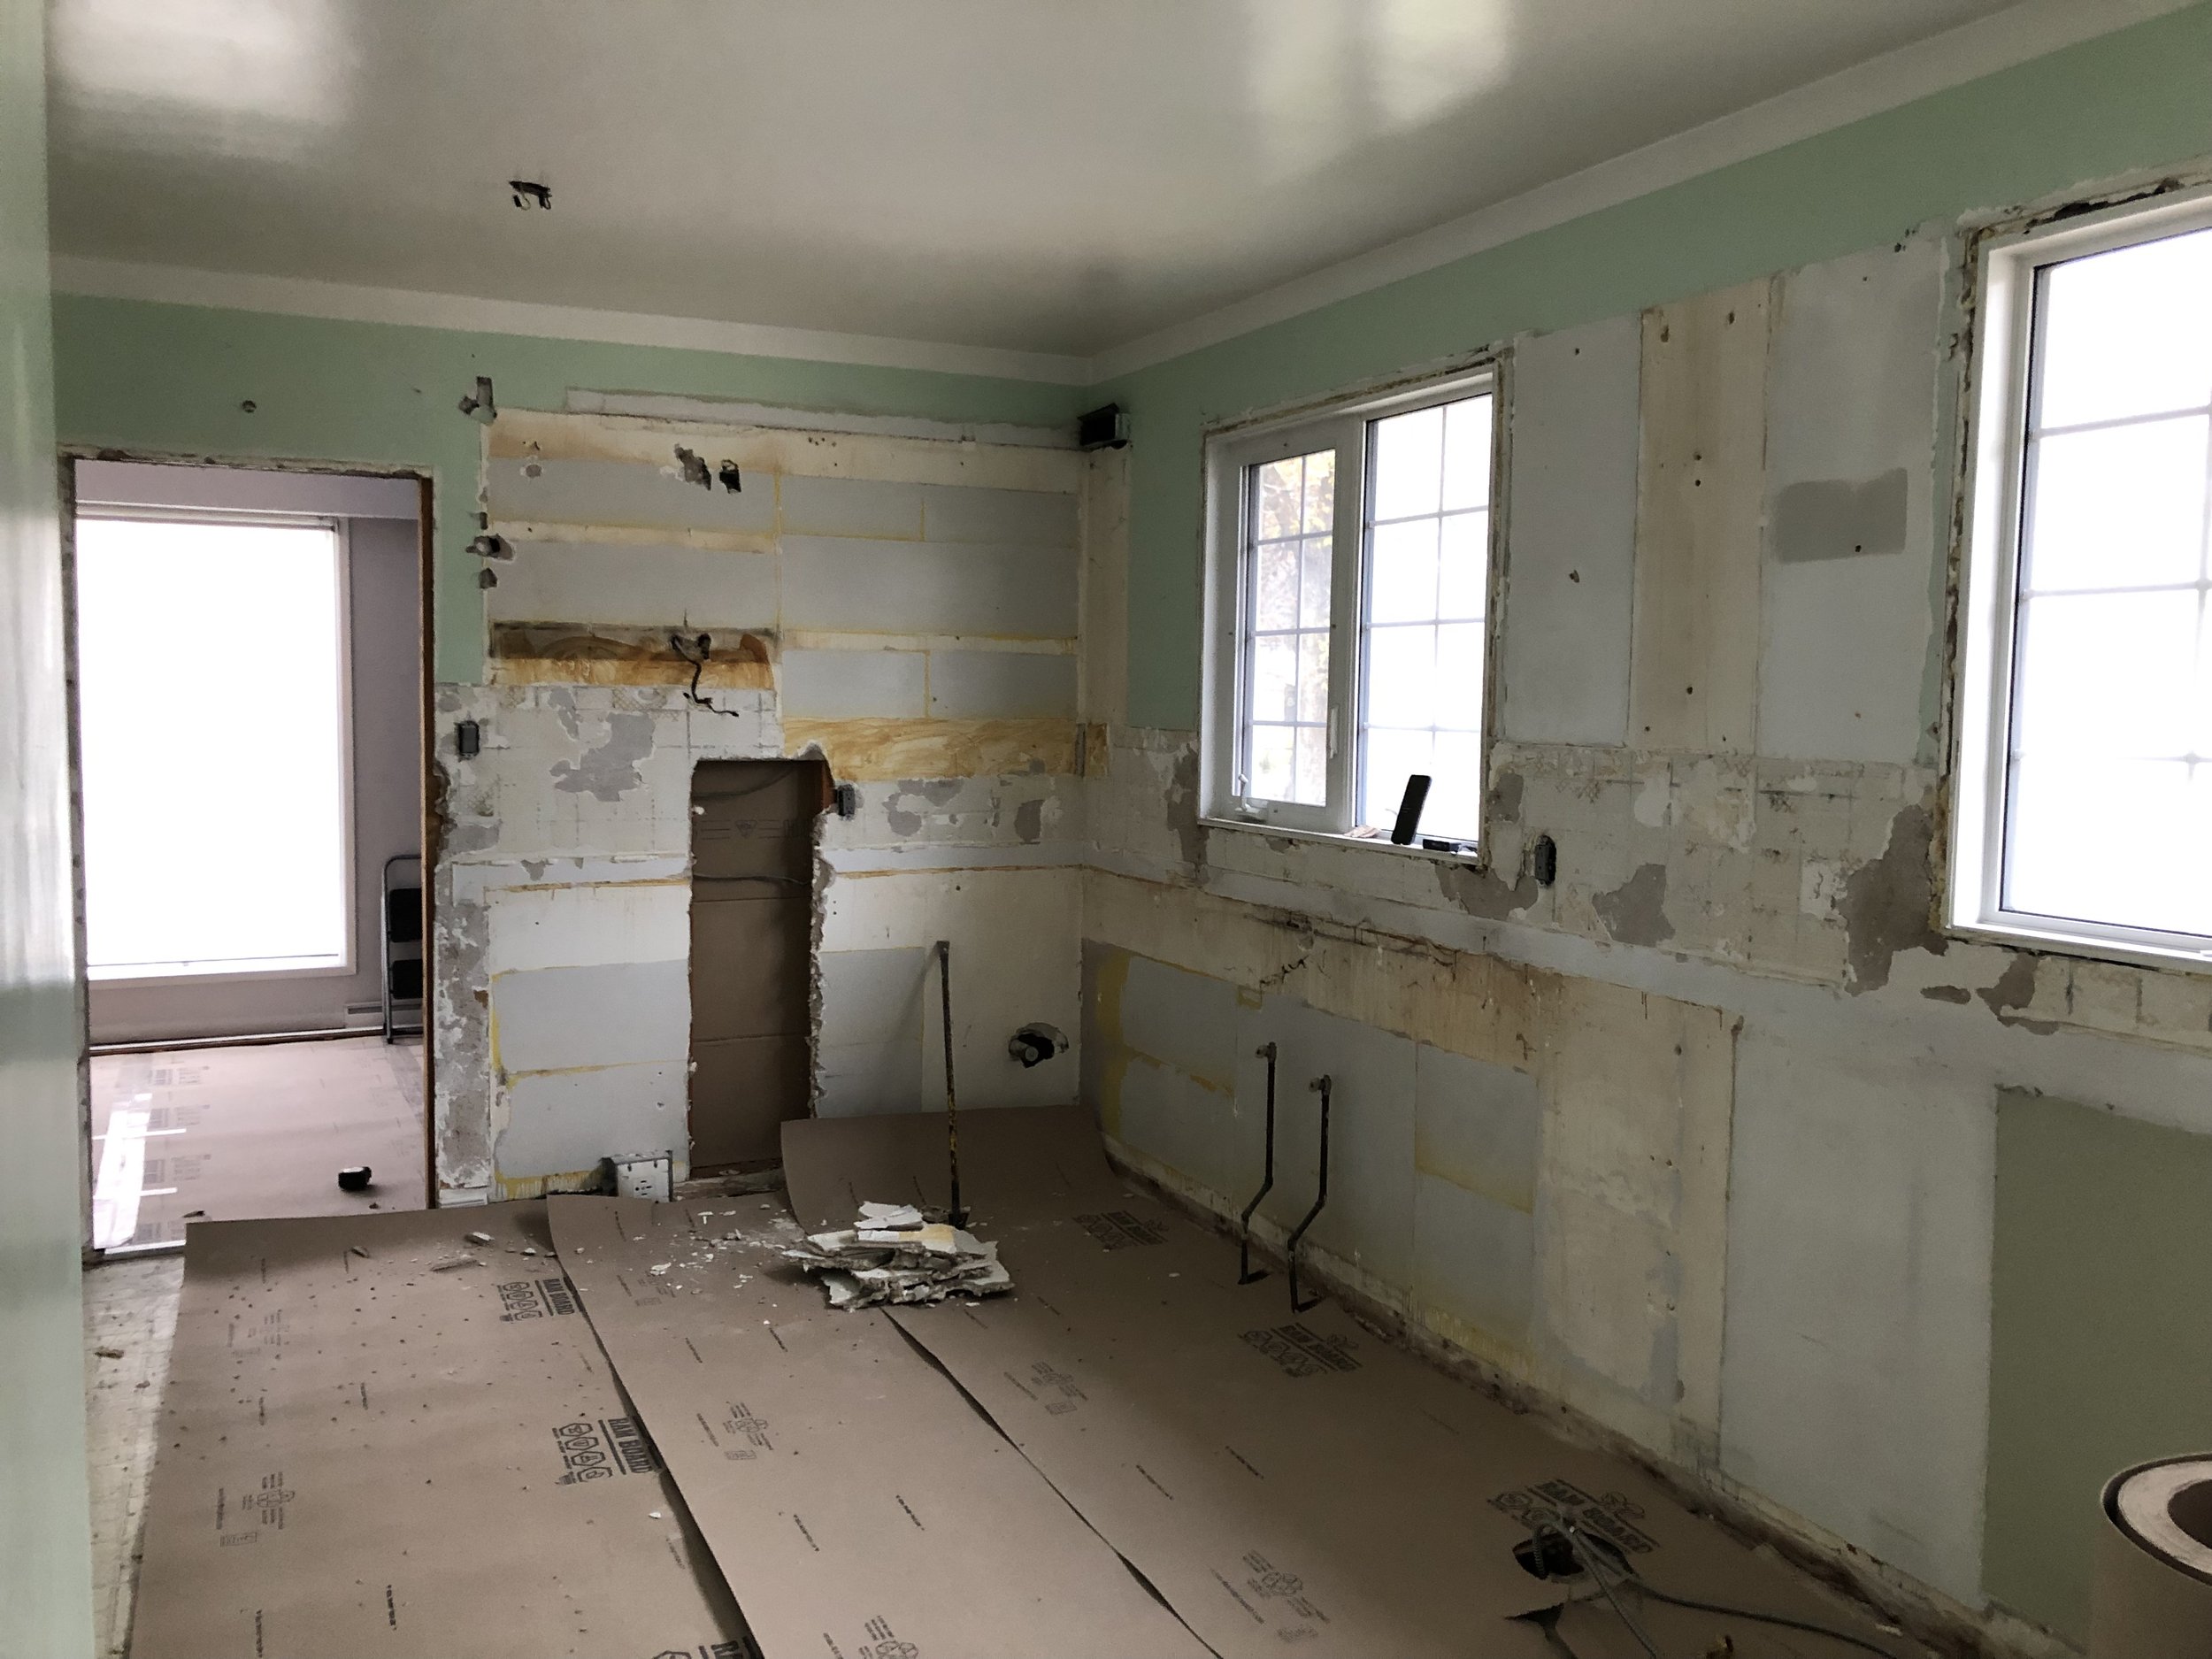
Built in 1960, this mid-century home had an original kitchen complete with linoleum flooring, light green cabinetry, outdated lighting, and tile that required a lot of TLC.


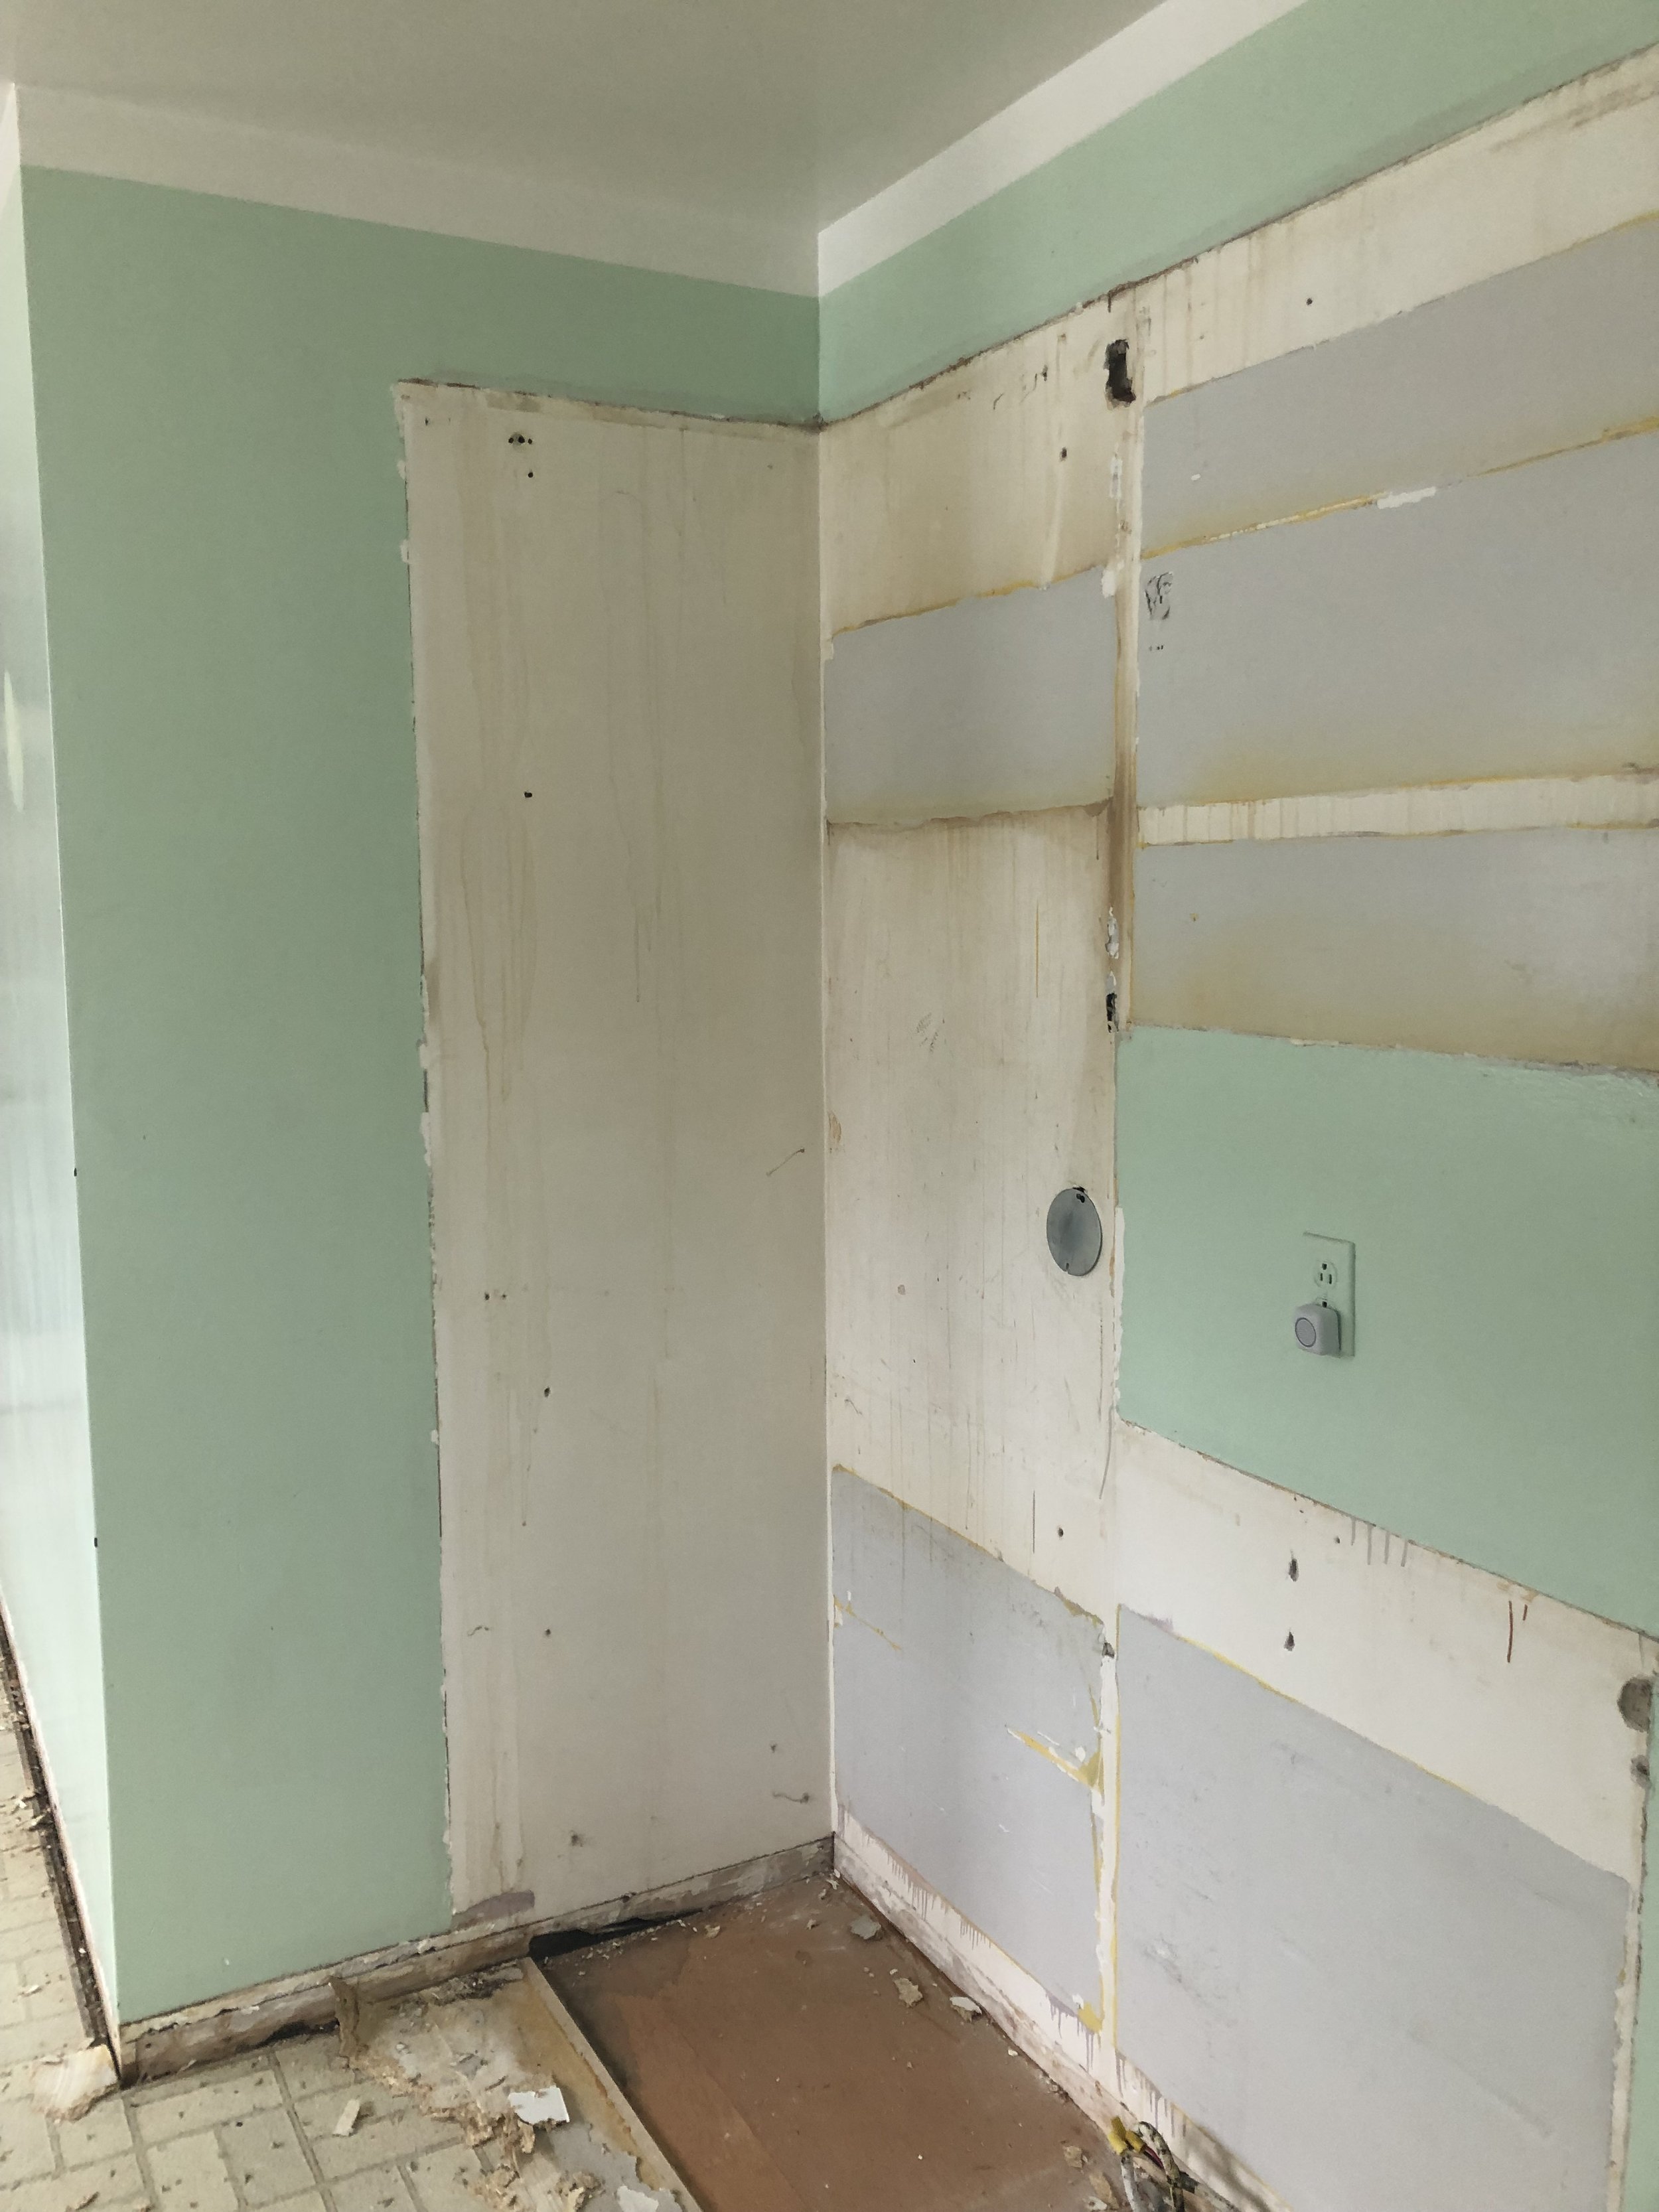
D U R I N G
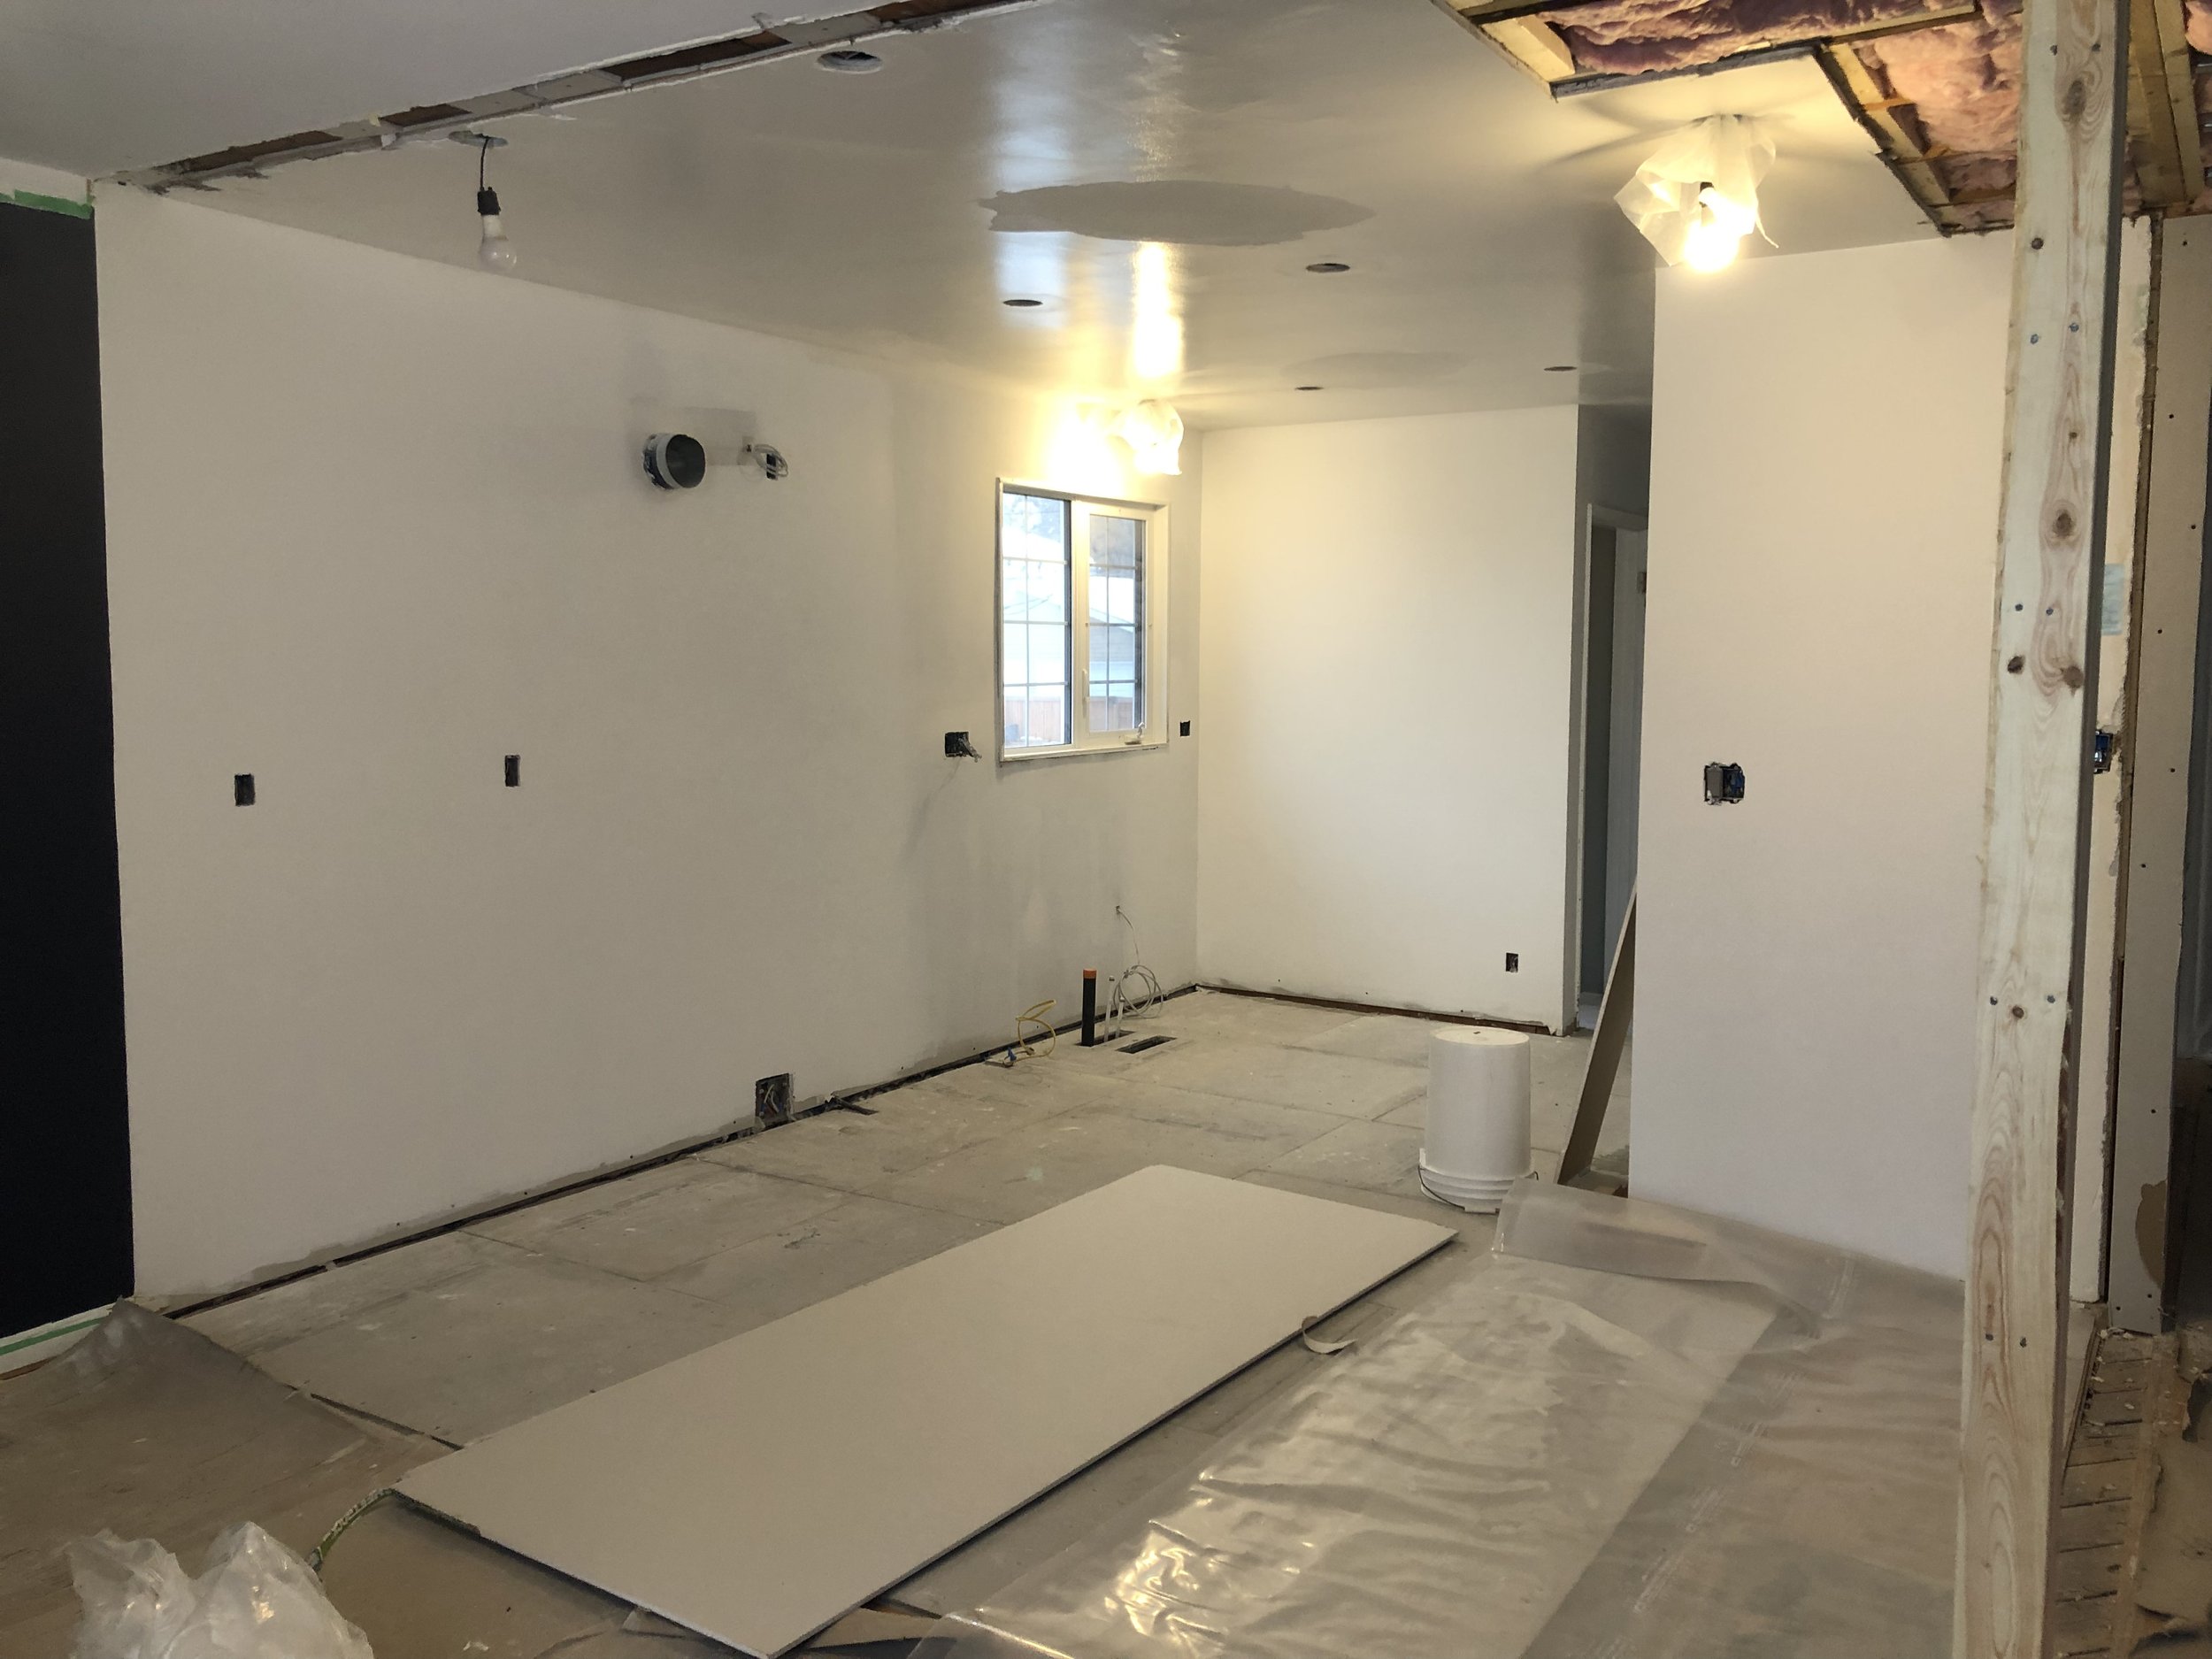
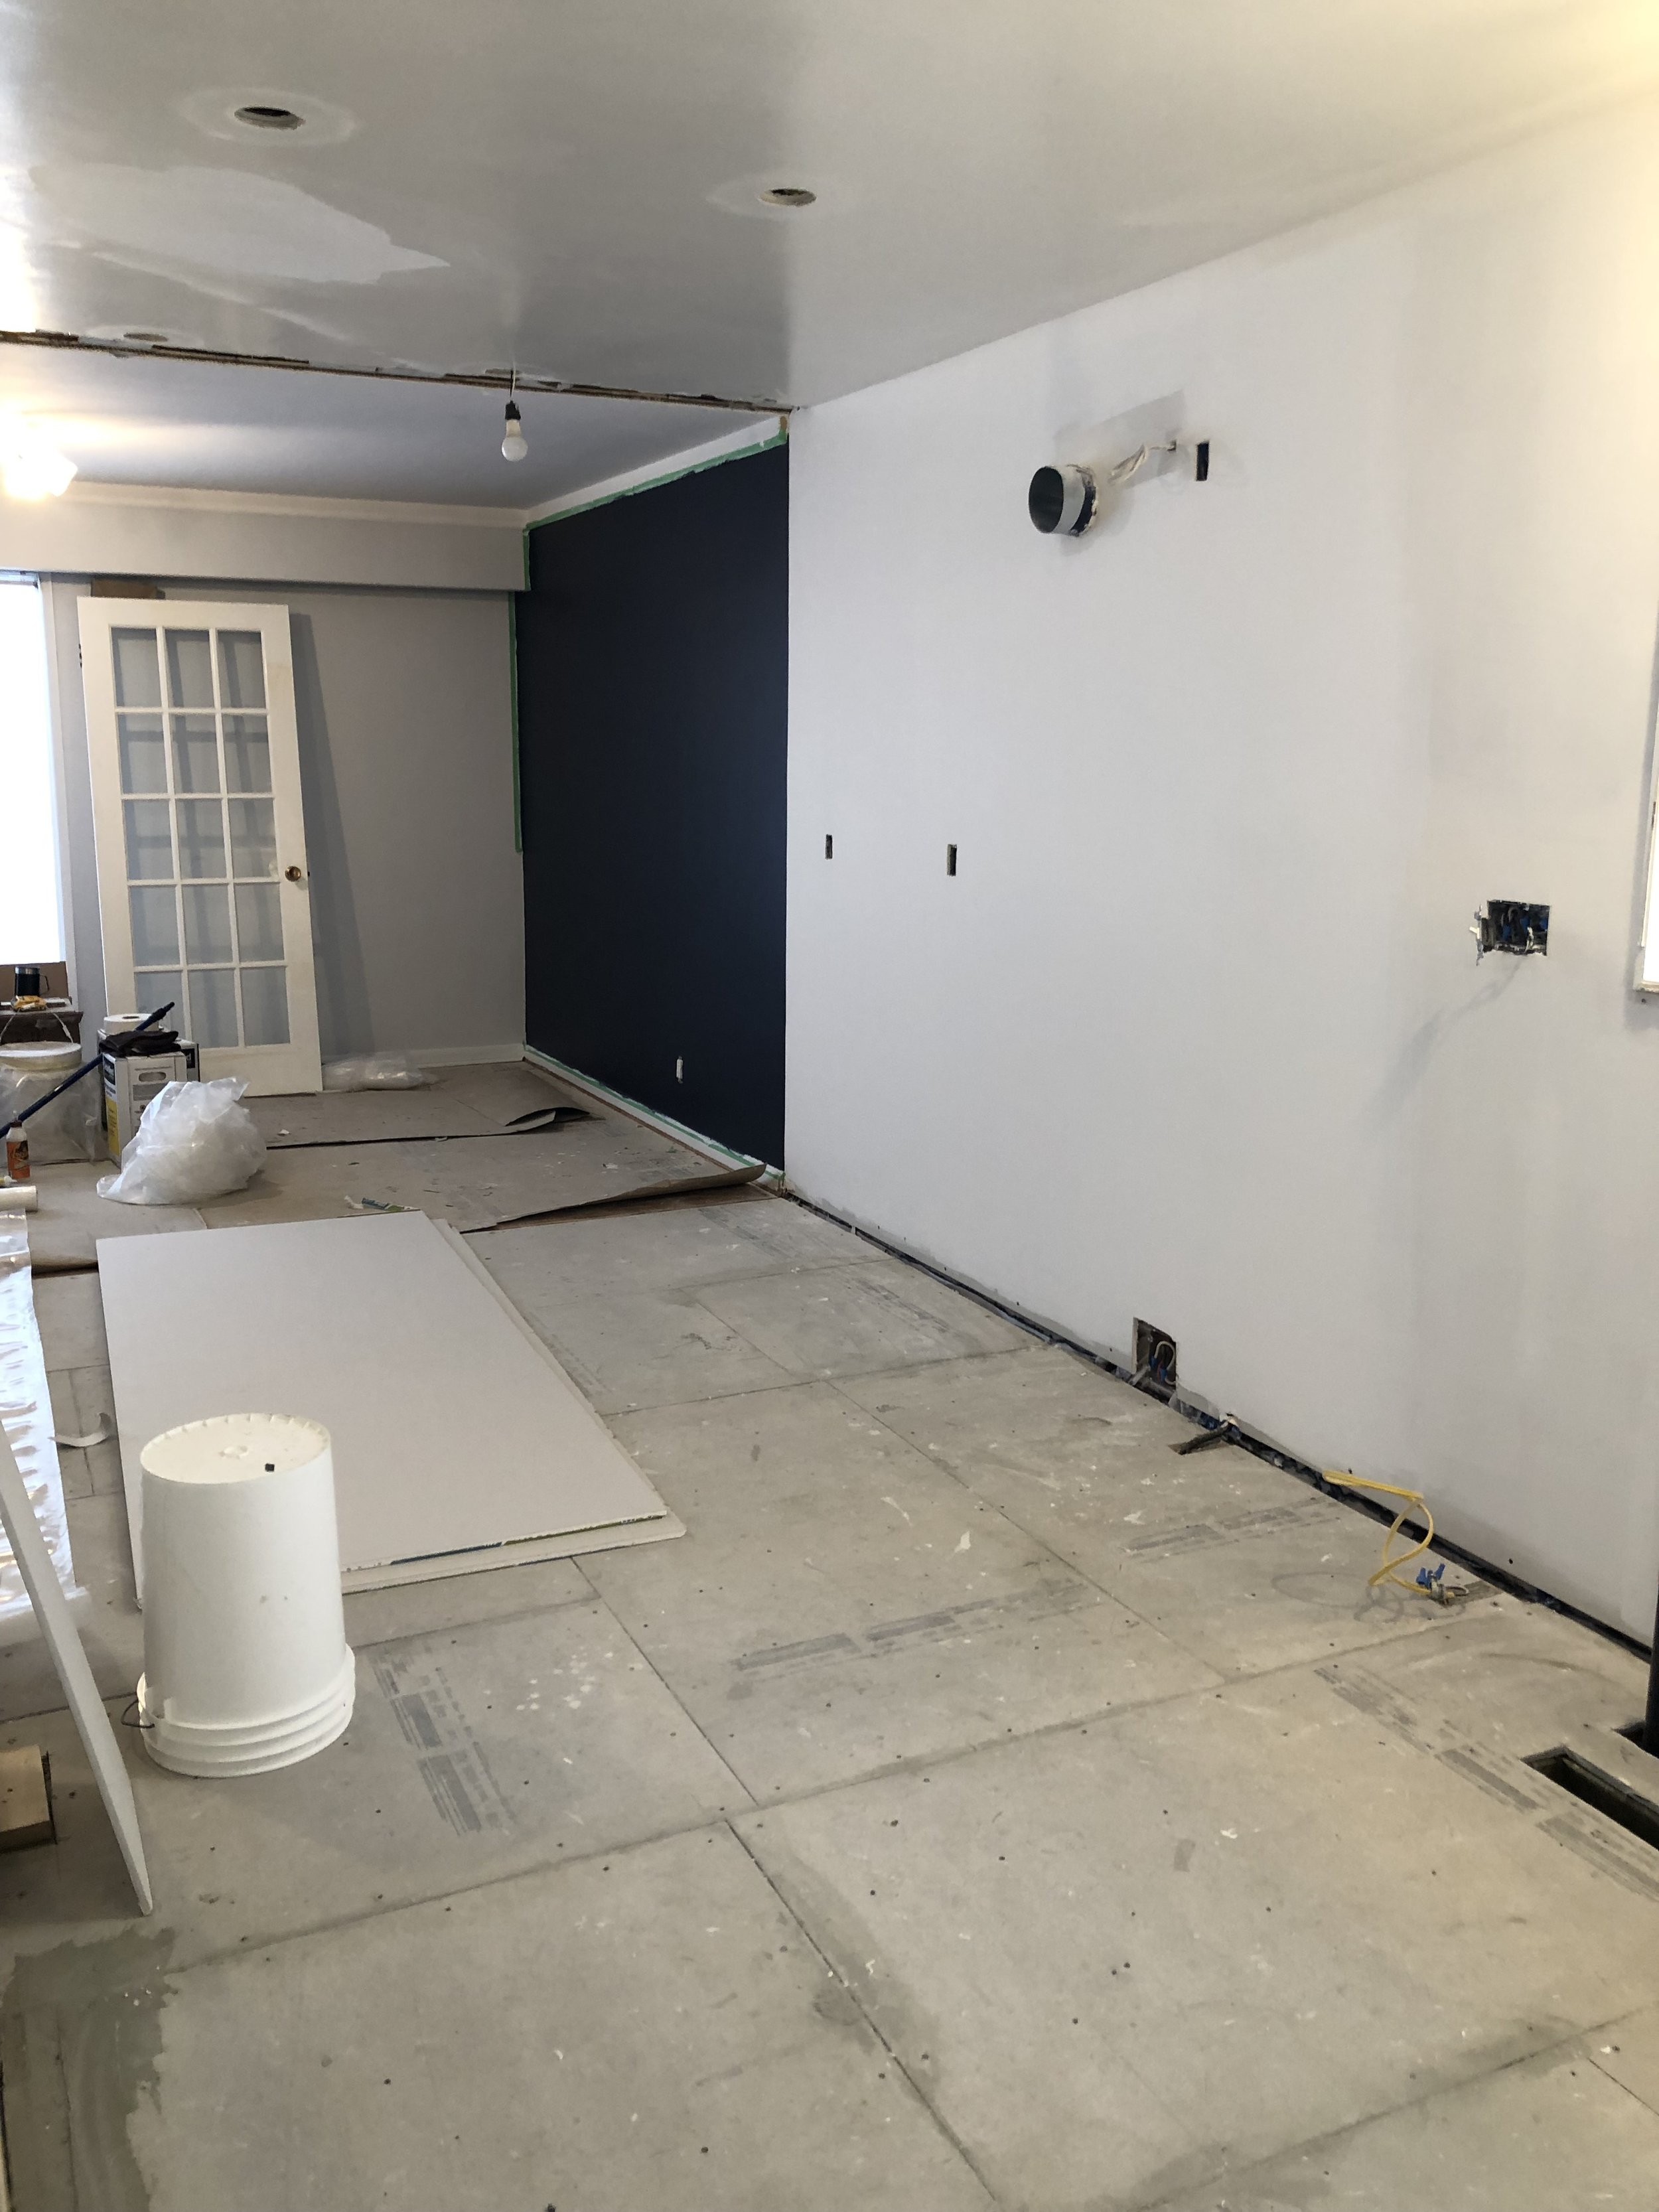
The first step in any construction project is site protection. Our carpentry team secured ramboard over the hardwood floors and installed a protective shield between the construction space and the bedroom space to contain the dust and debris.
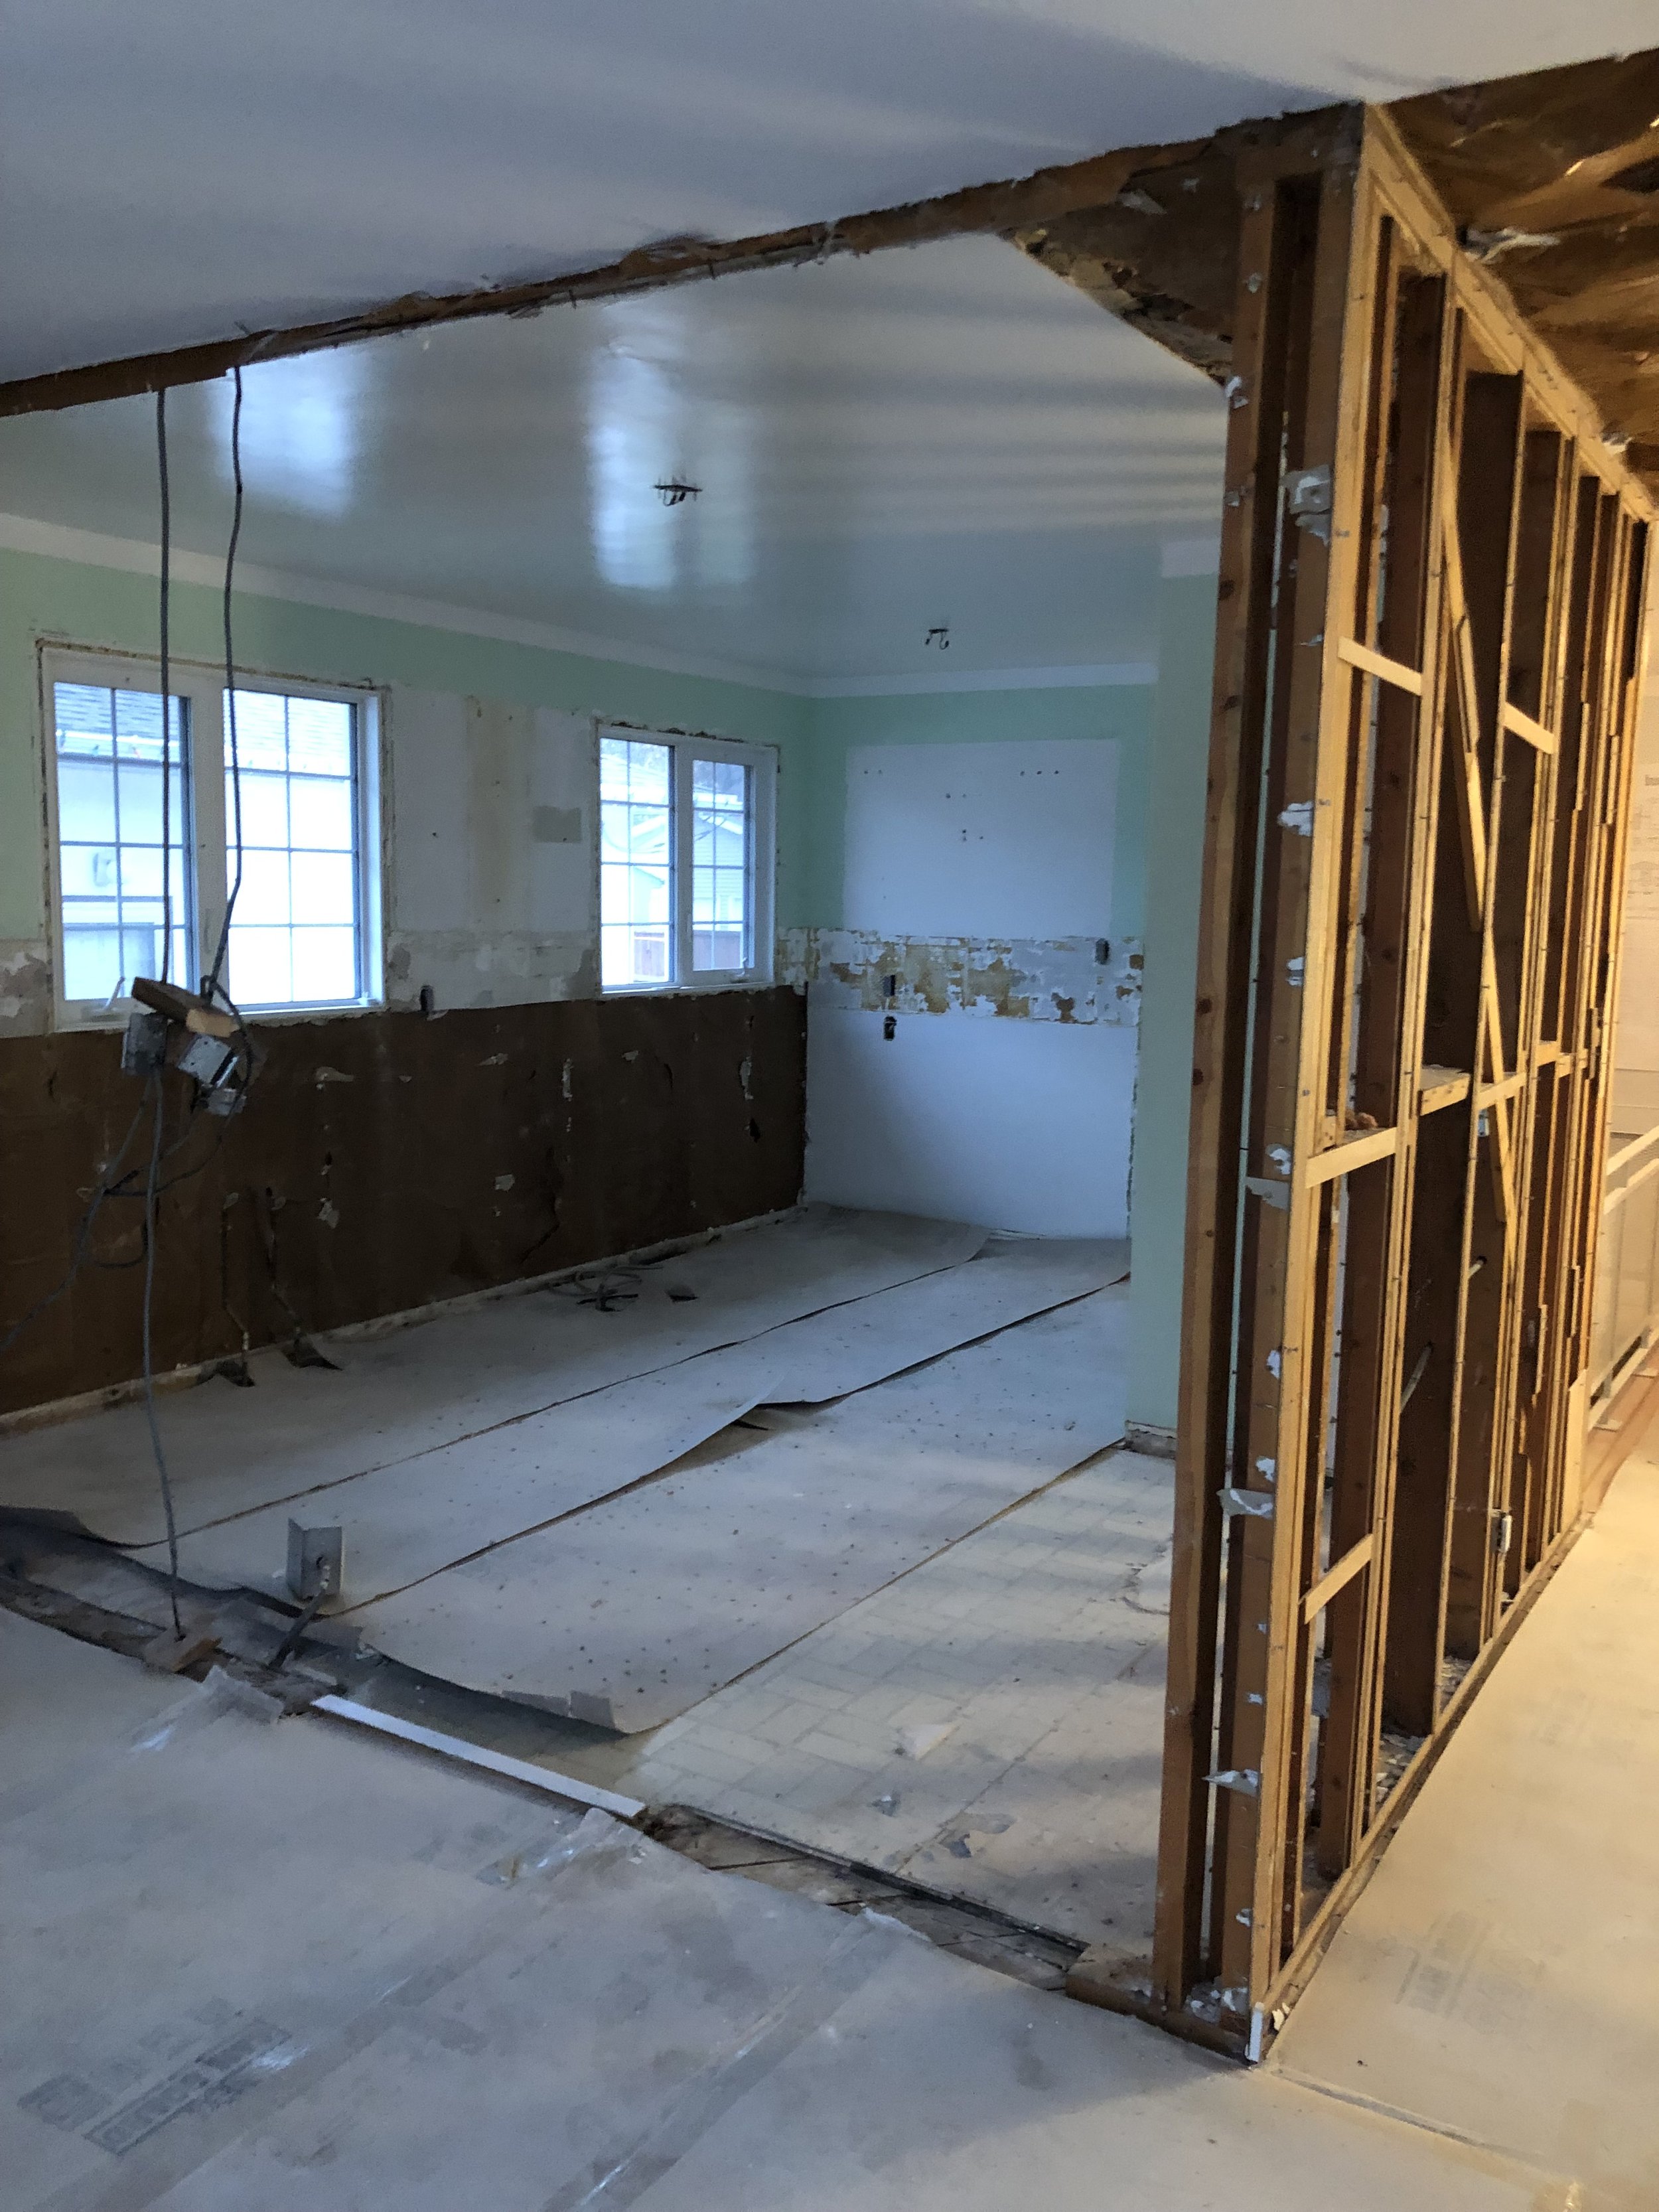
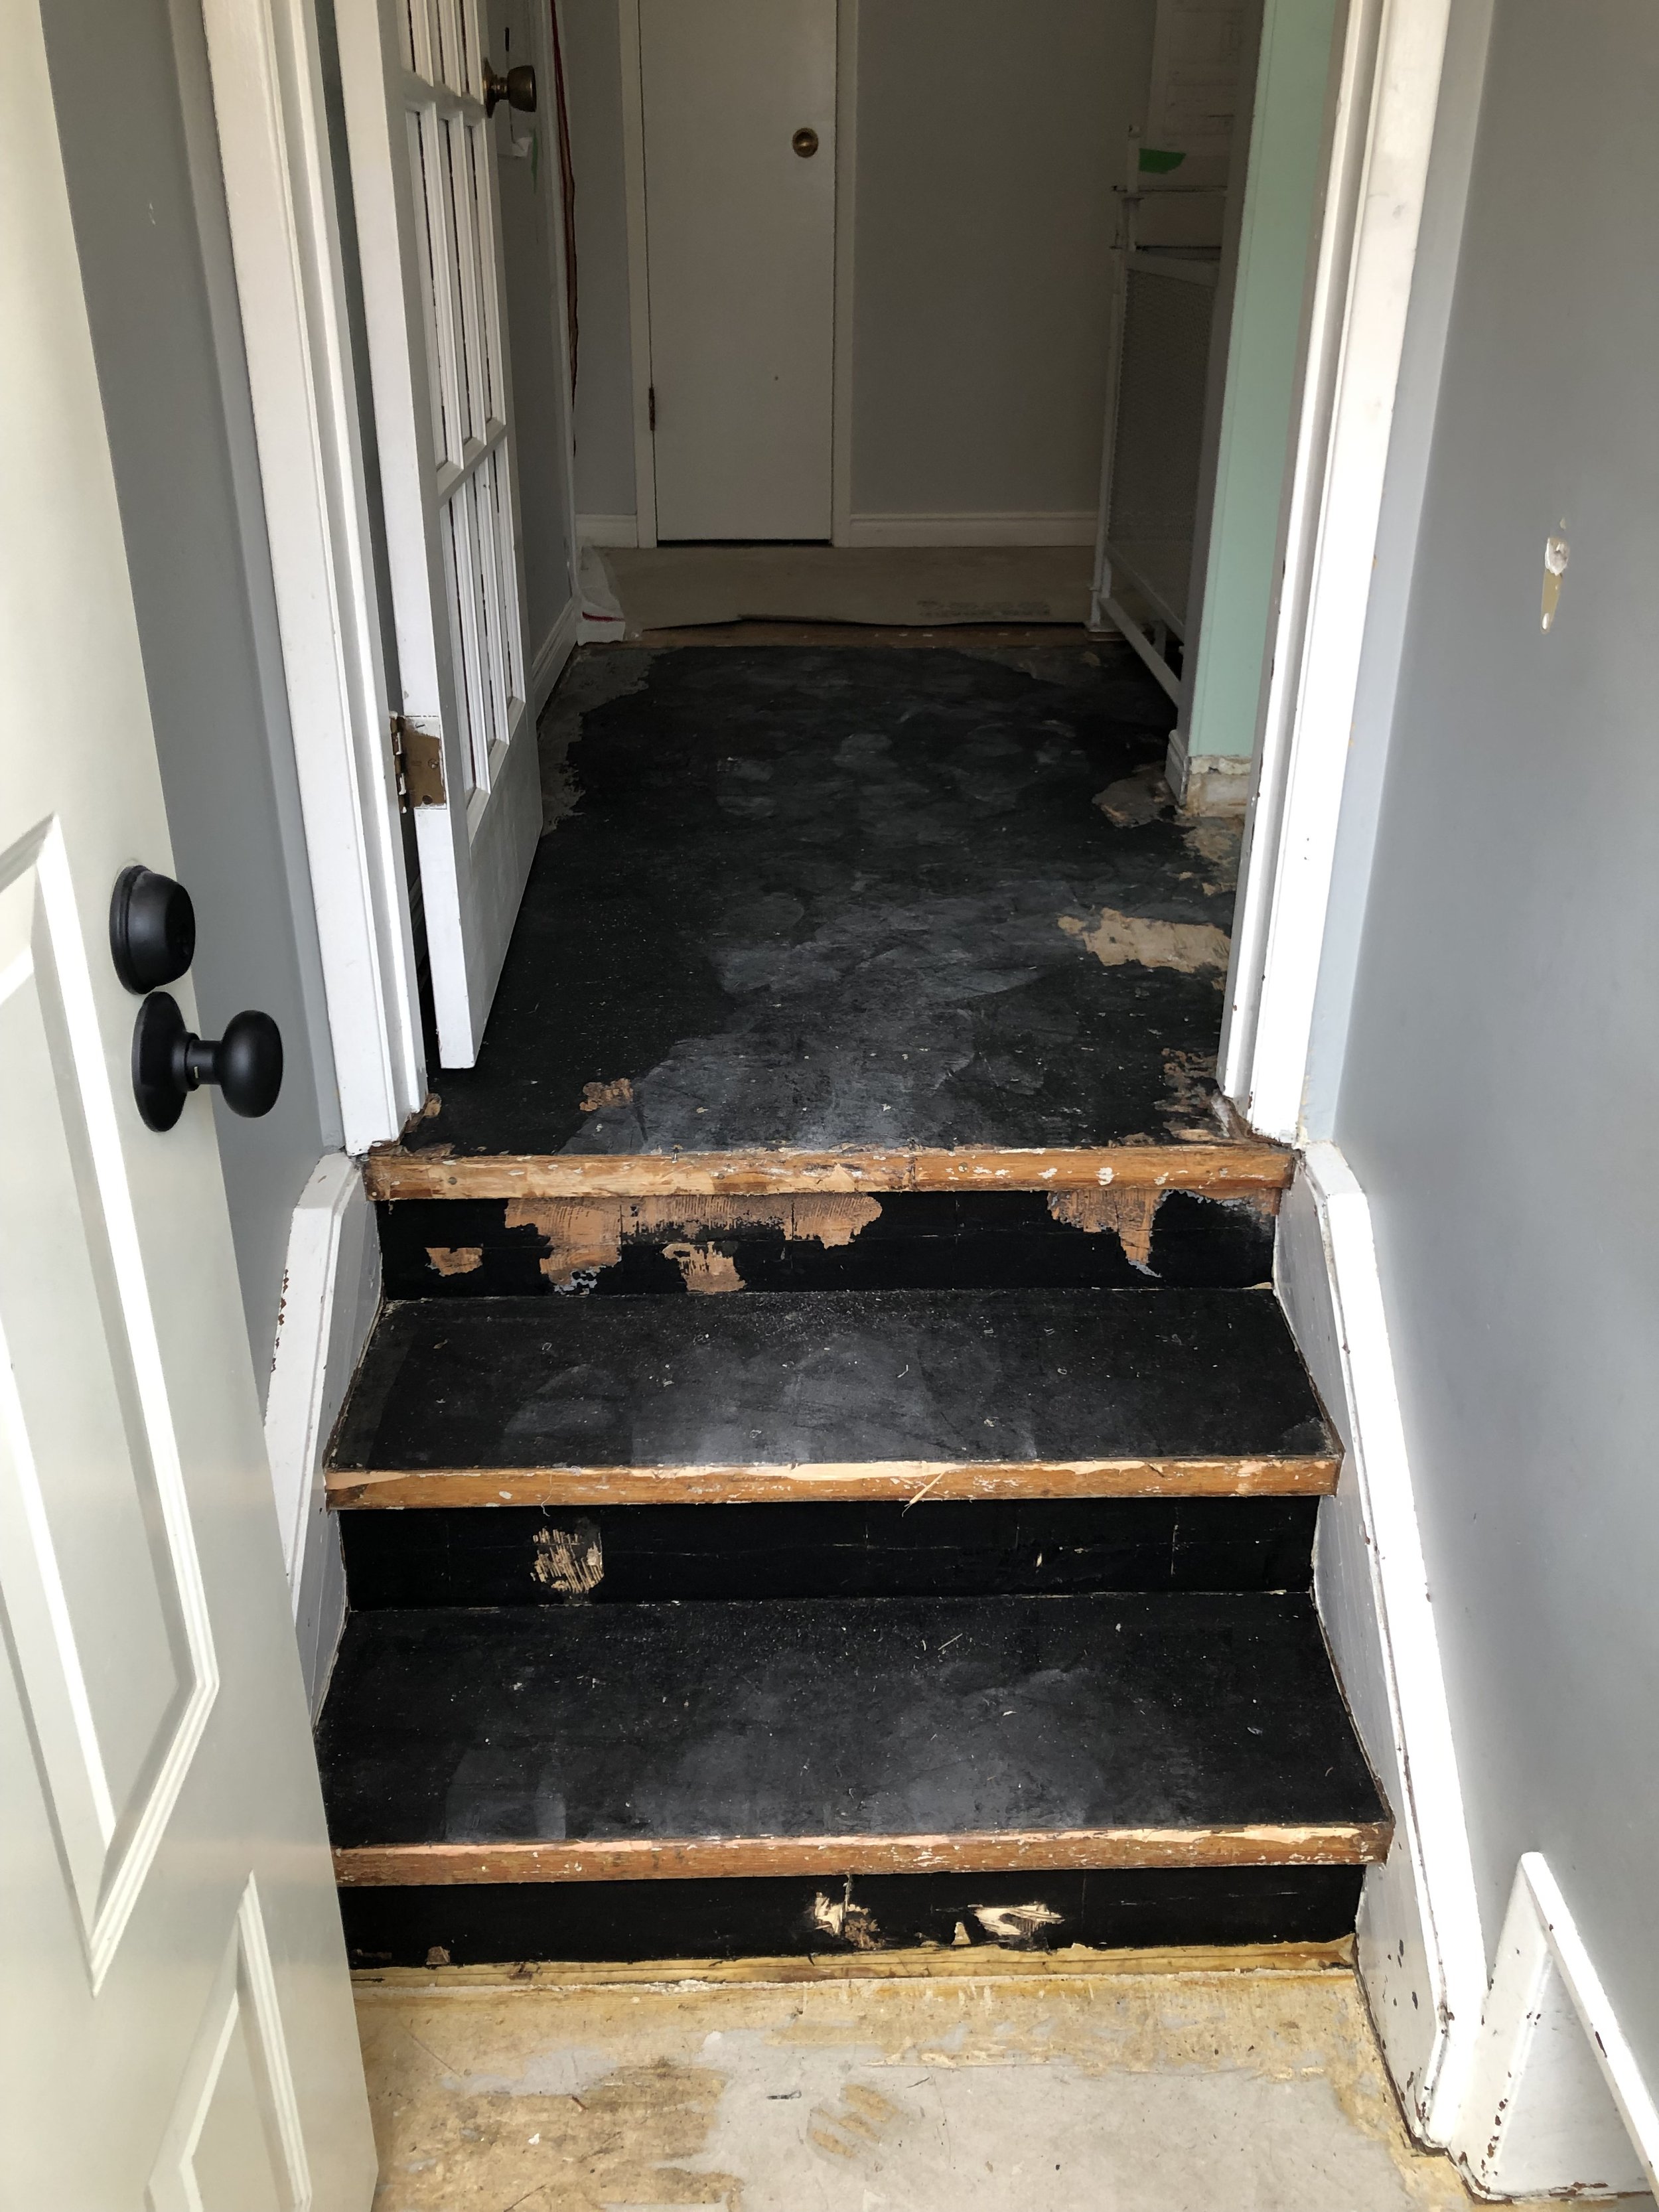
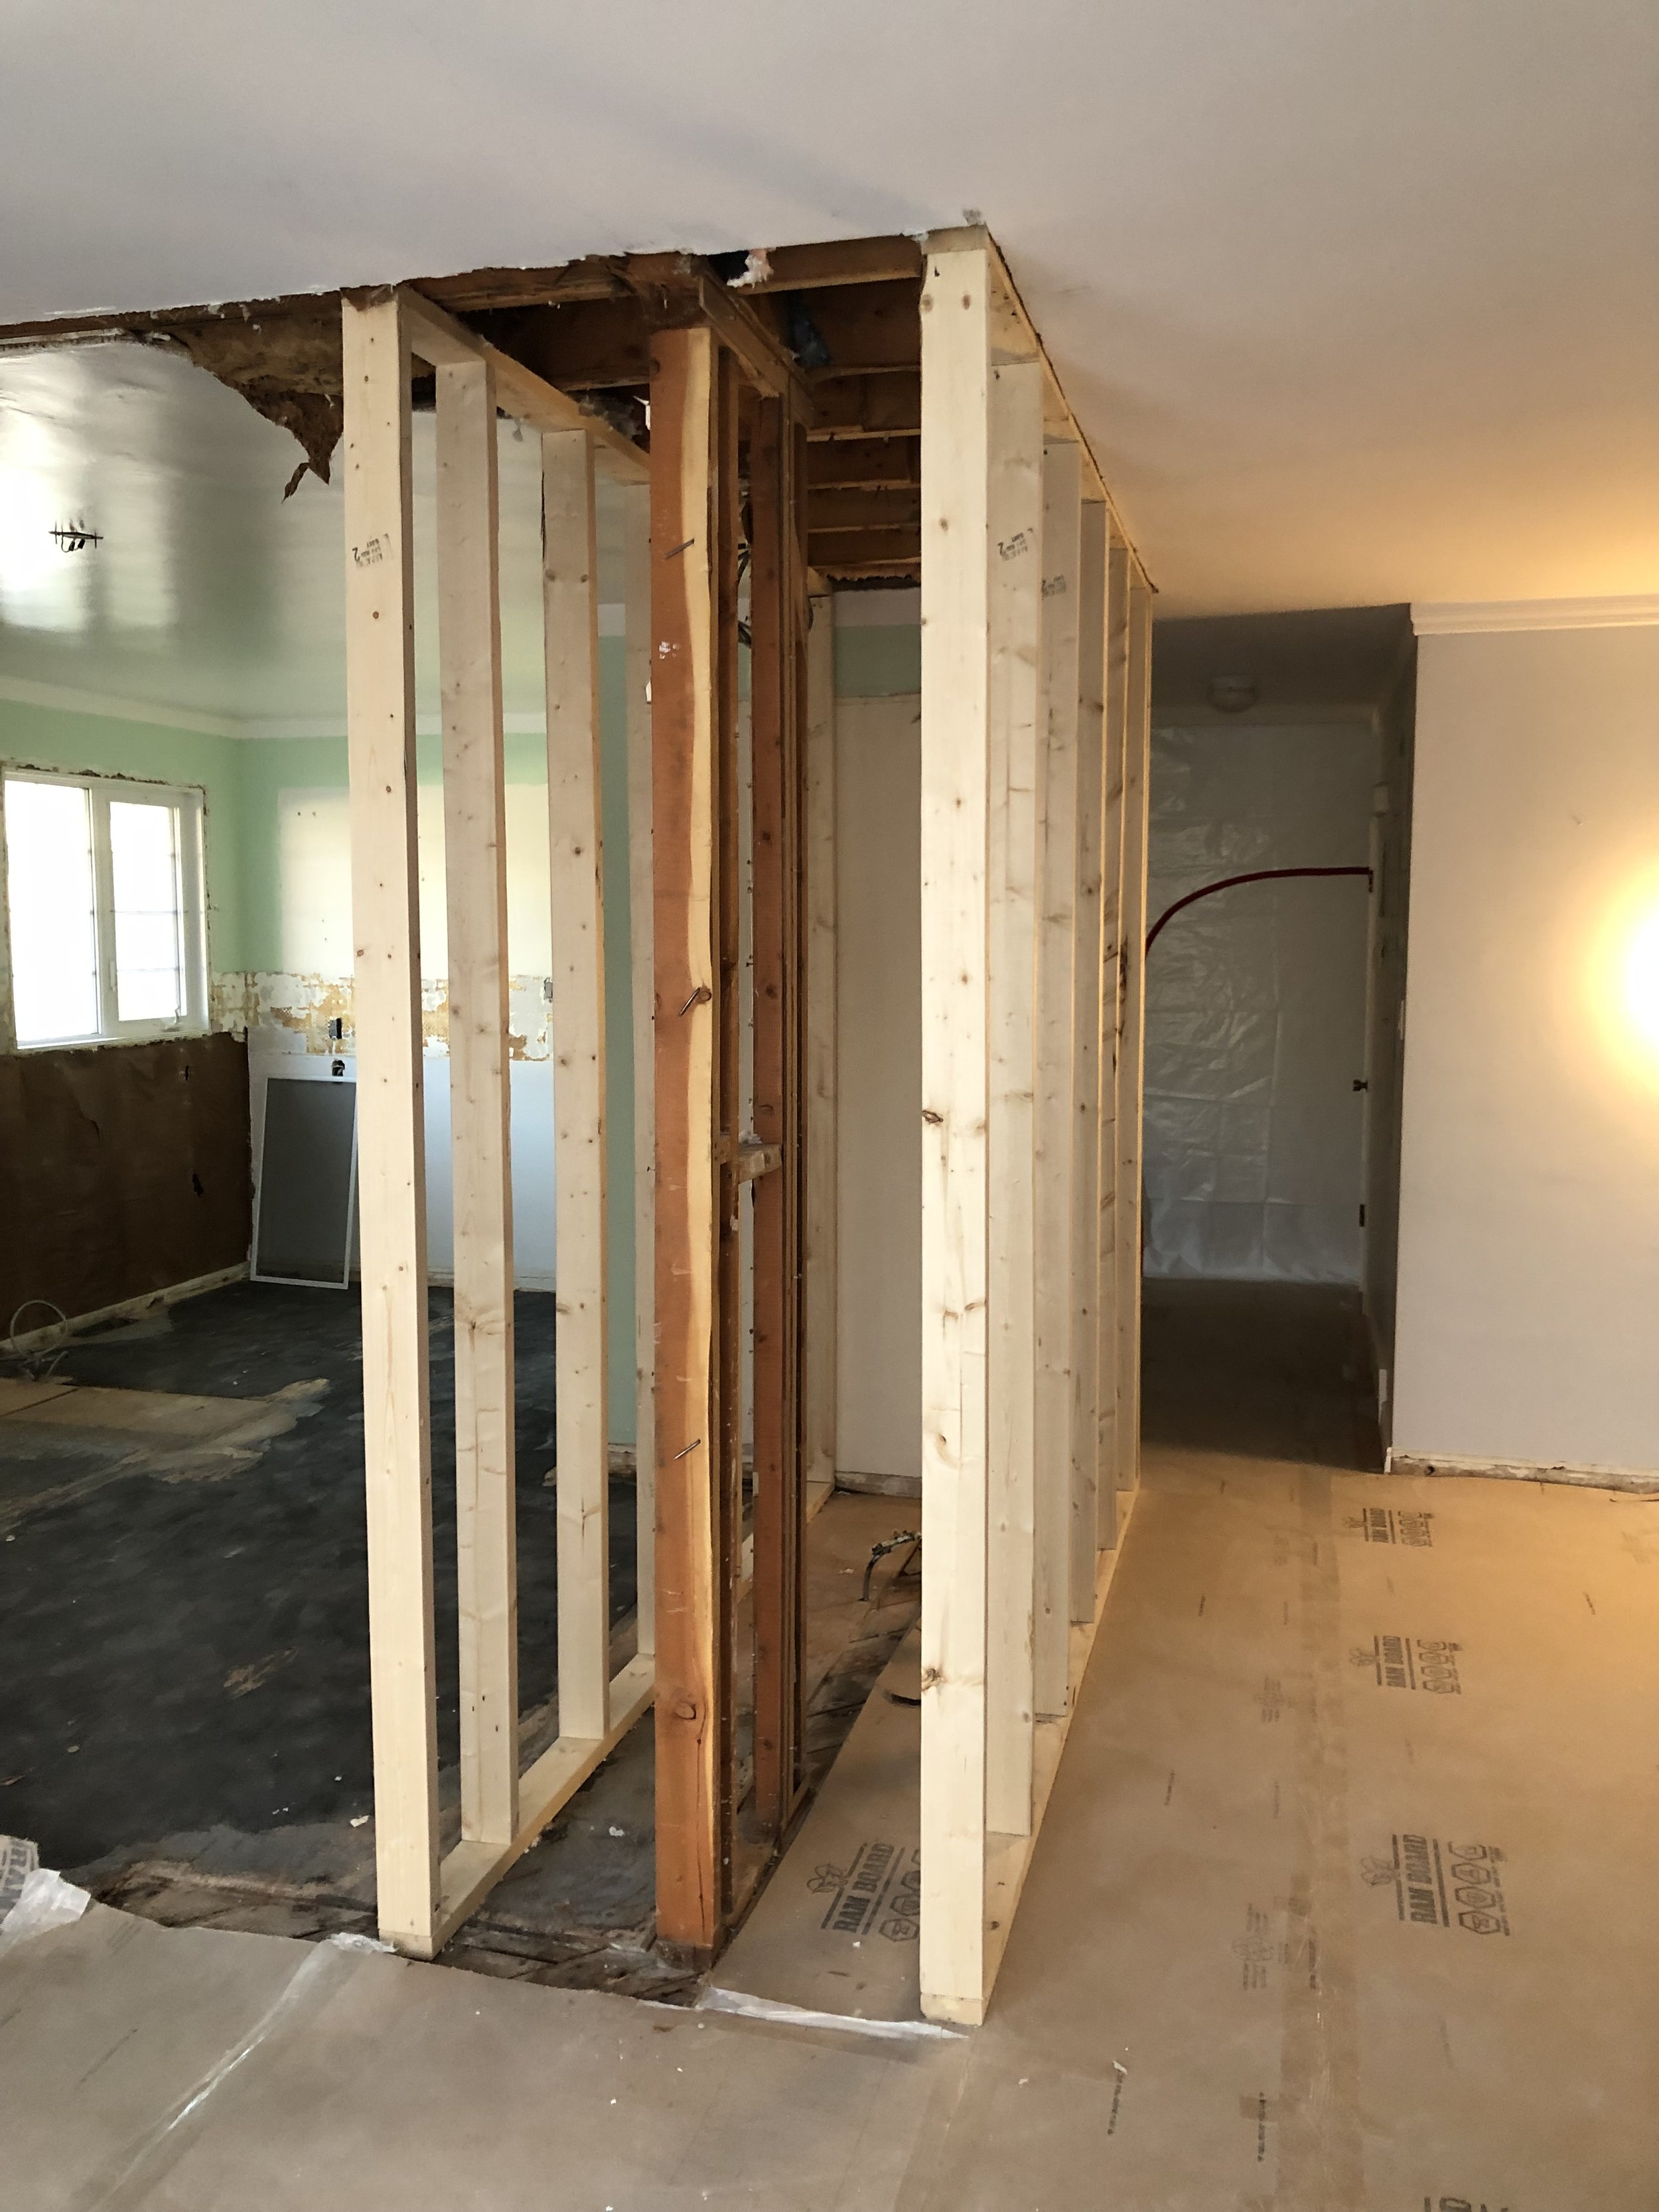
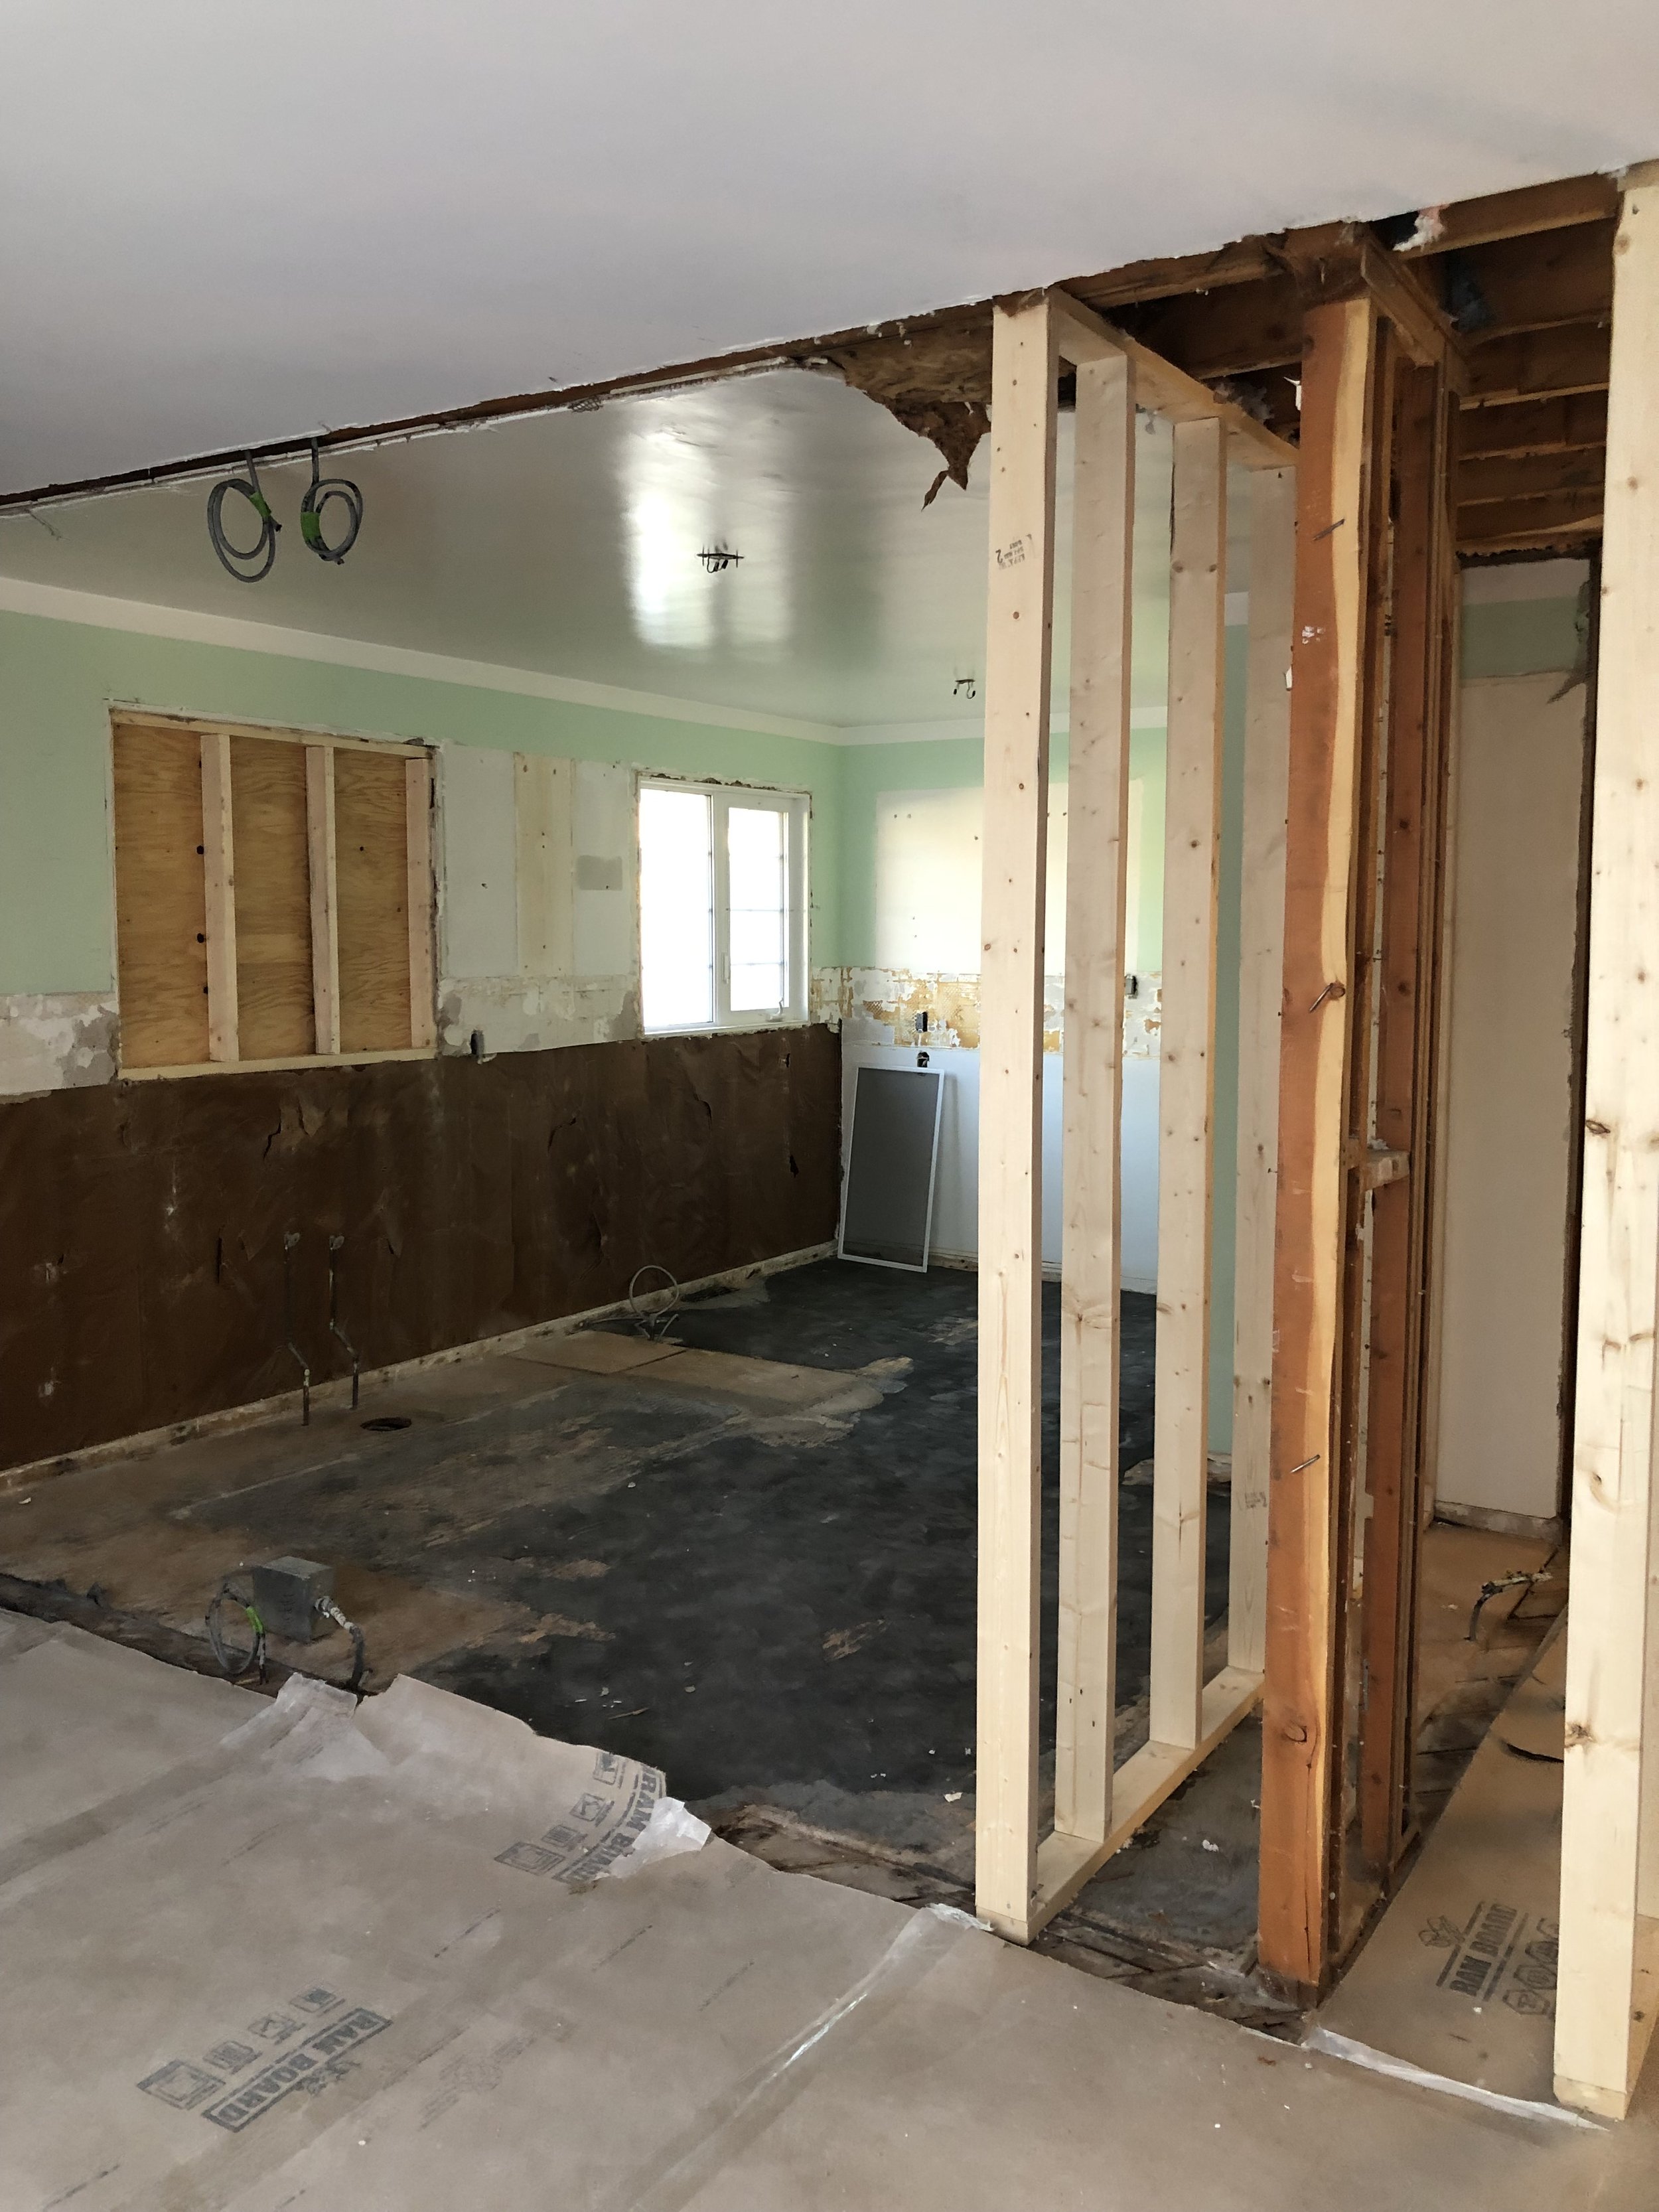
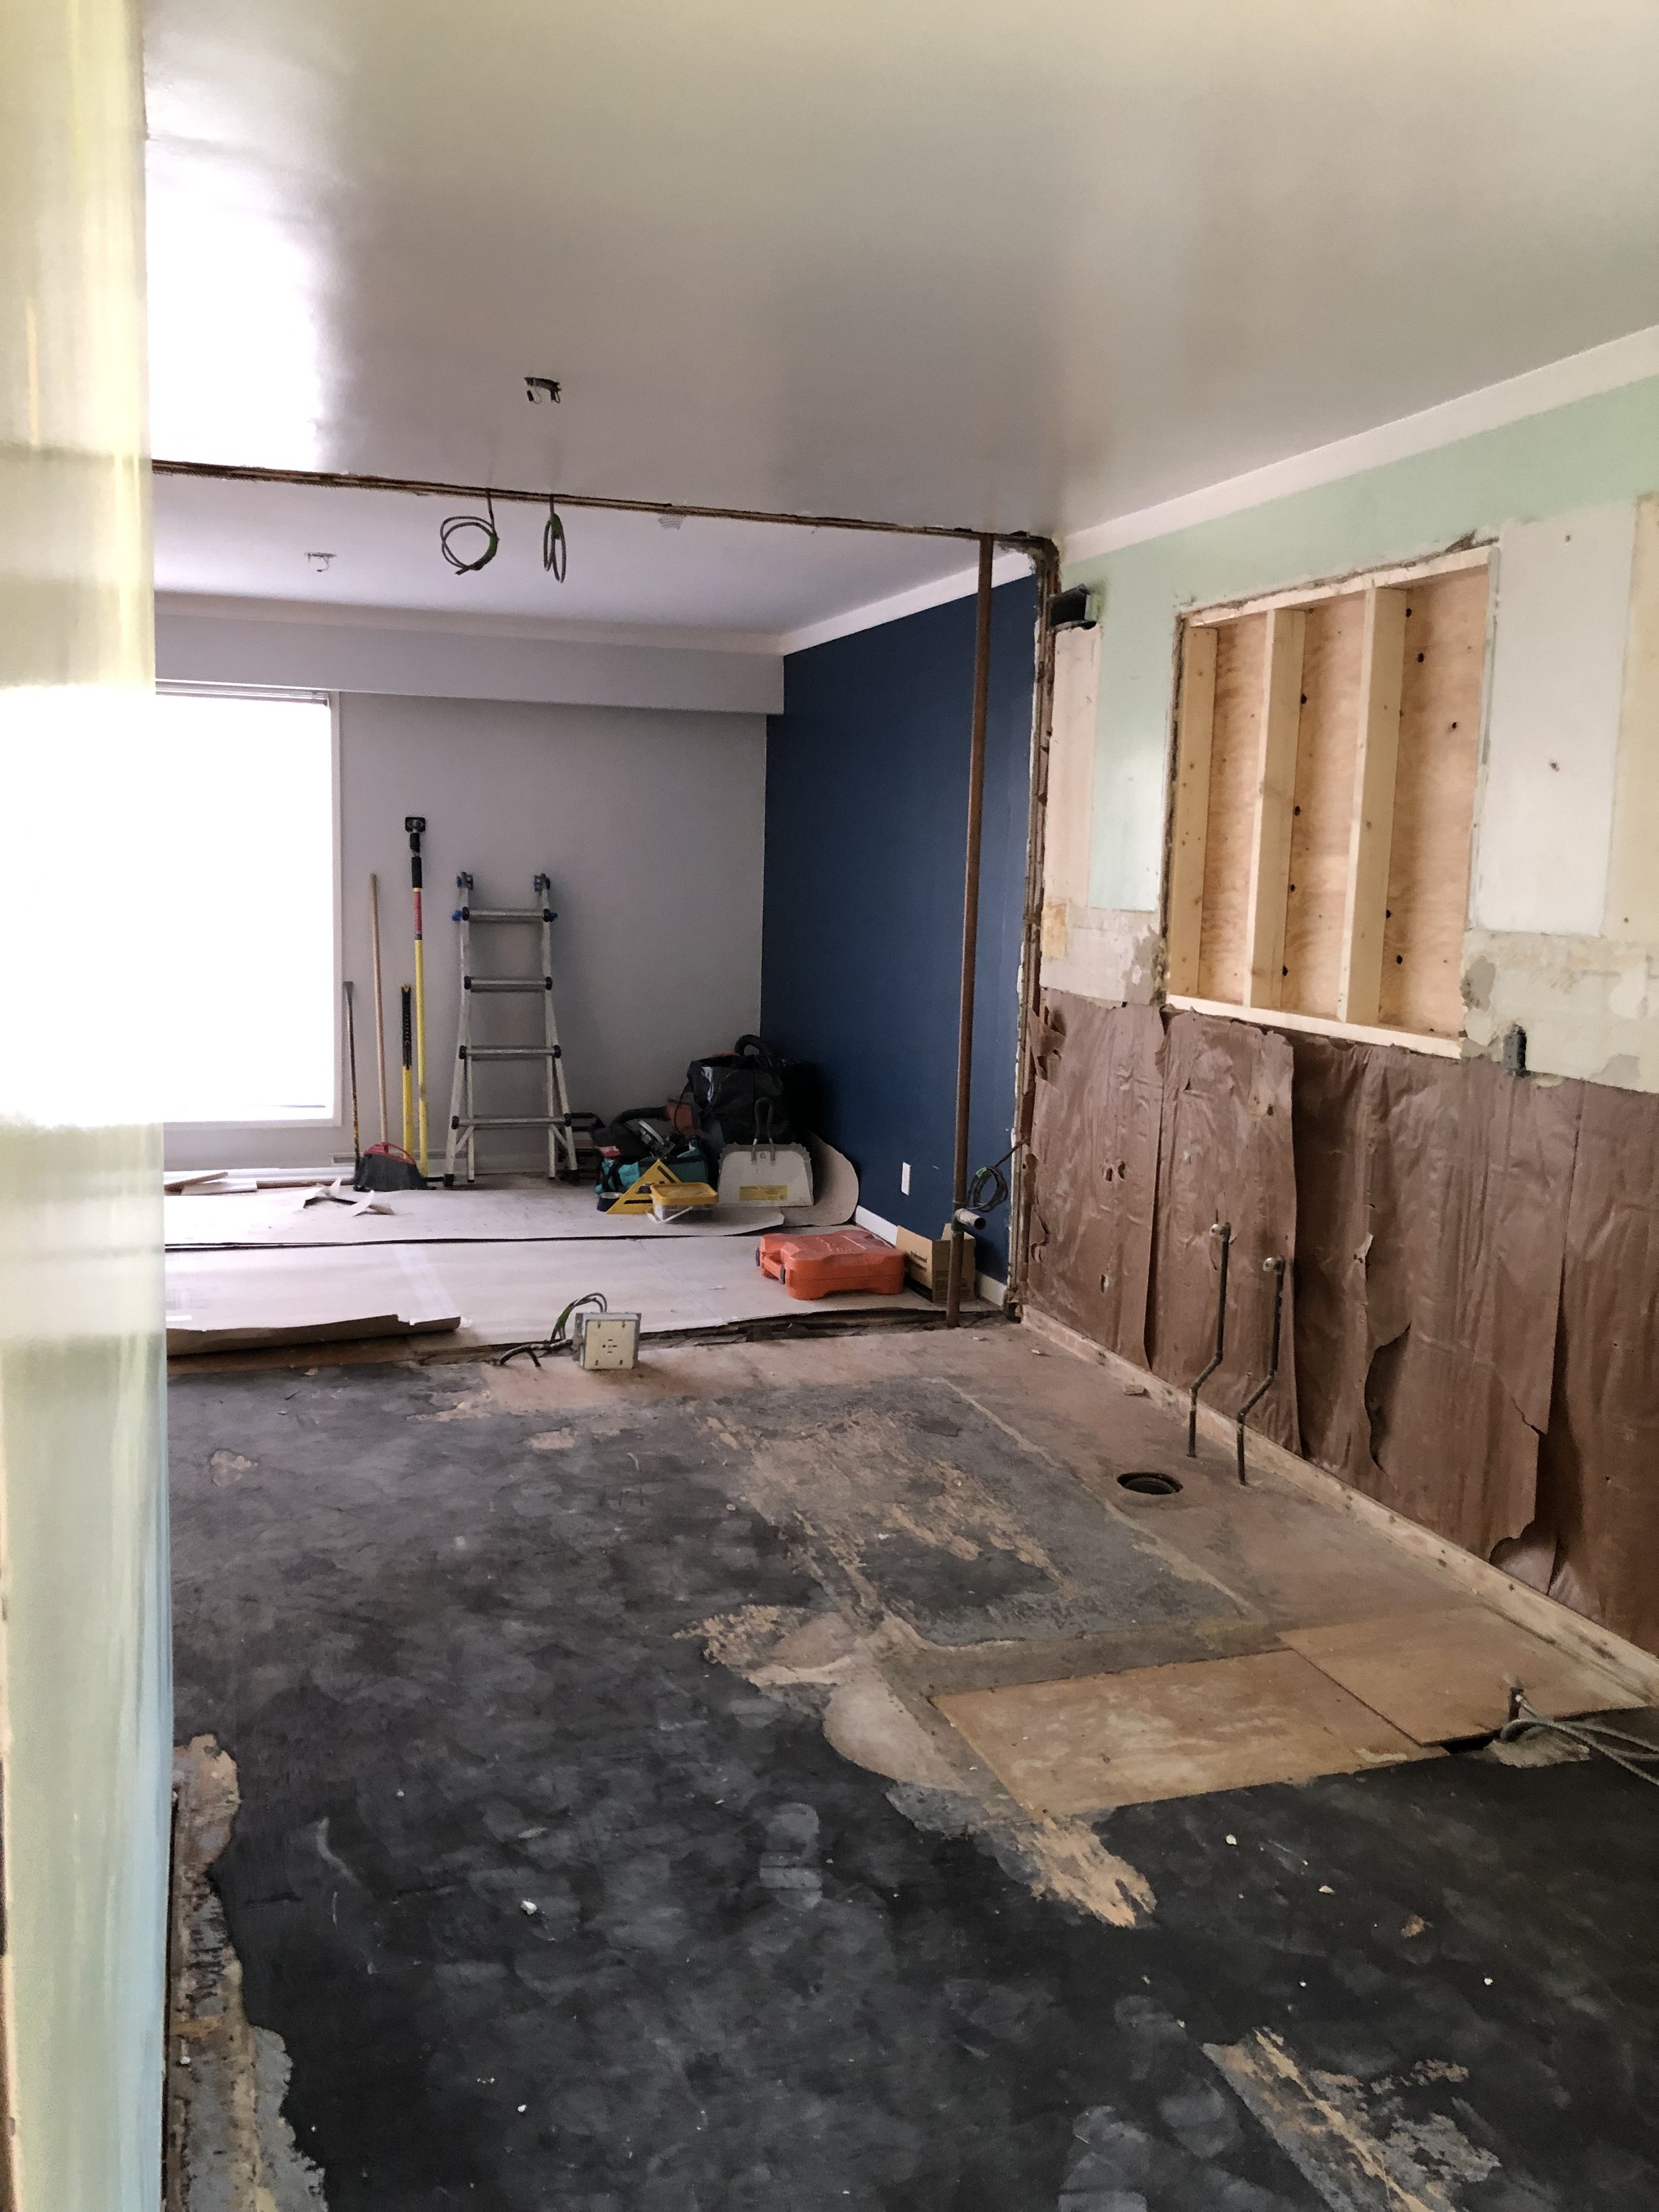
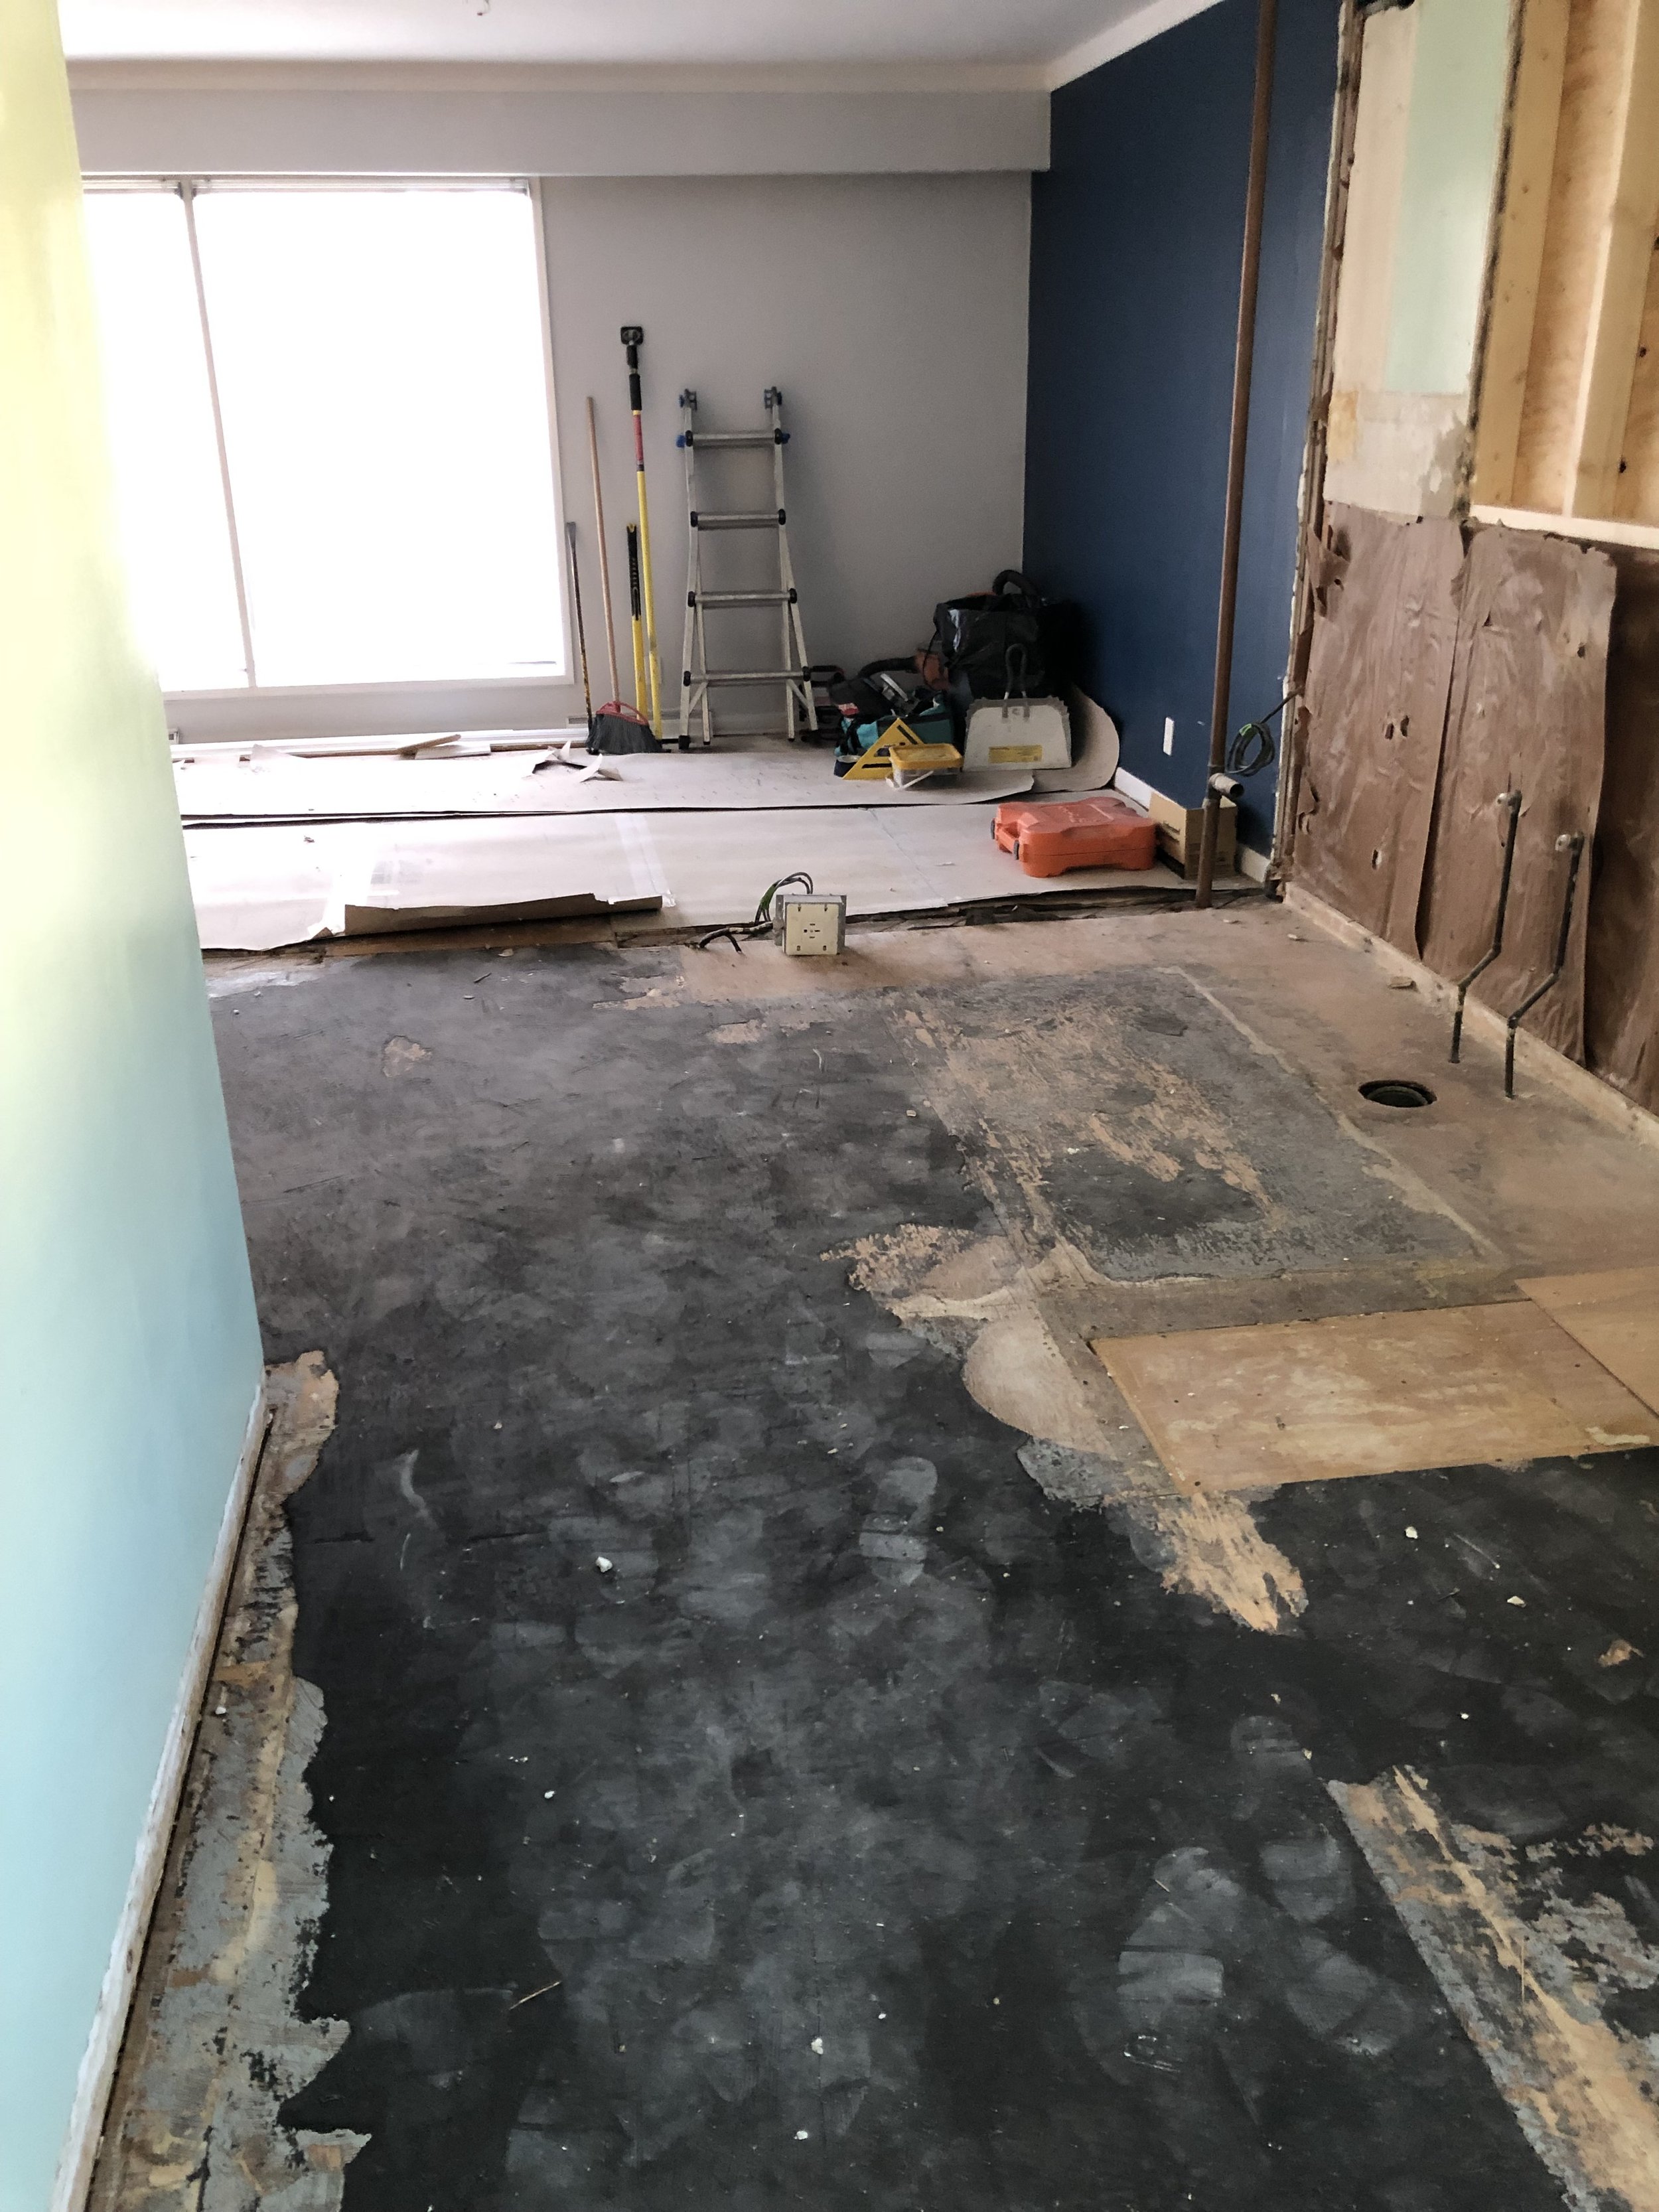
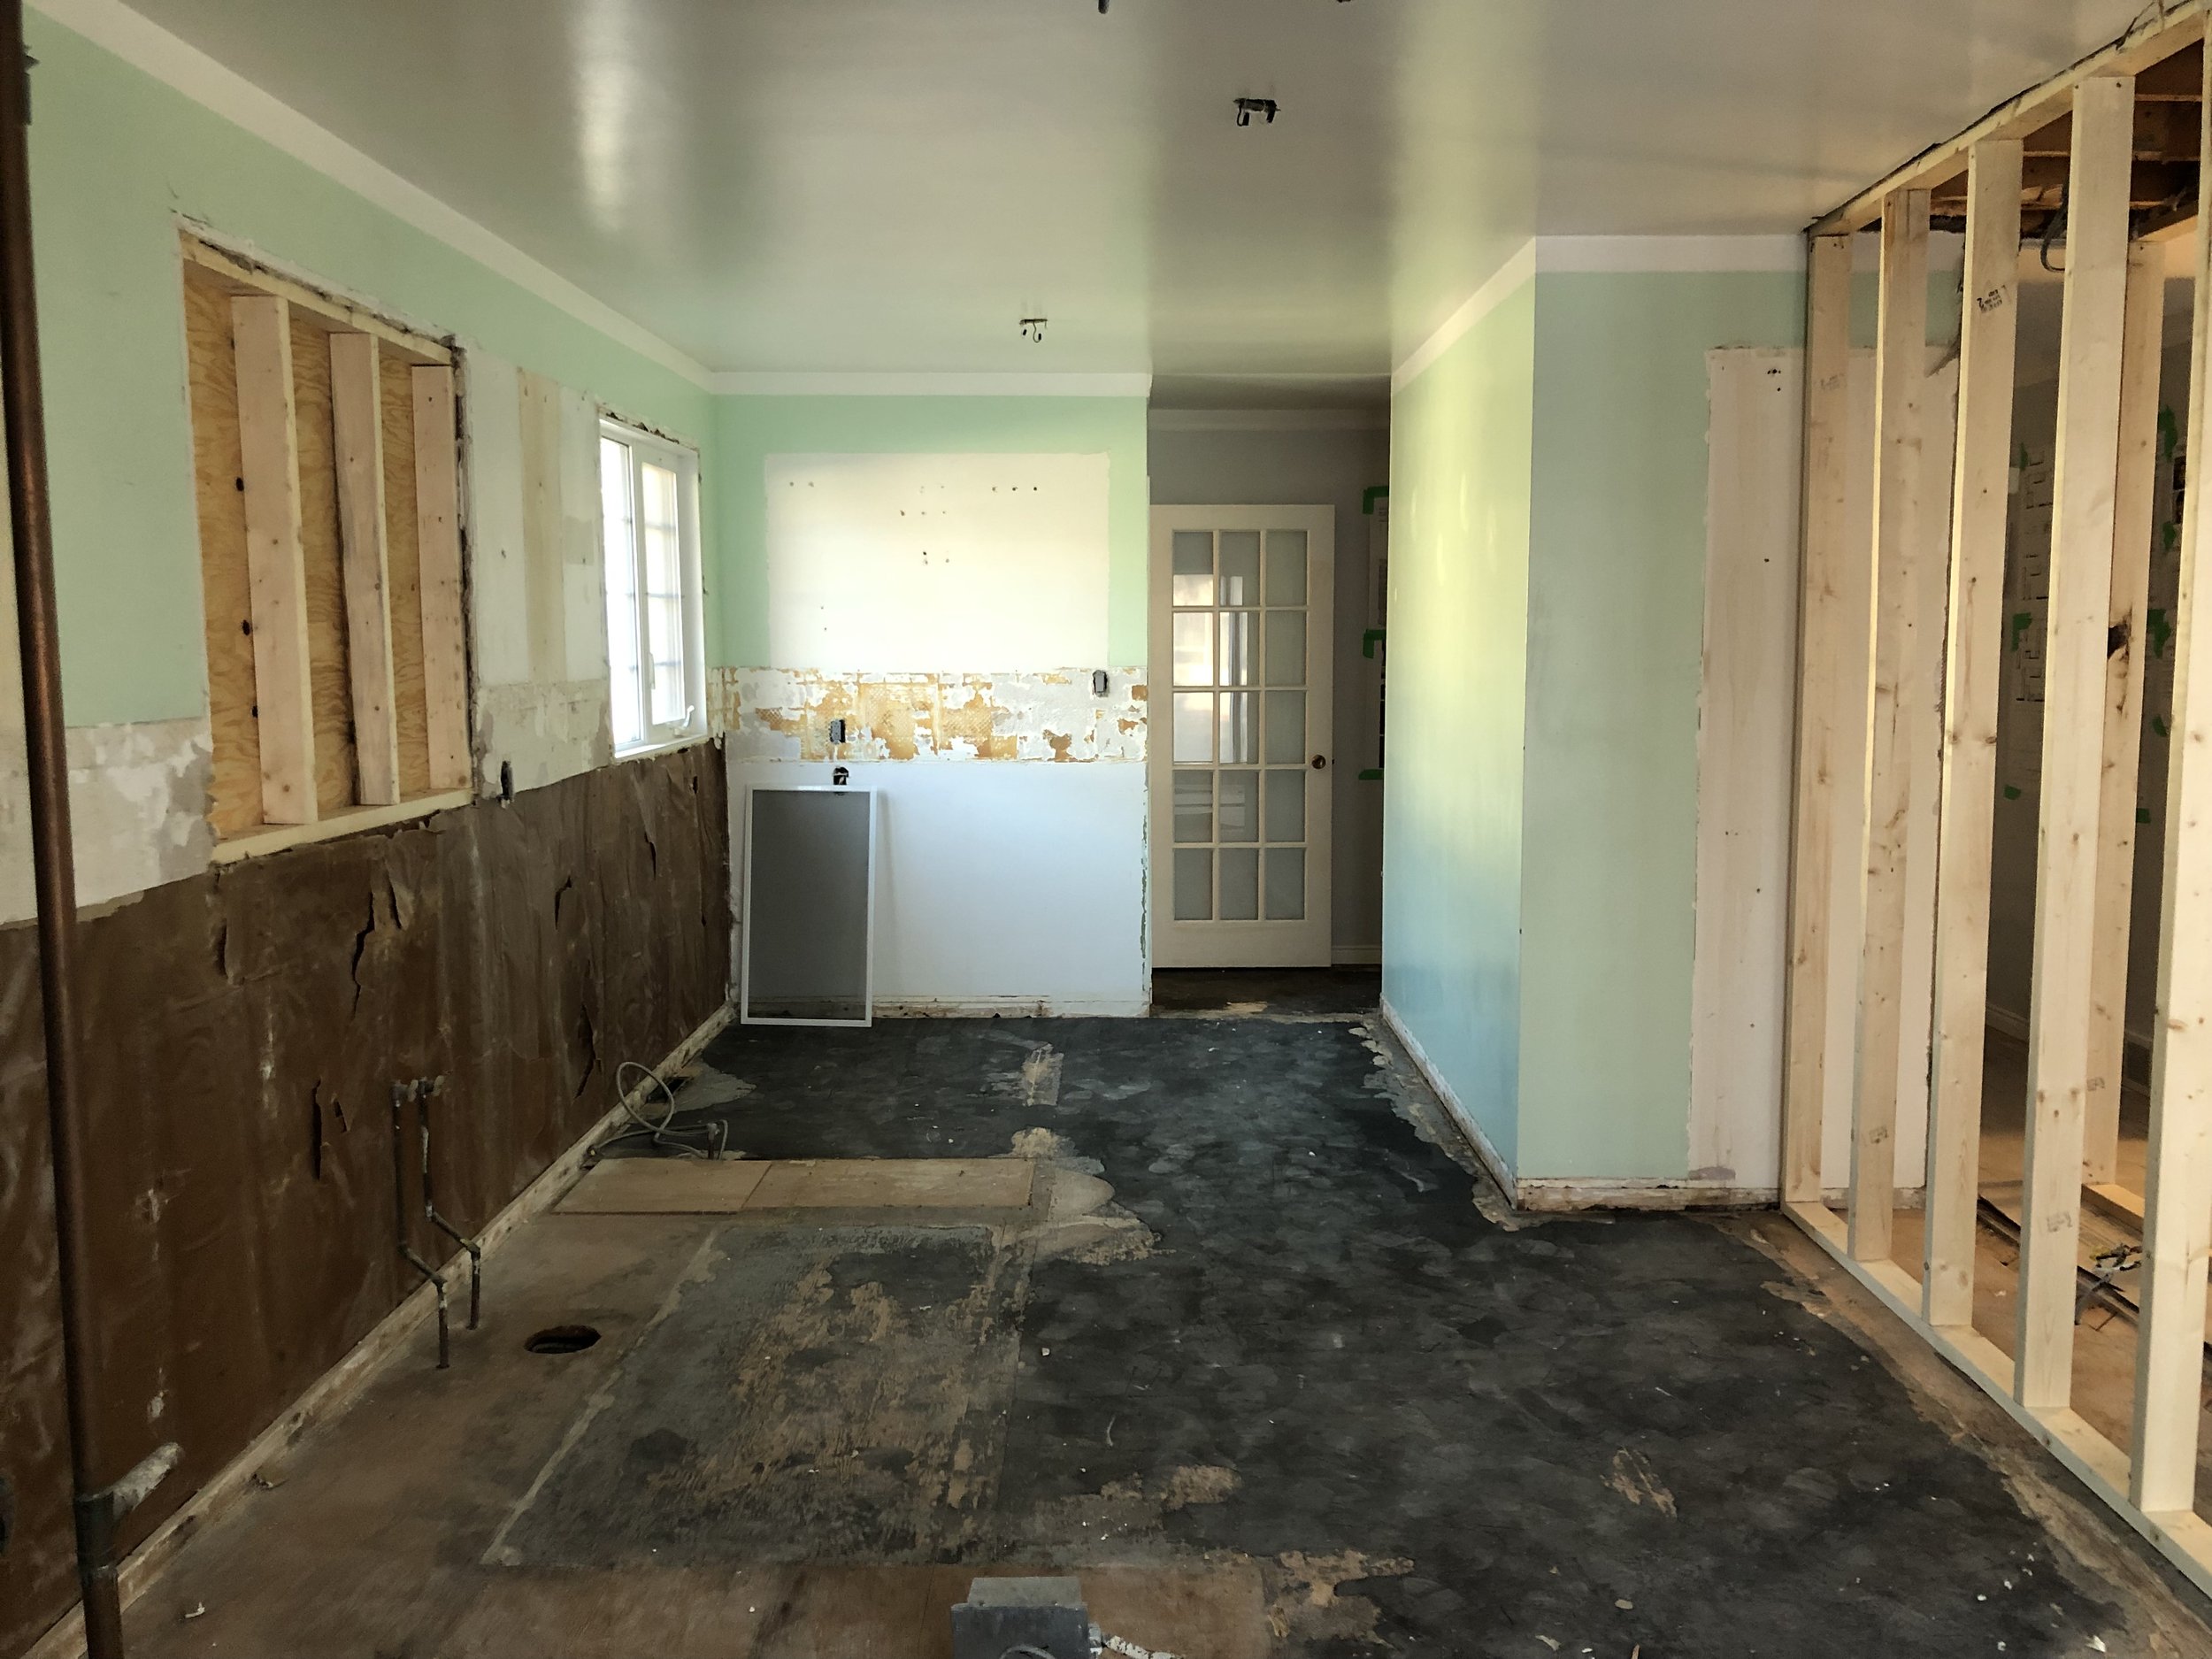
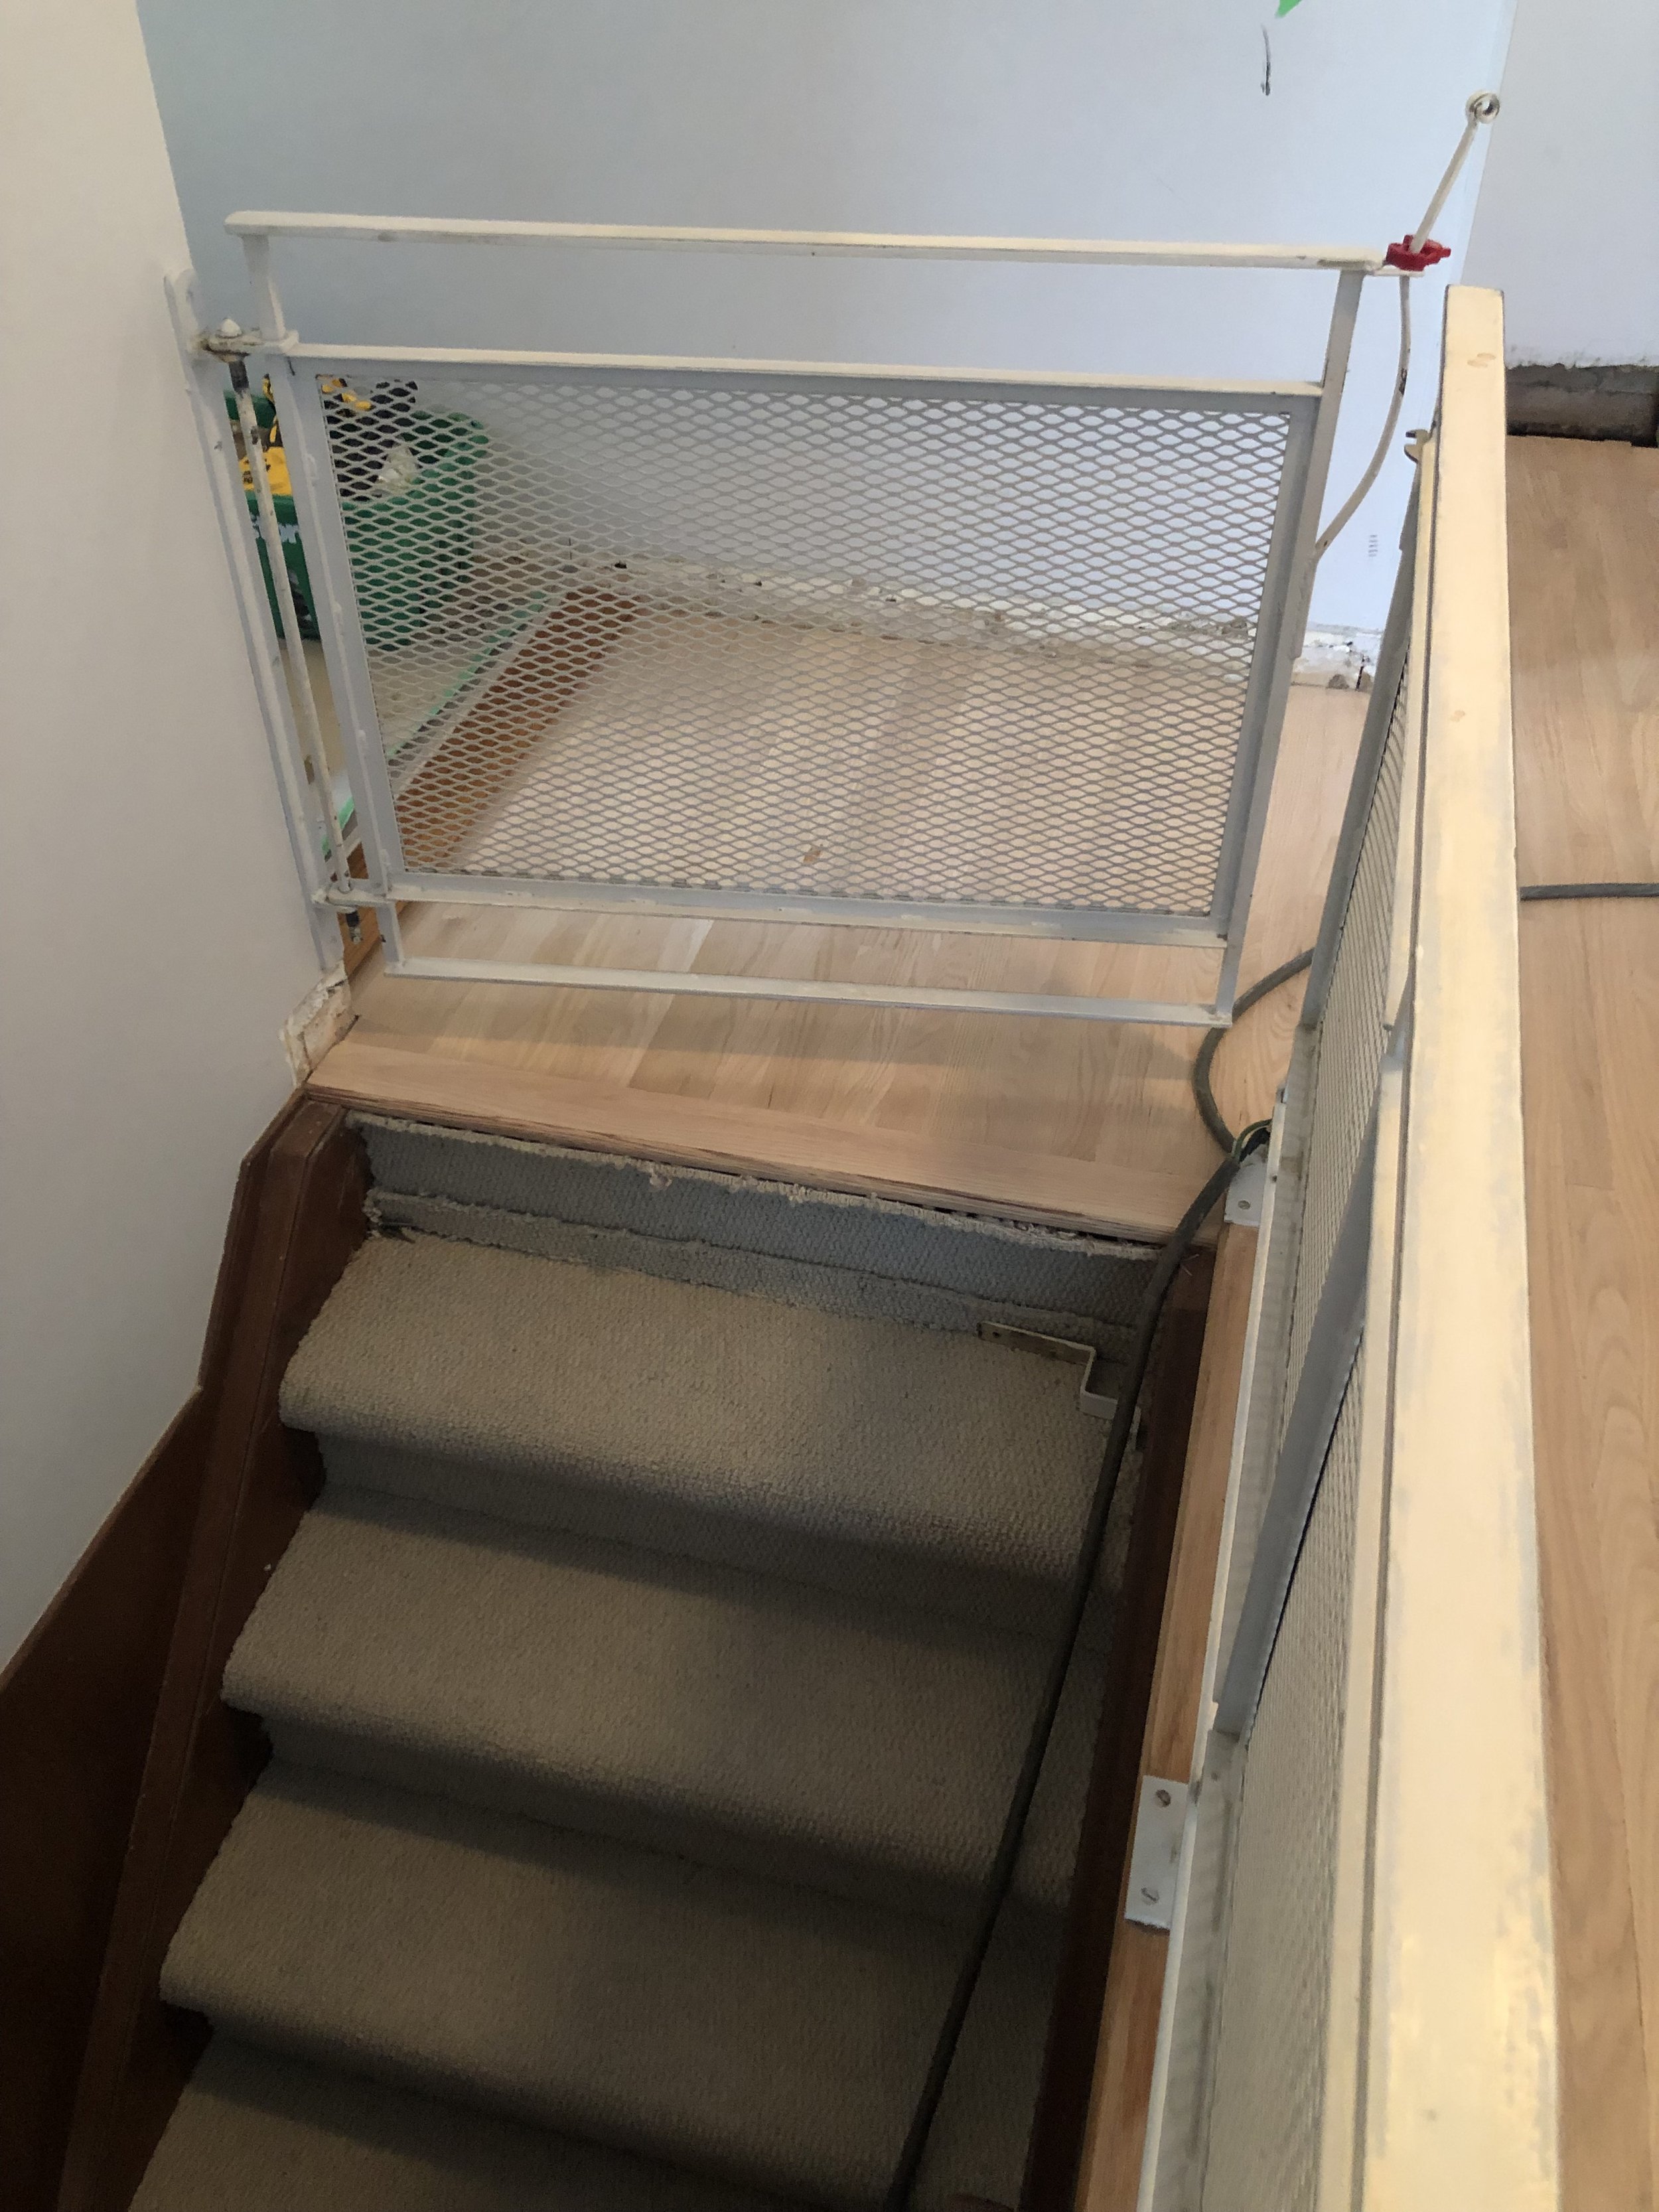
The demolition process included removing one partition wall between the kitchen and dining room, and one load bearing wall between the kitchen and living room. One of the two windows in the kitchen was removed to increase wall space for cabinetry and appliances and much of the exterior wall plaster and drywall was removed to pave the way for a plumb finished surface. Due to the age of the home, we also brought in a material testing team to test the kitchen flooring, drywall, and basement ceiling to ensure that the project was safe. The drywall and basement ceiling tested negative, however the kitchen flooring came back positive for asbestos so we had this safely abated before continuing with the project. In the end, we removed all of the flooring in the kitchen as well as the stairs down to the basement and back door.
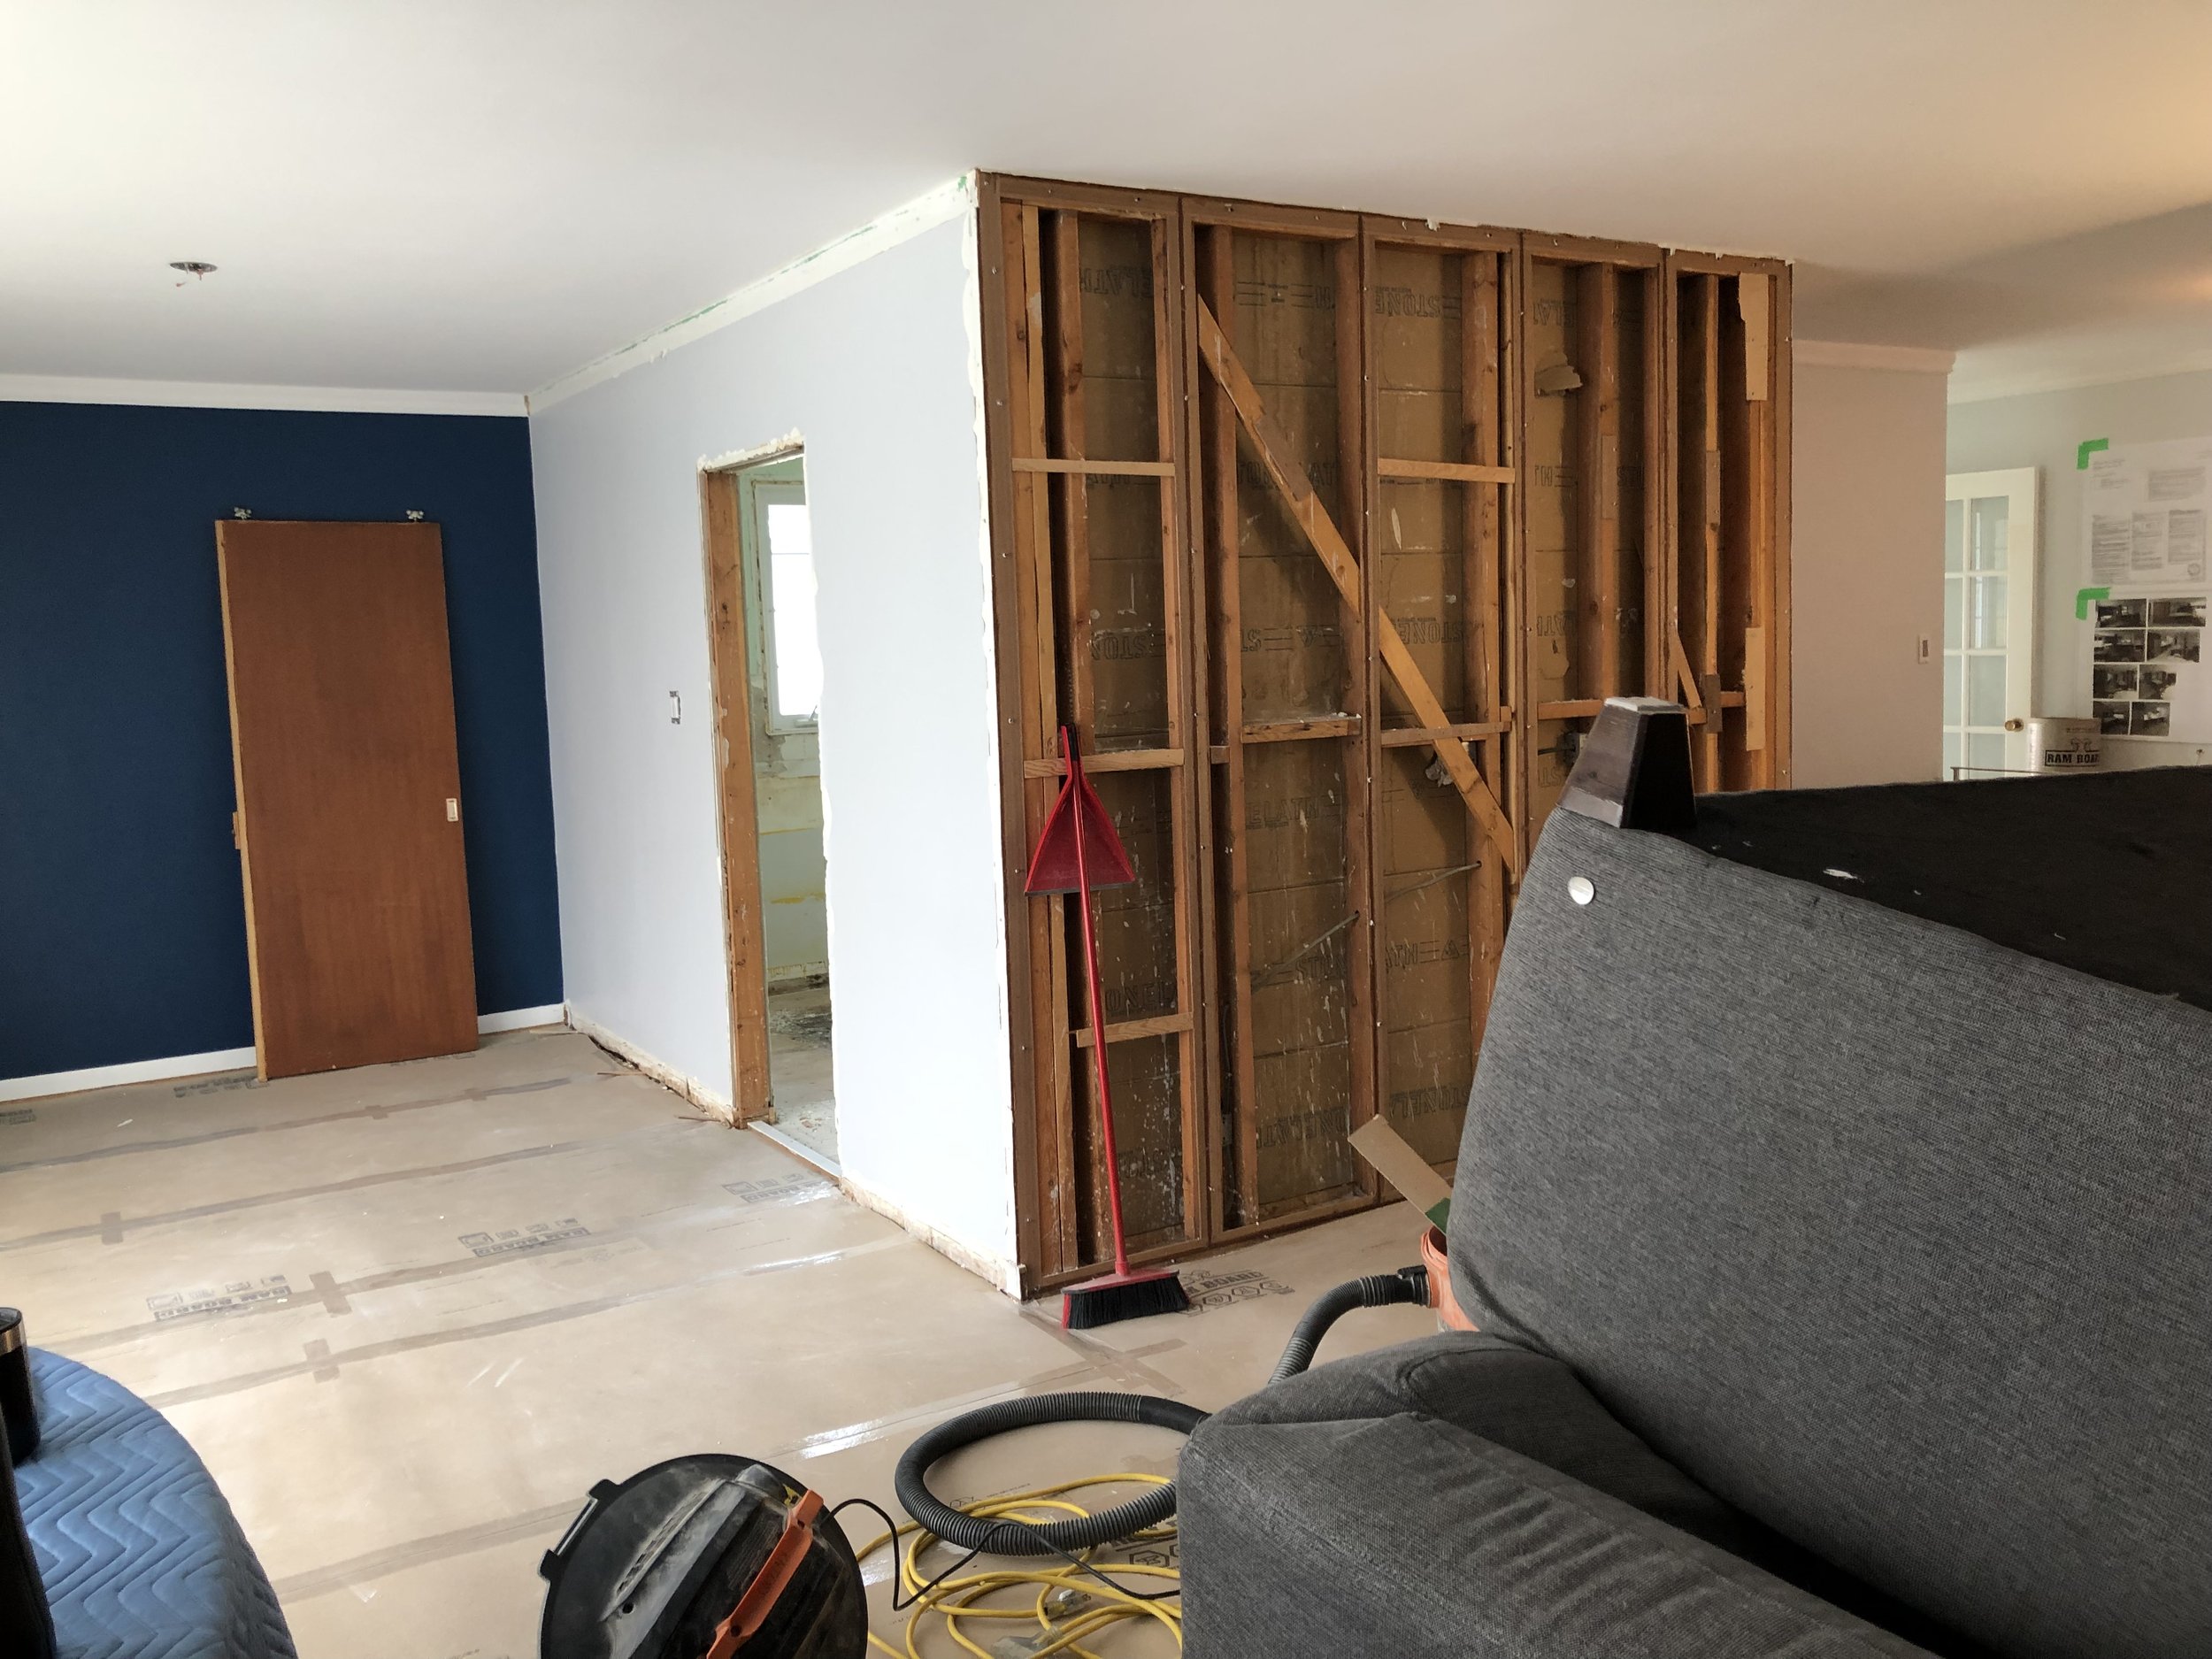

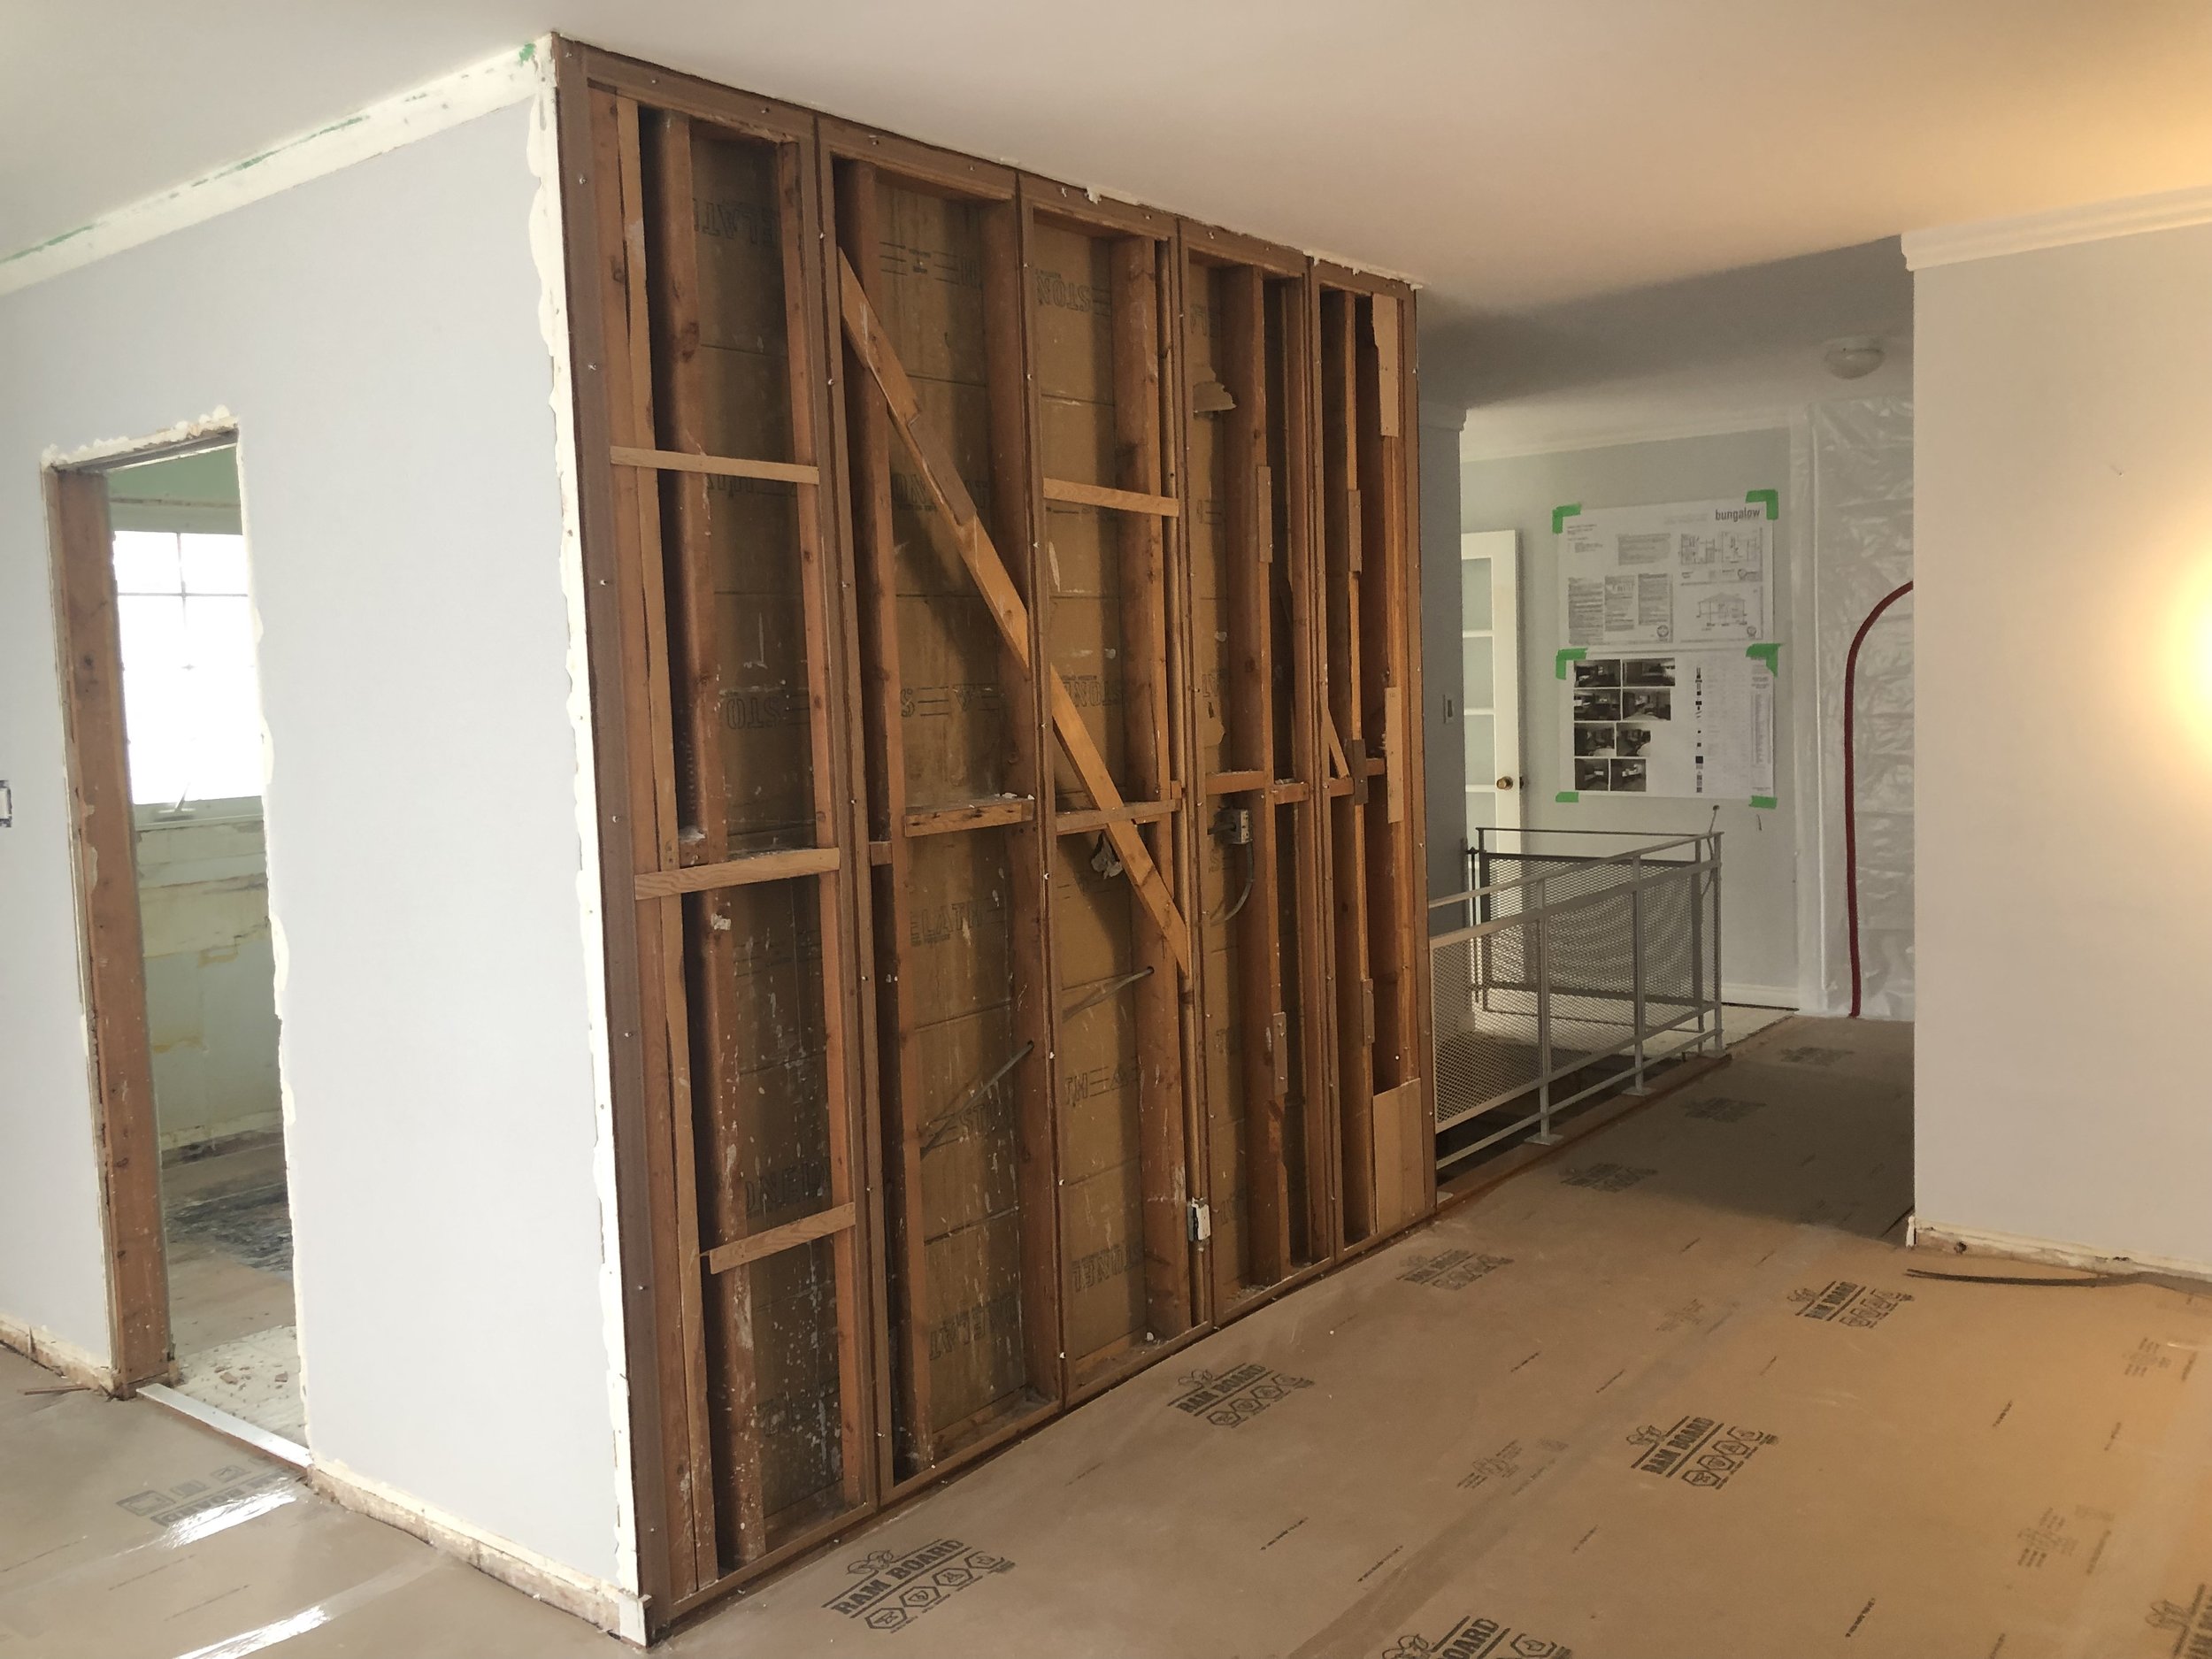
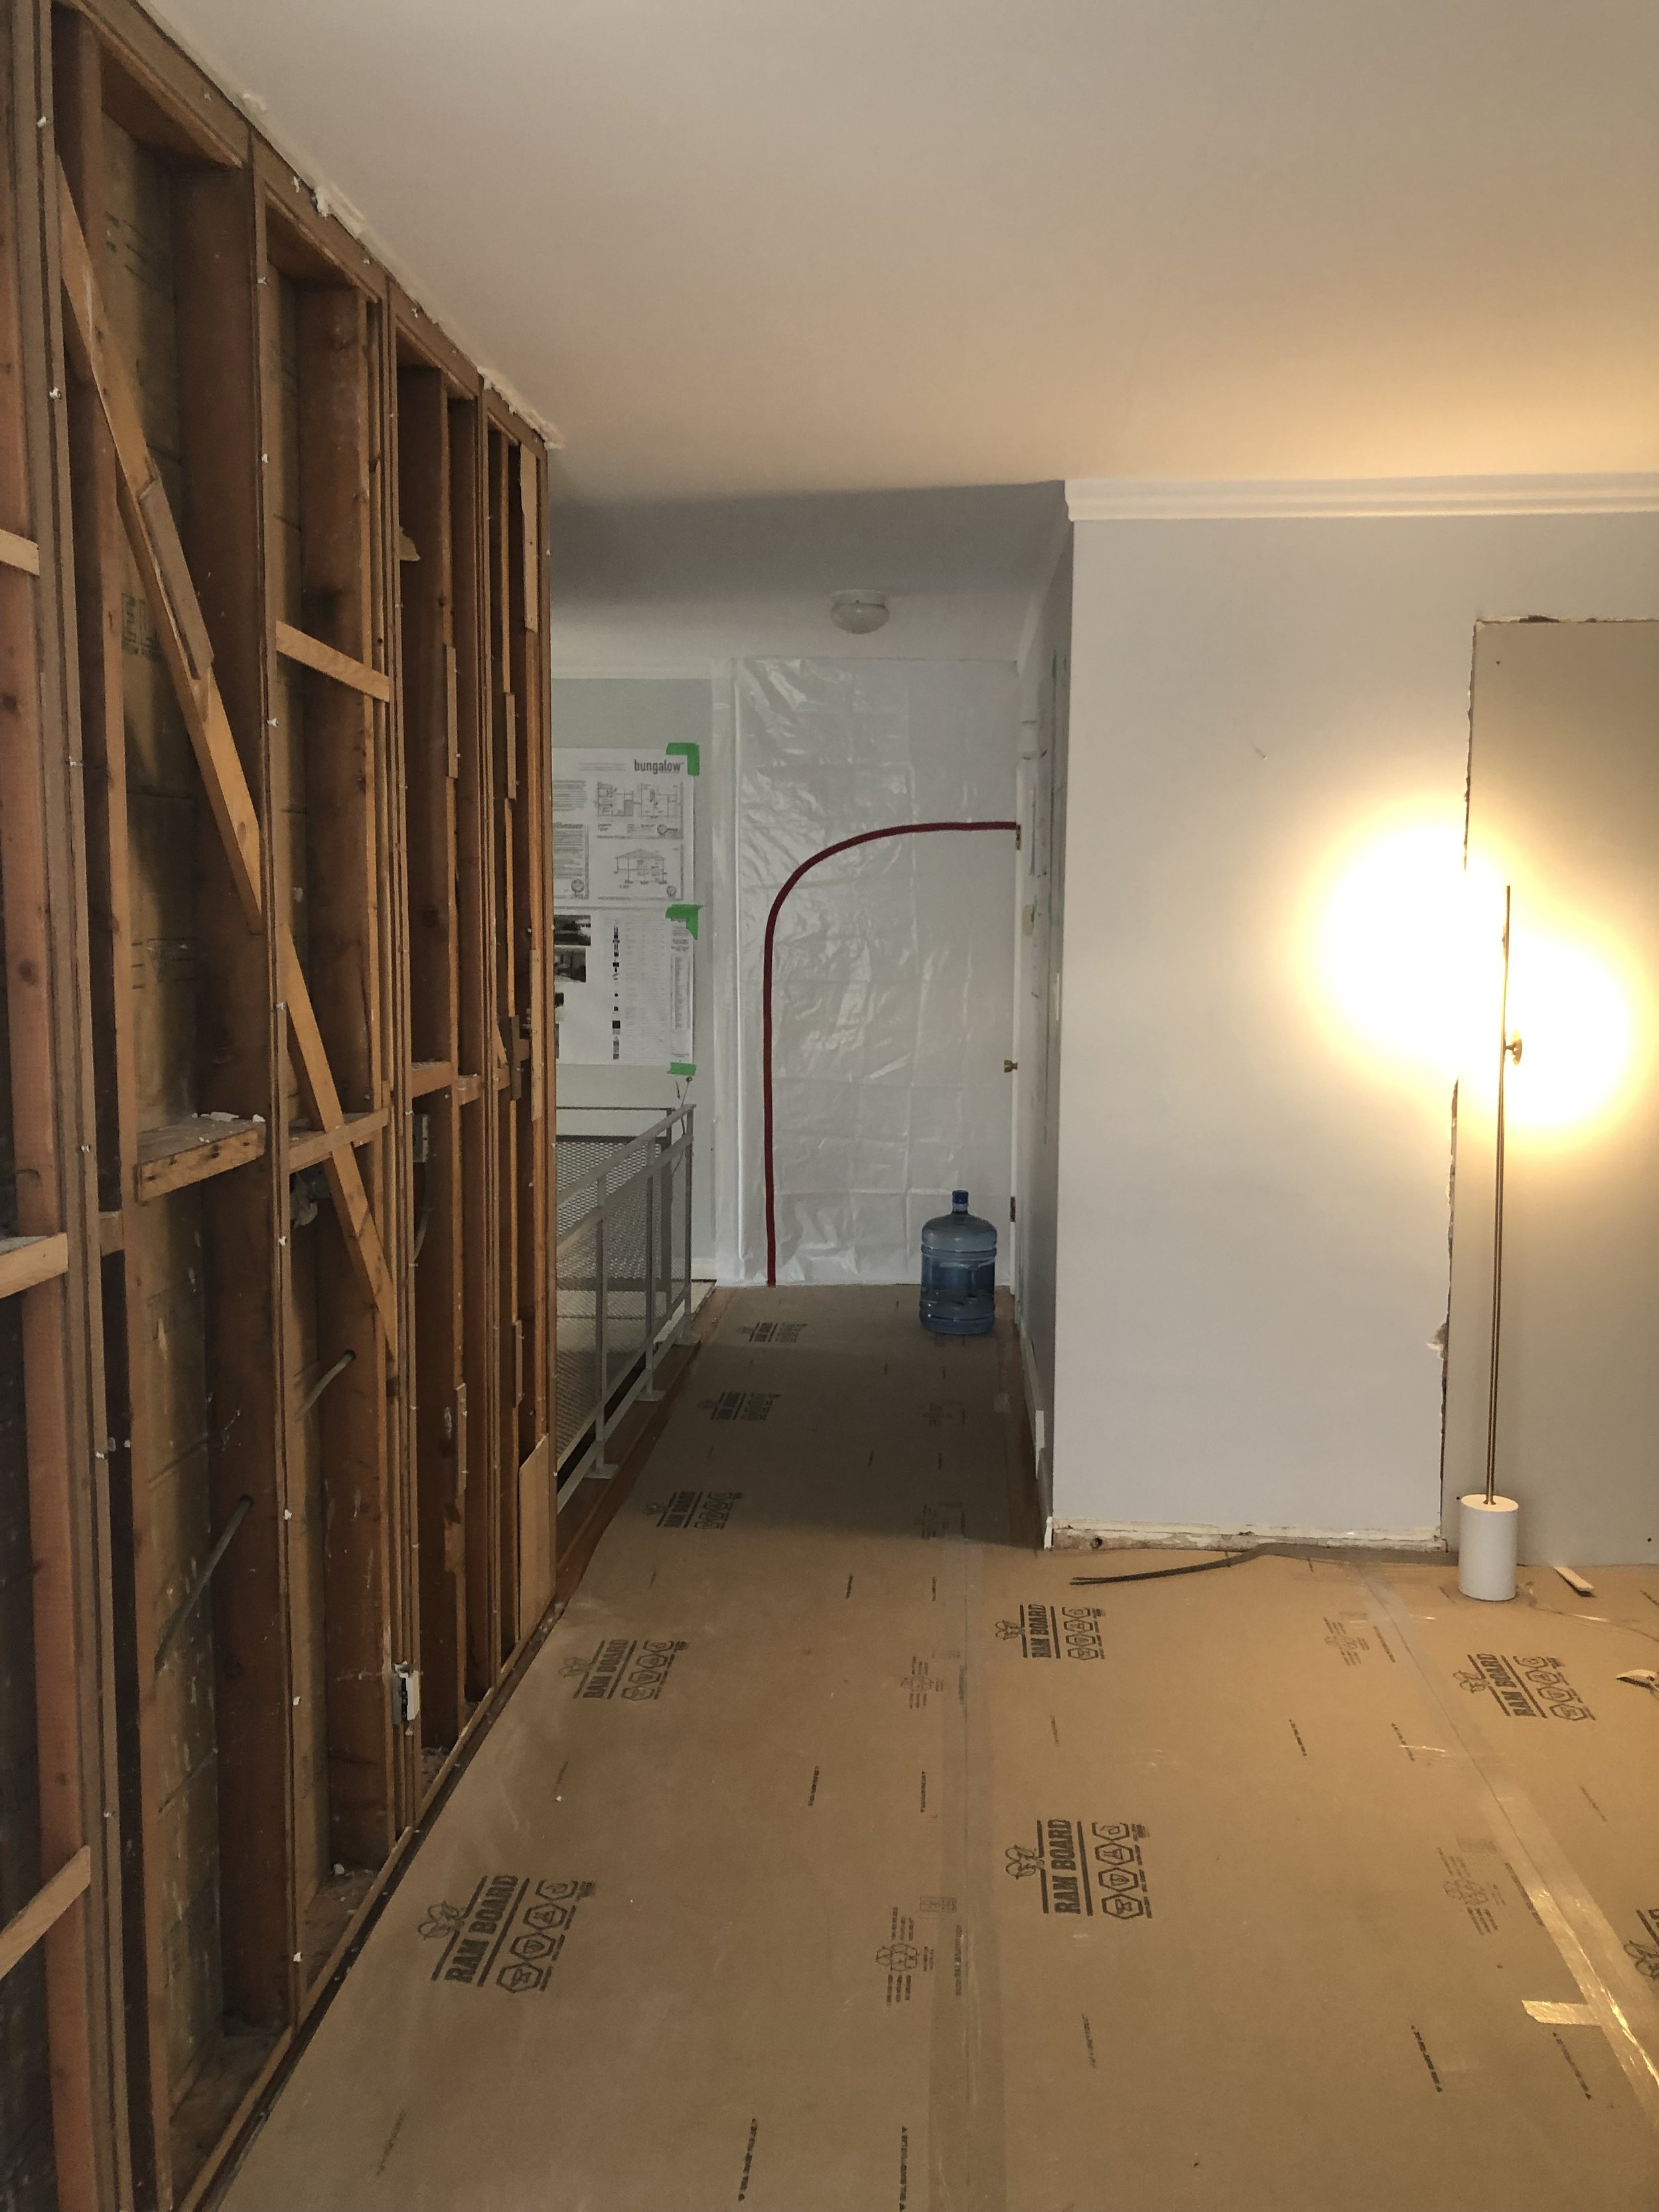

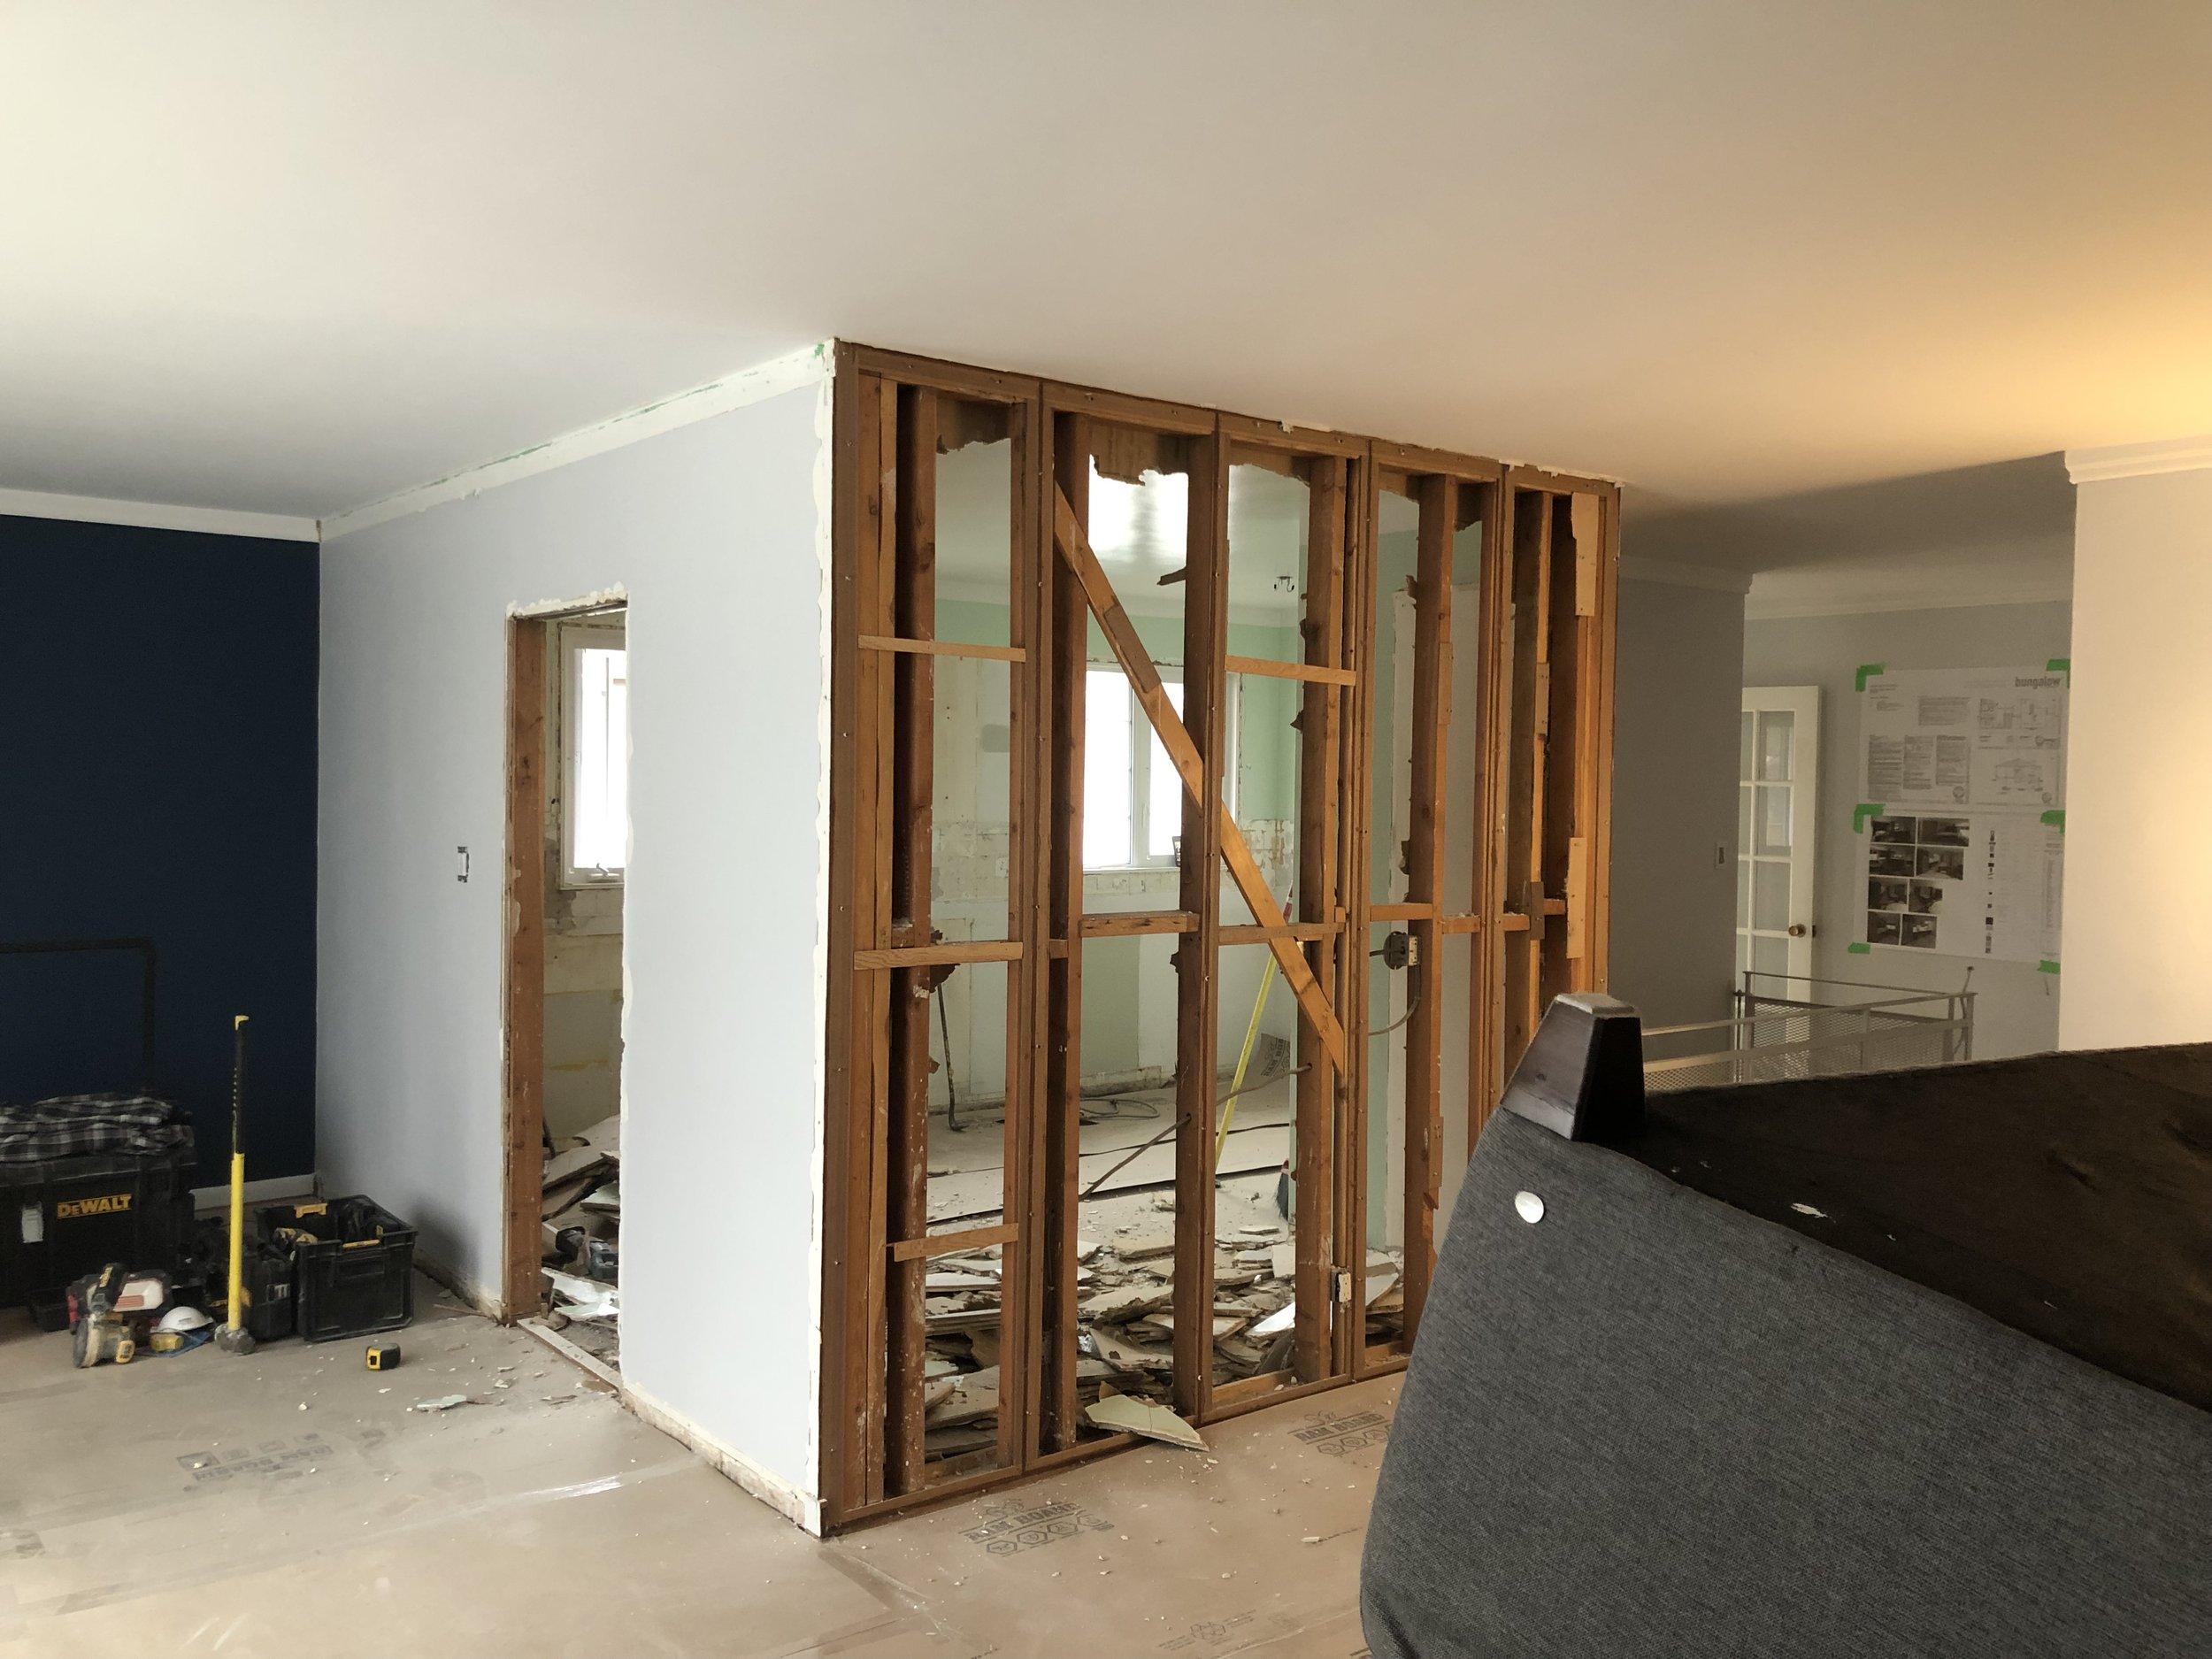
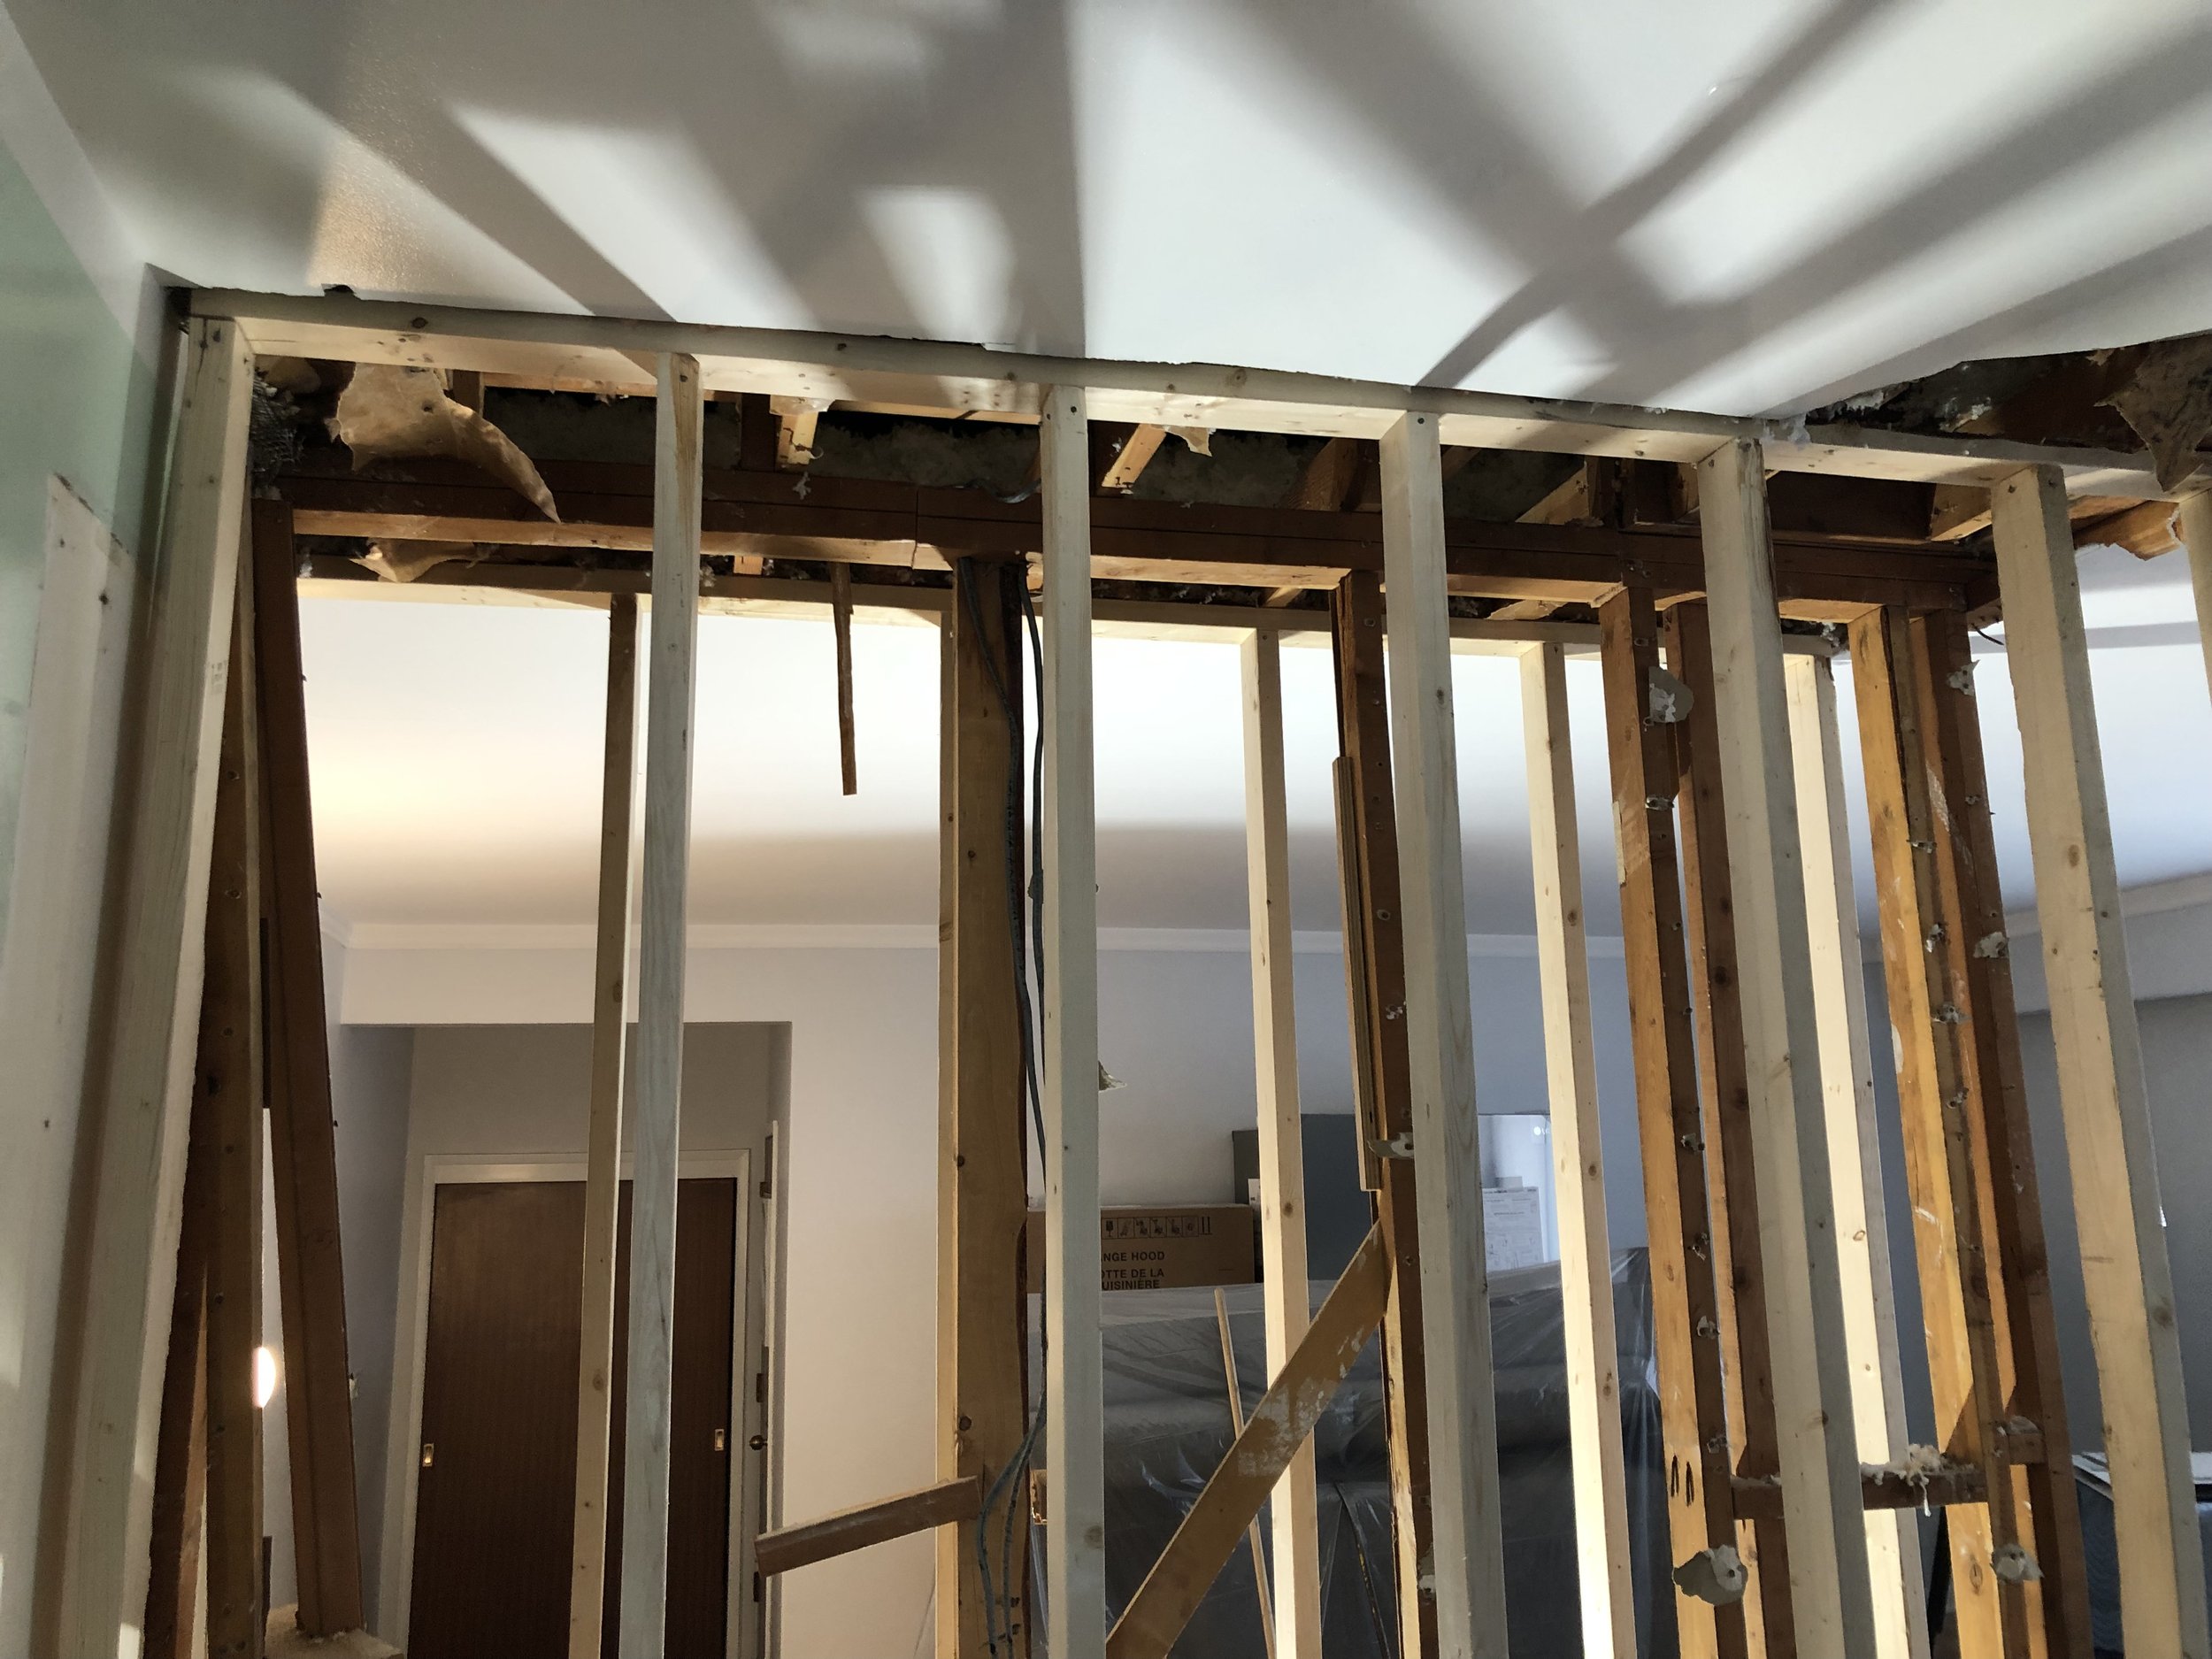
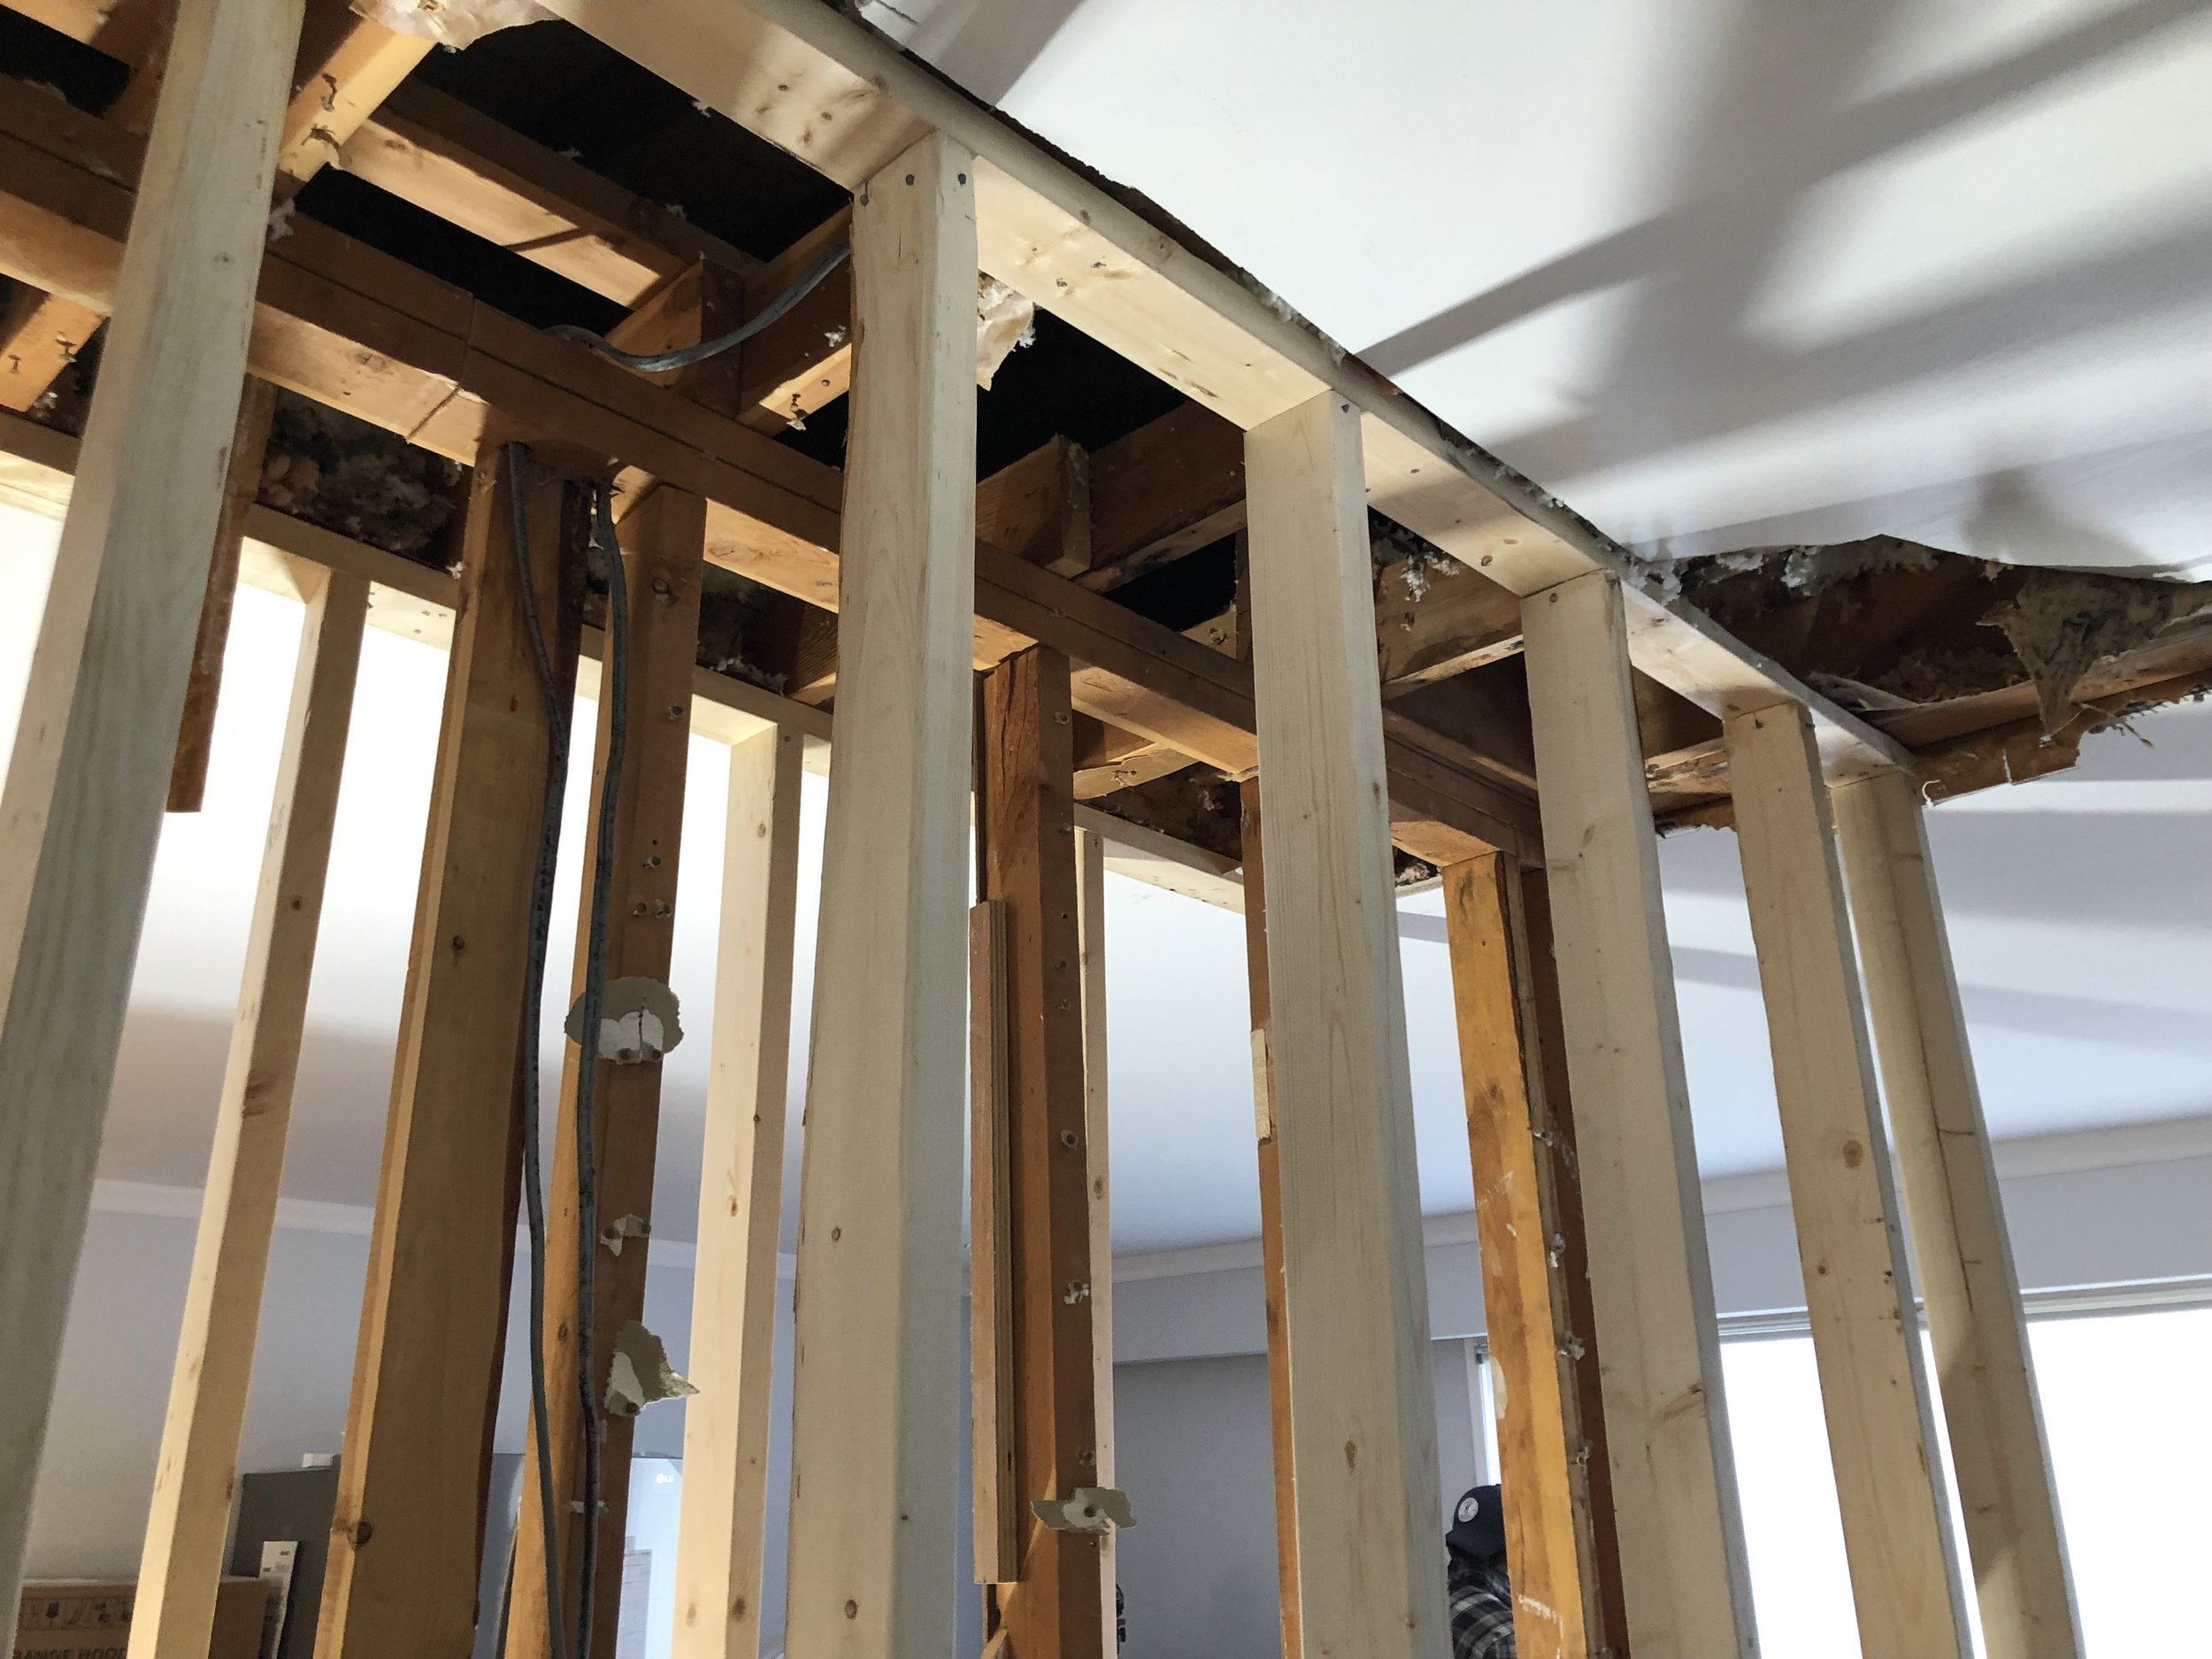
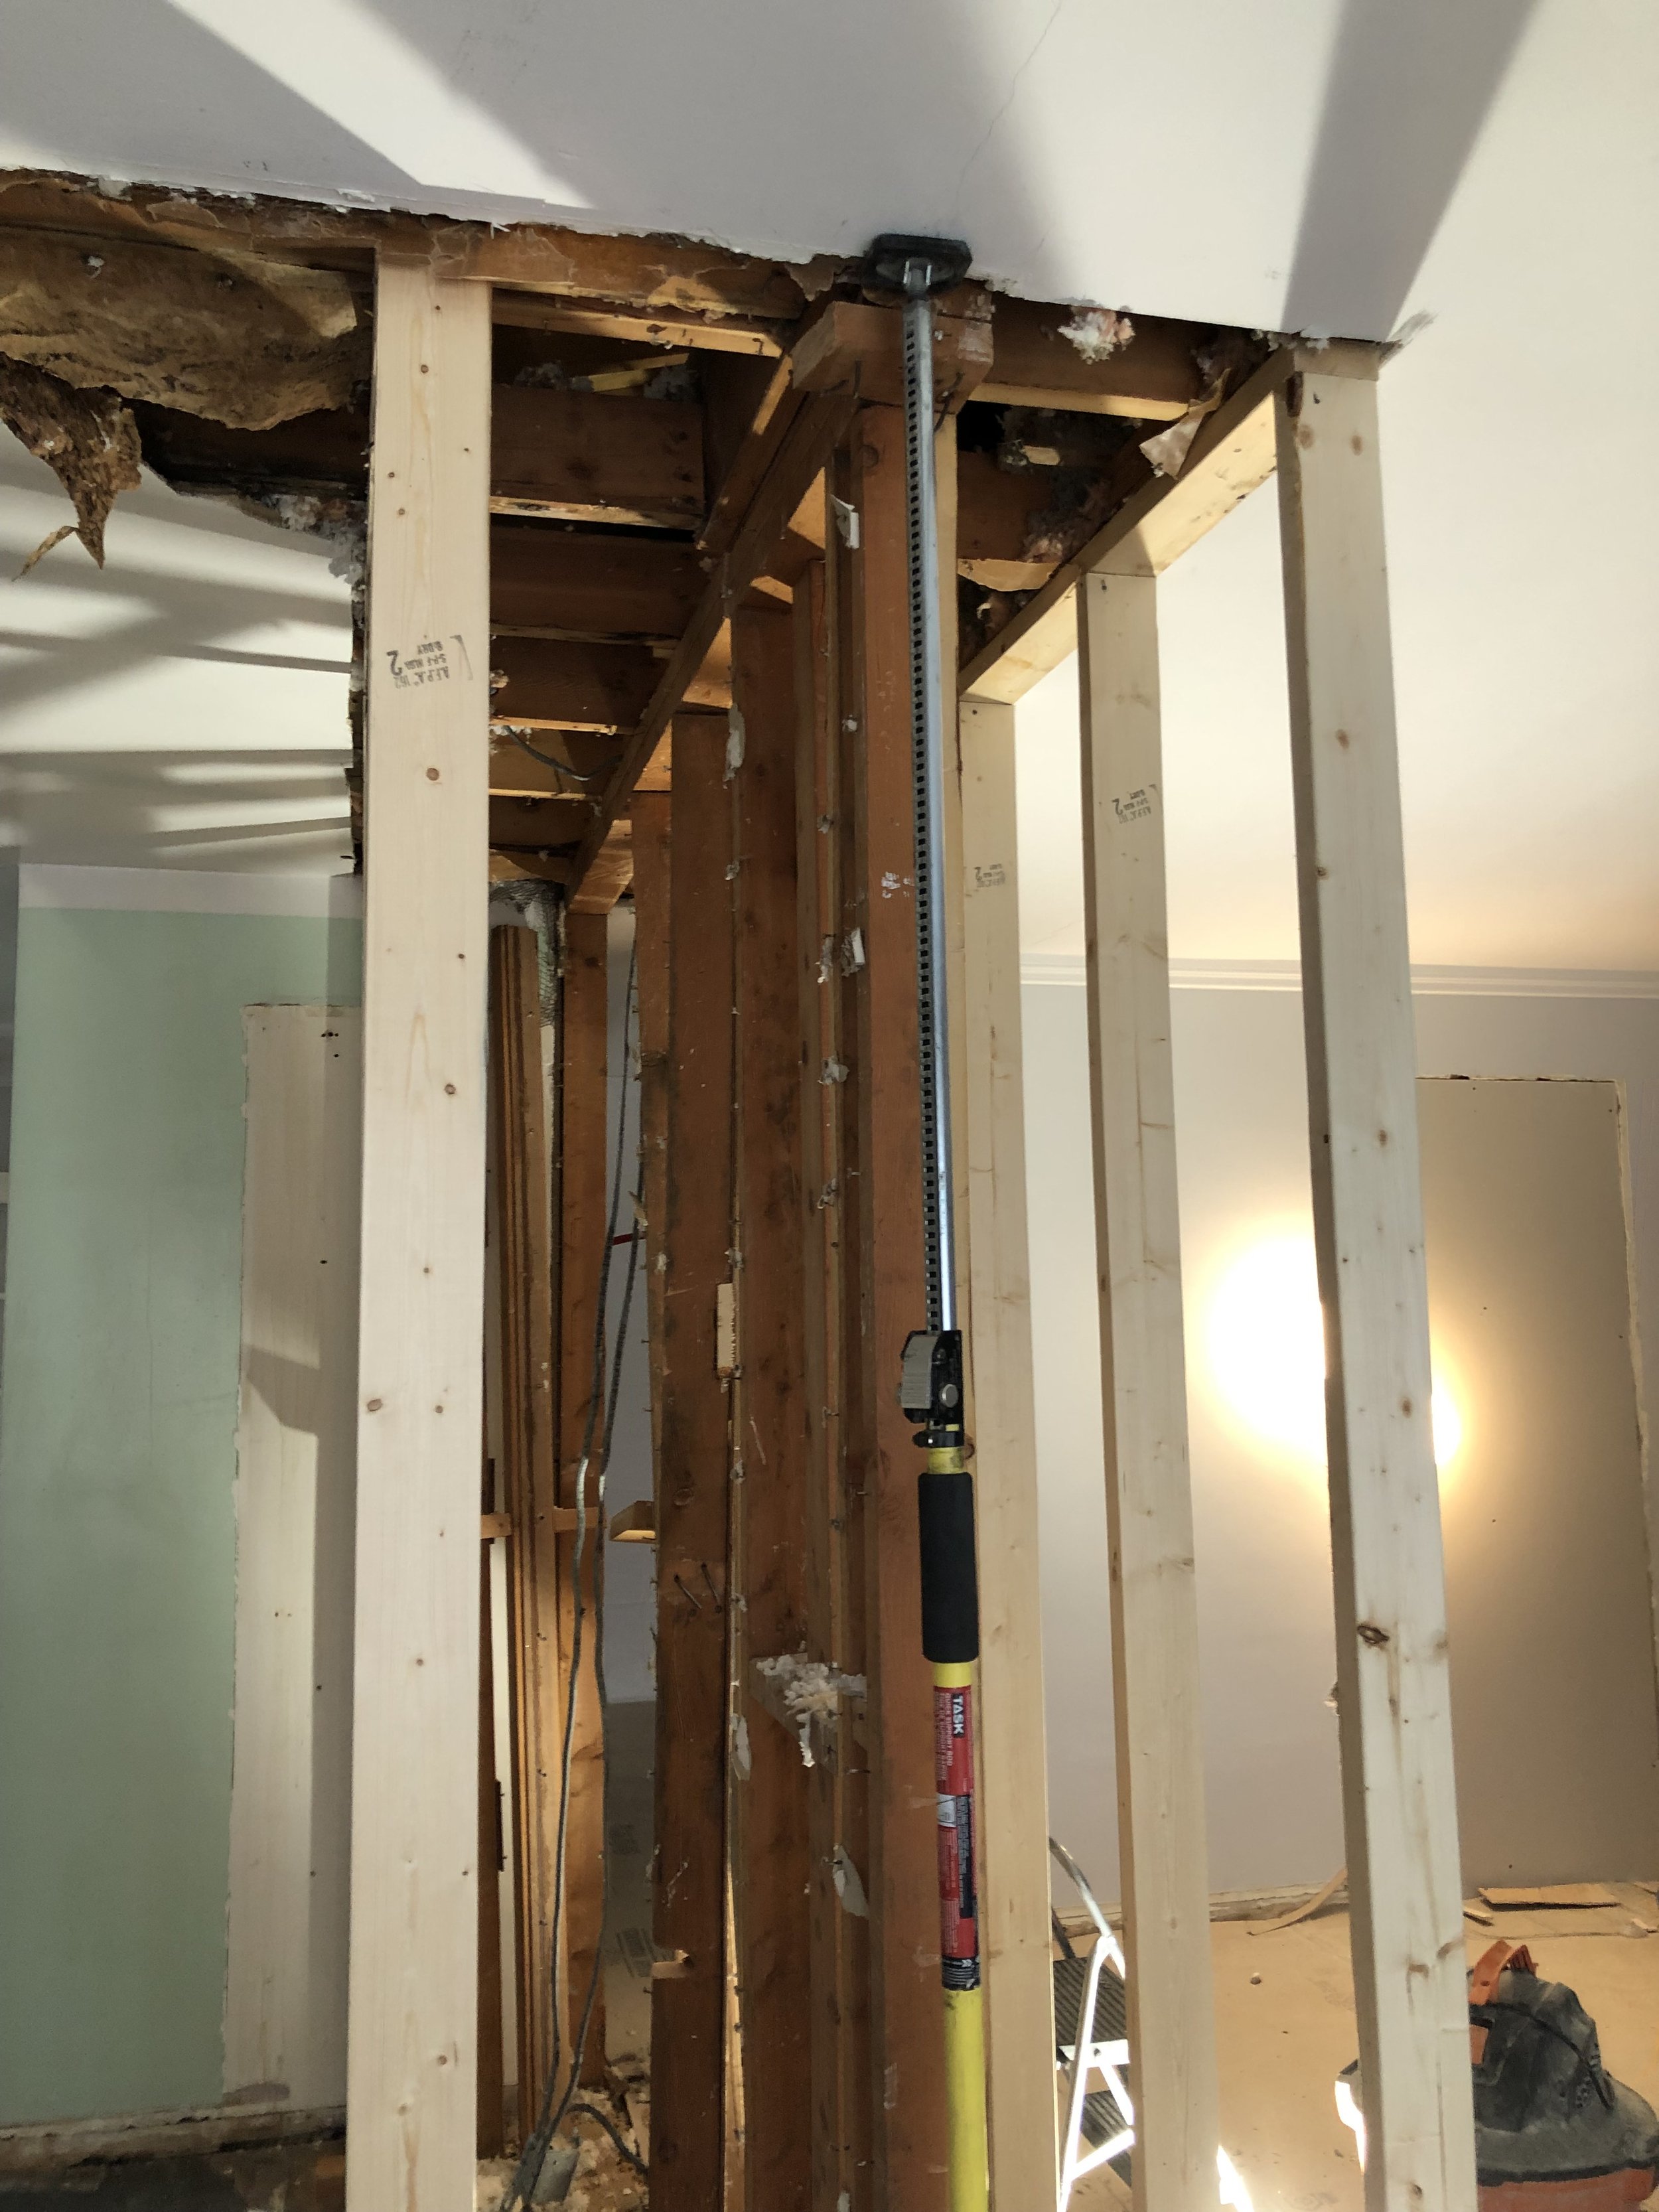
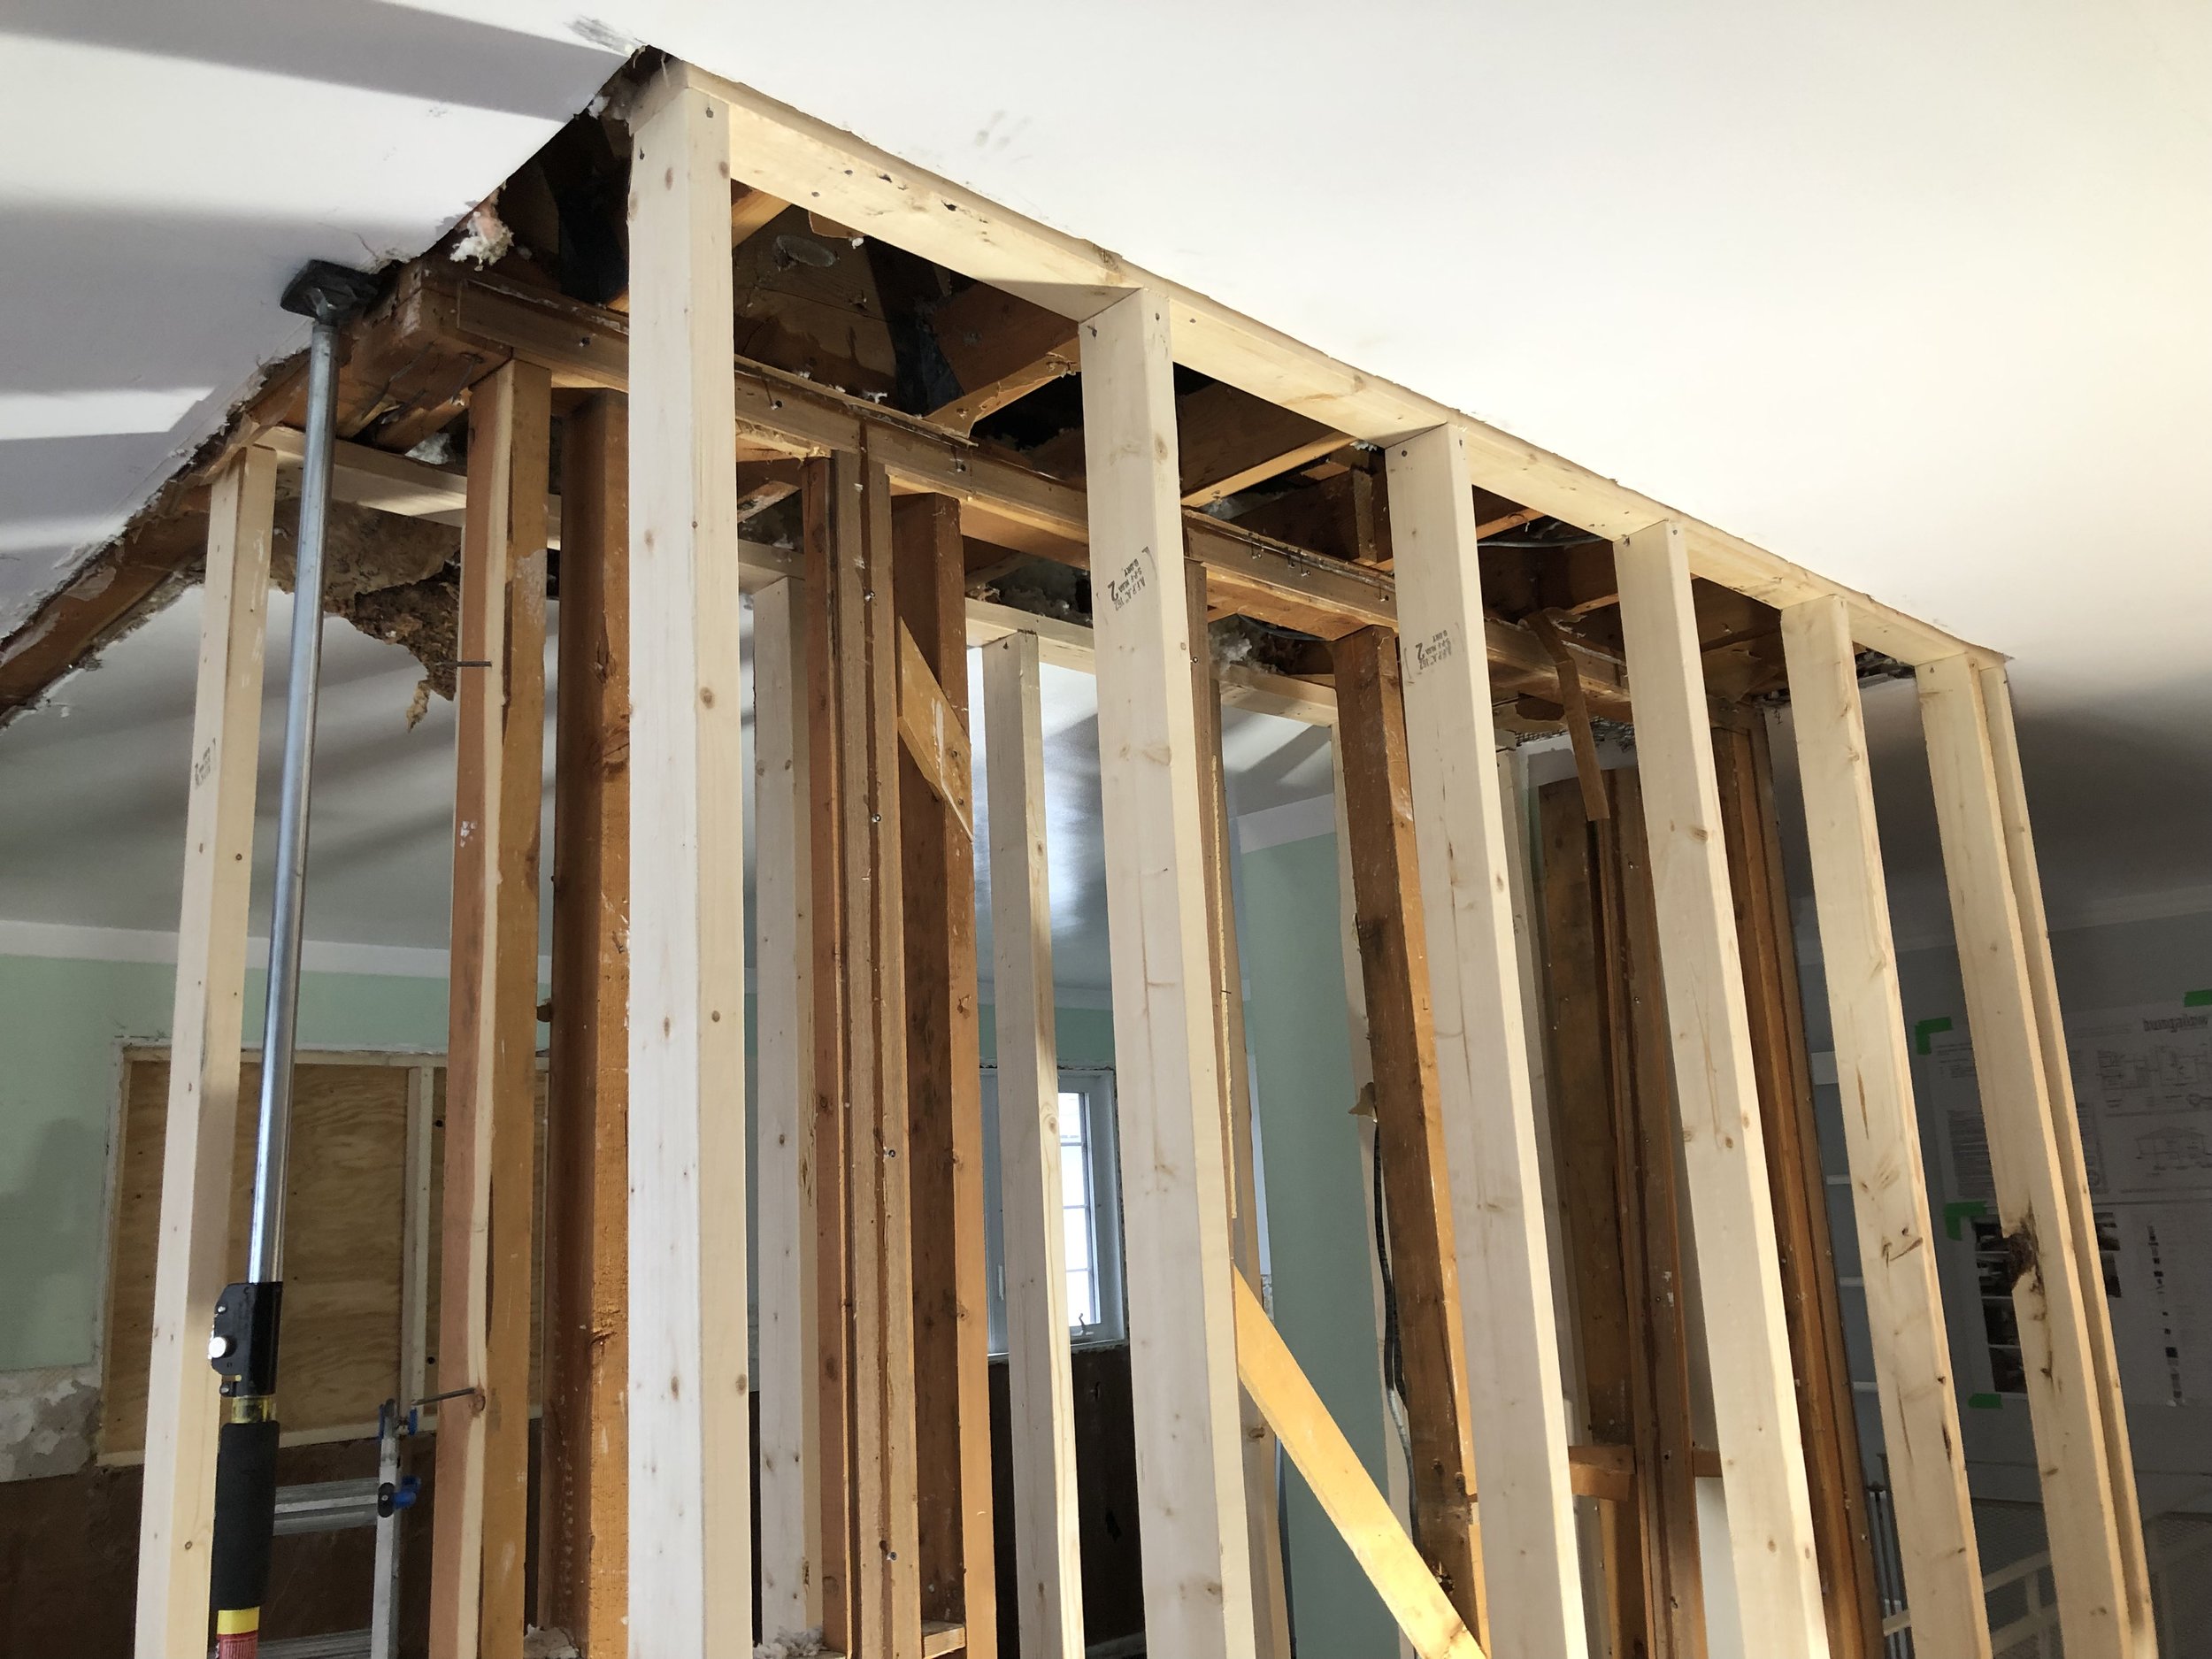
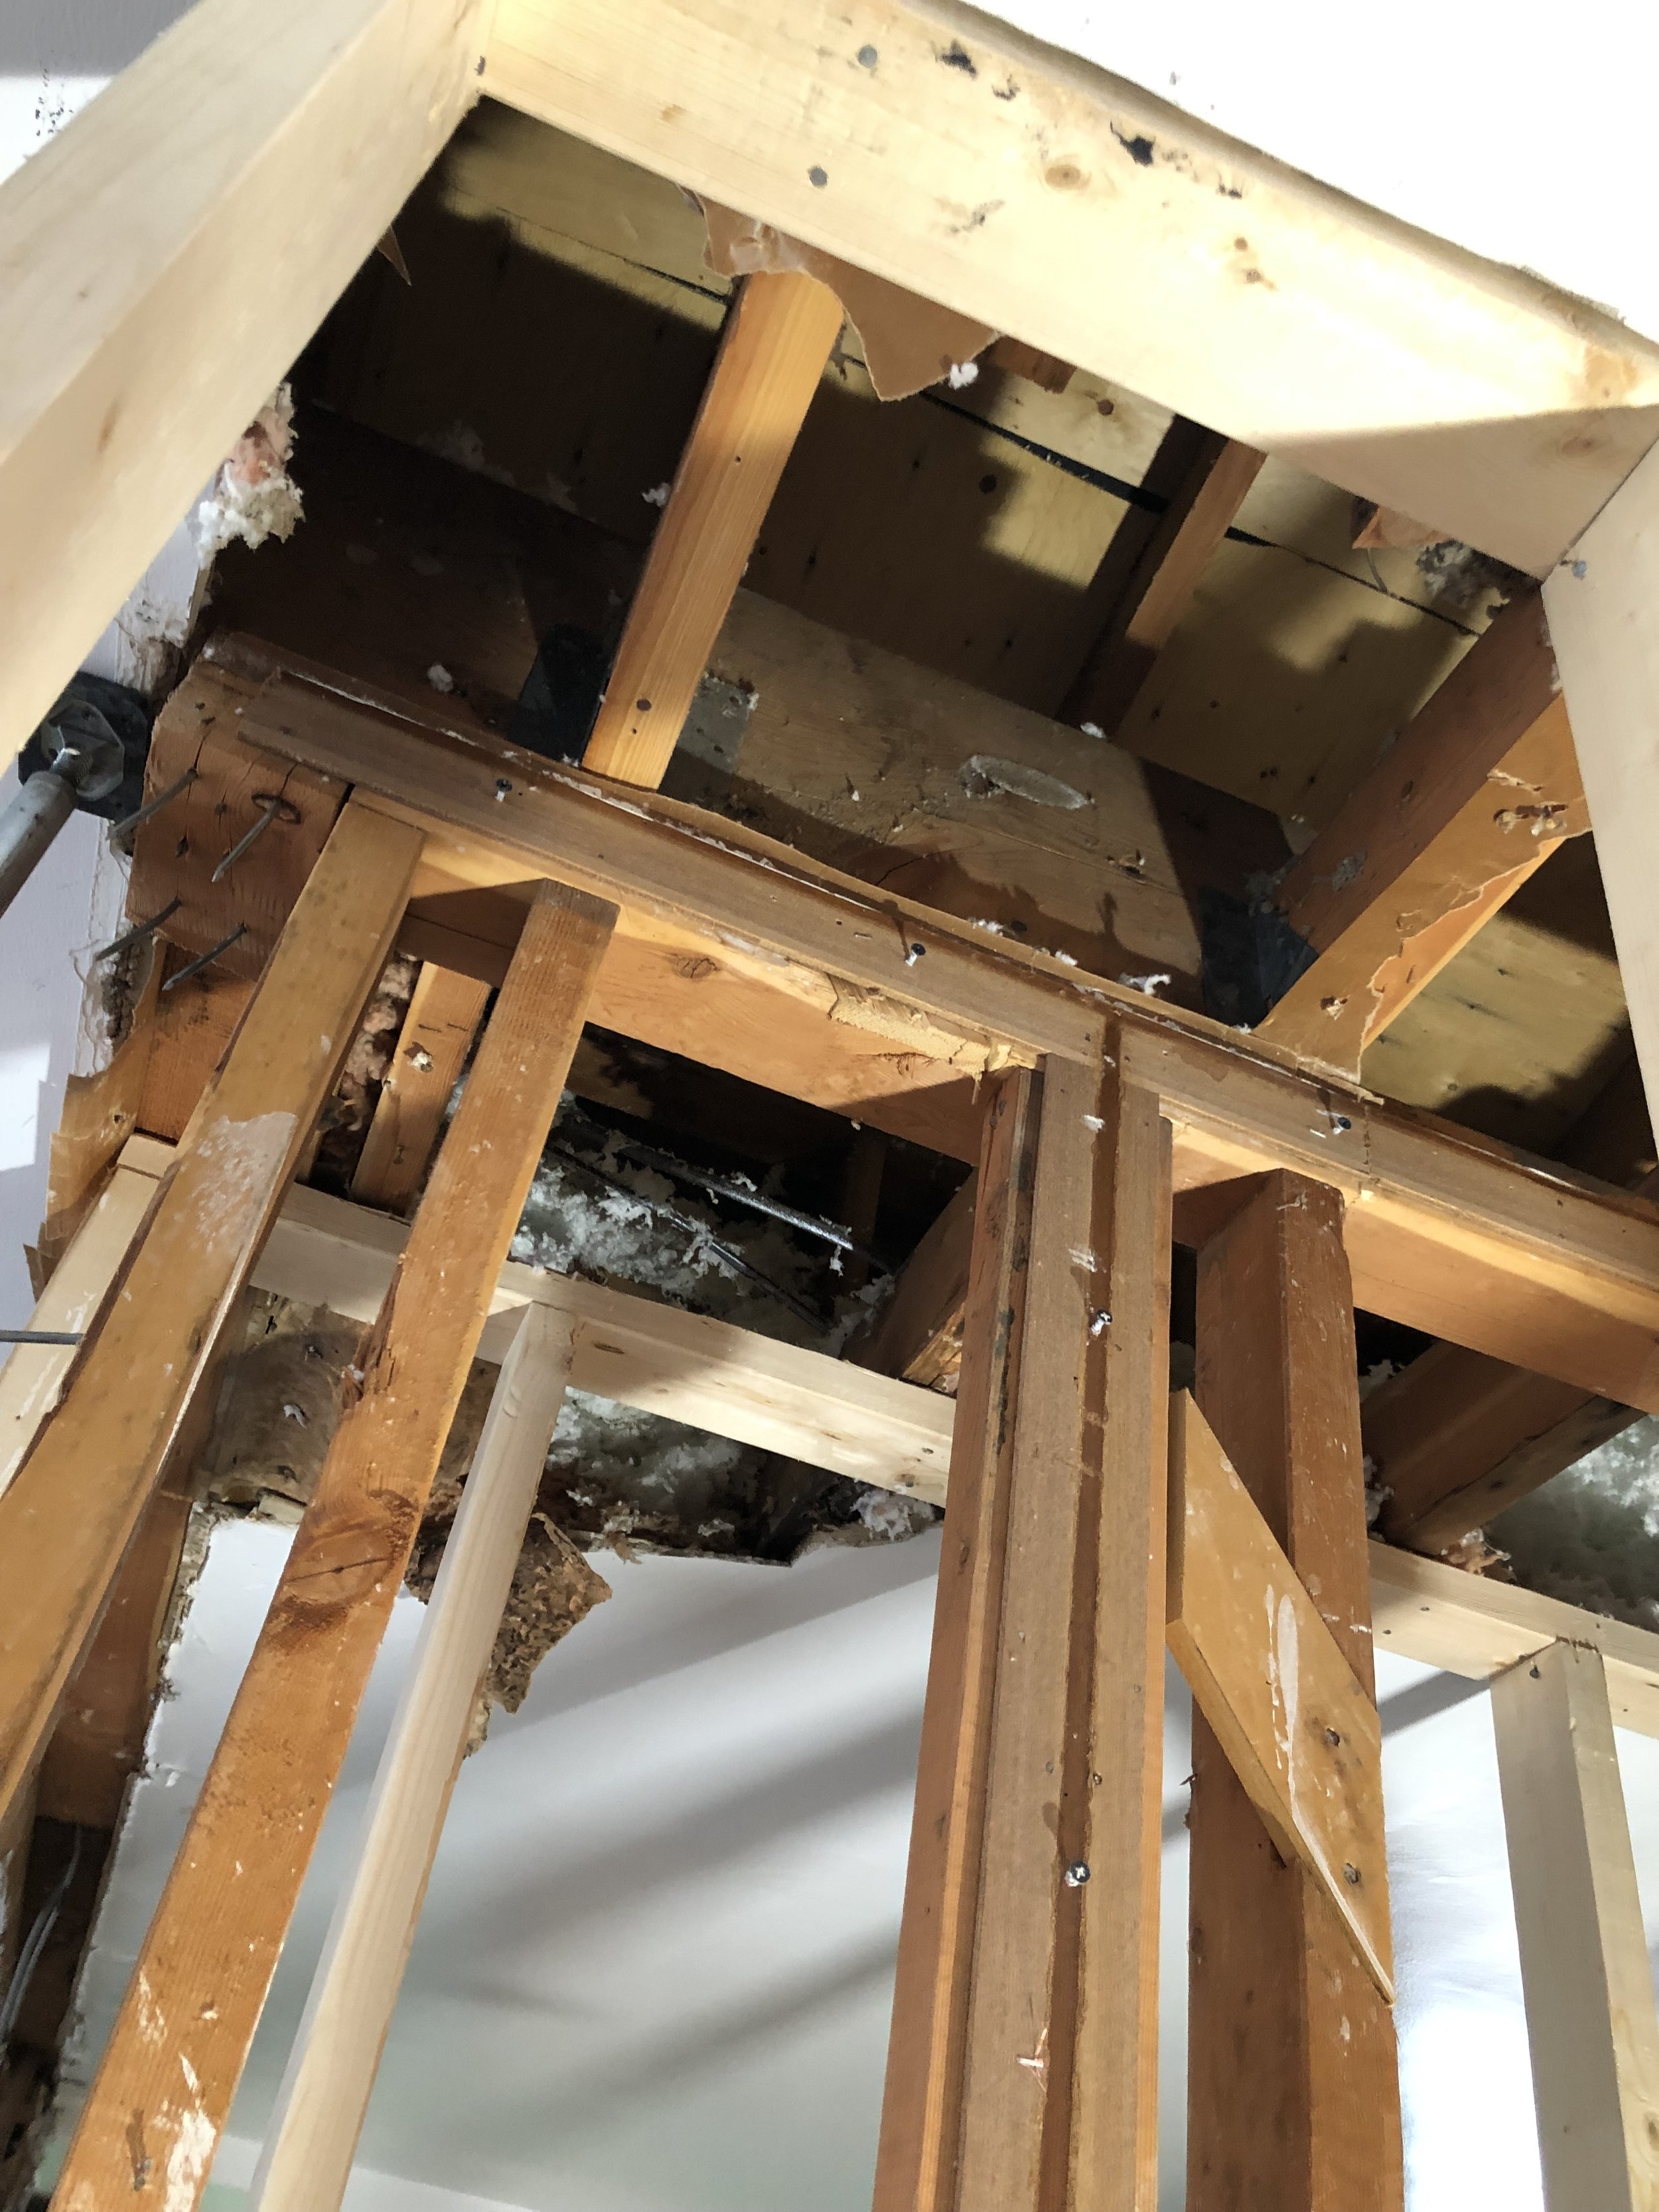
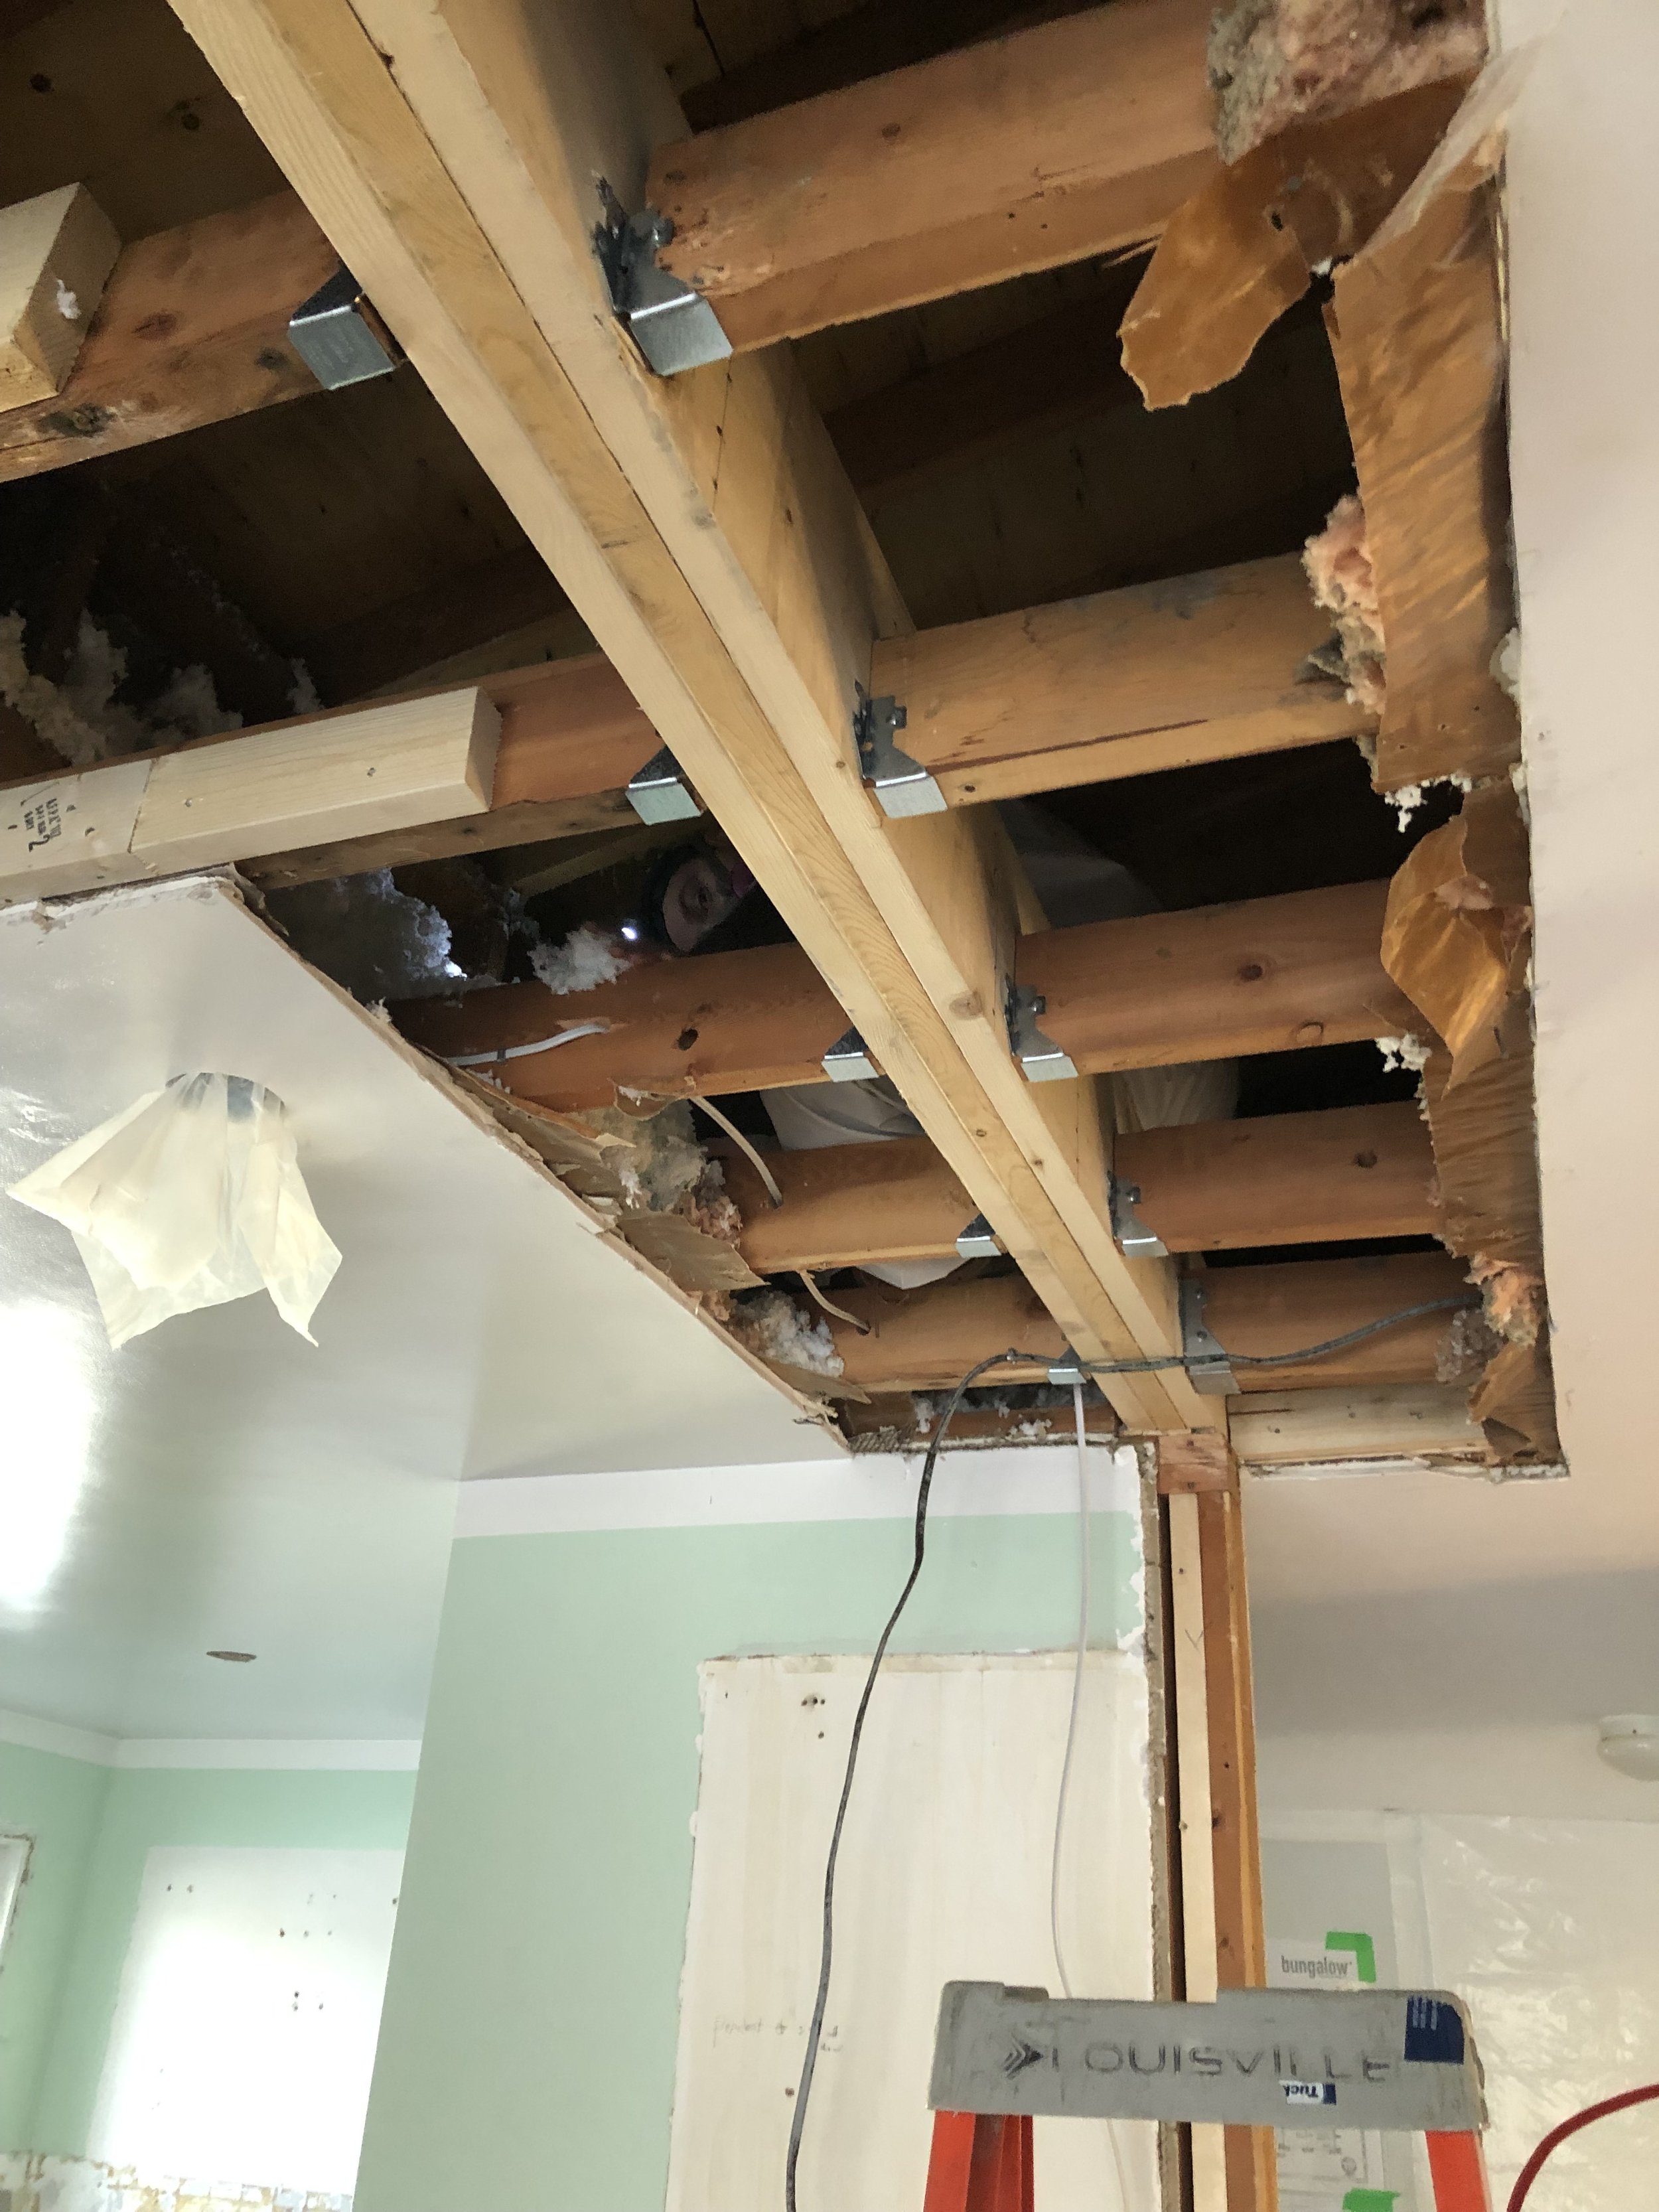
The next step was completing the structural work. The carpentry team built two temporary walls, one on either side of the bearing wall, to carry the load while they removed the bearing wall and replaced it with a structural post and flush beam. This is done so that the ceiling and roof trusses don’t sag or give way while the team is redirecting the load to the post. This method also ensures that there isn’t cracking in surrounding areas and that the carpentry team and homeowners are safe during construction.
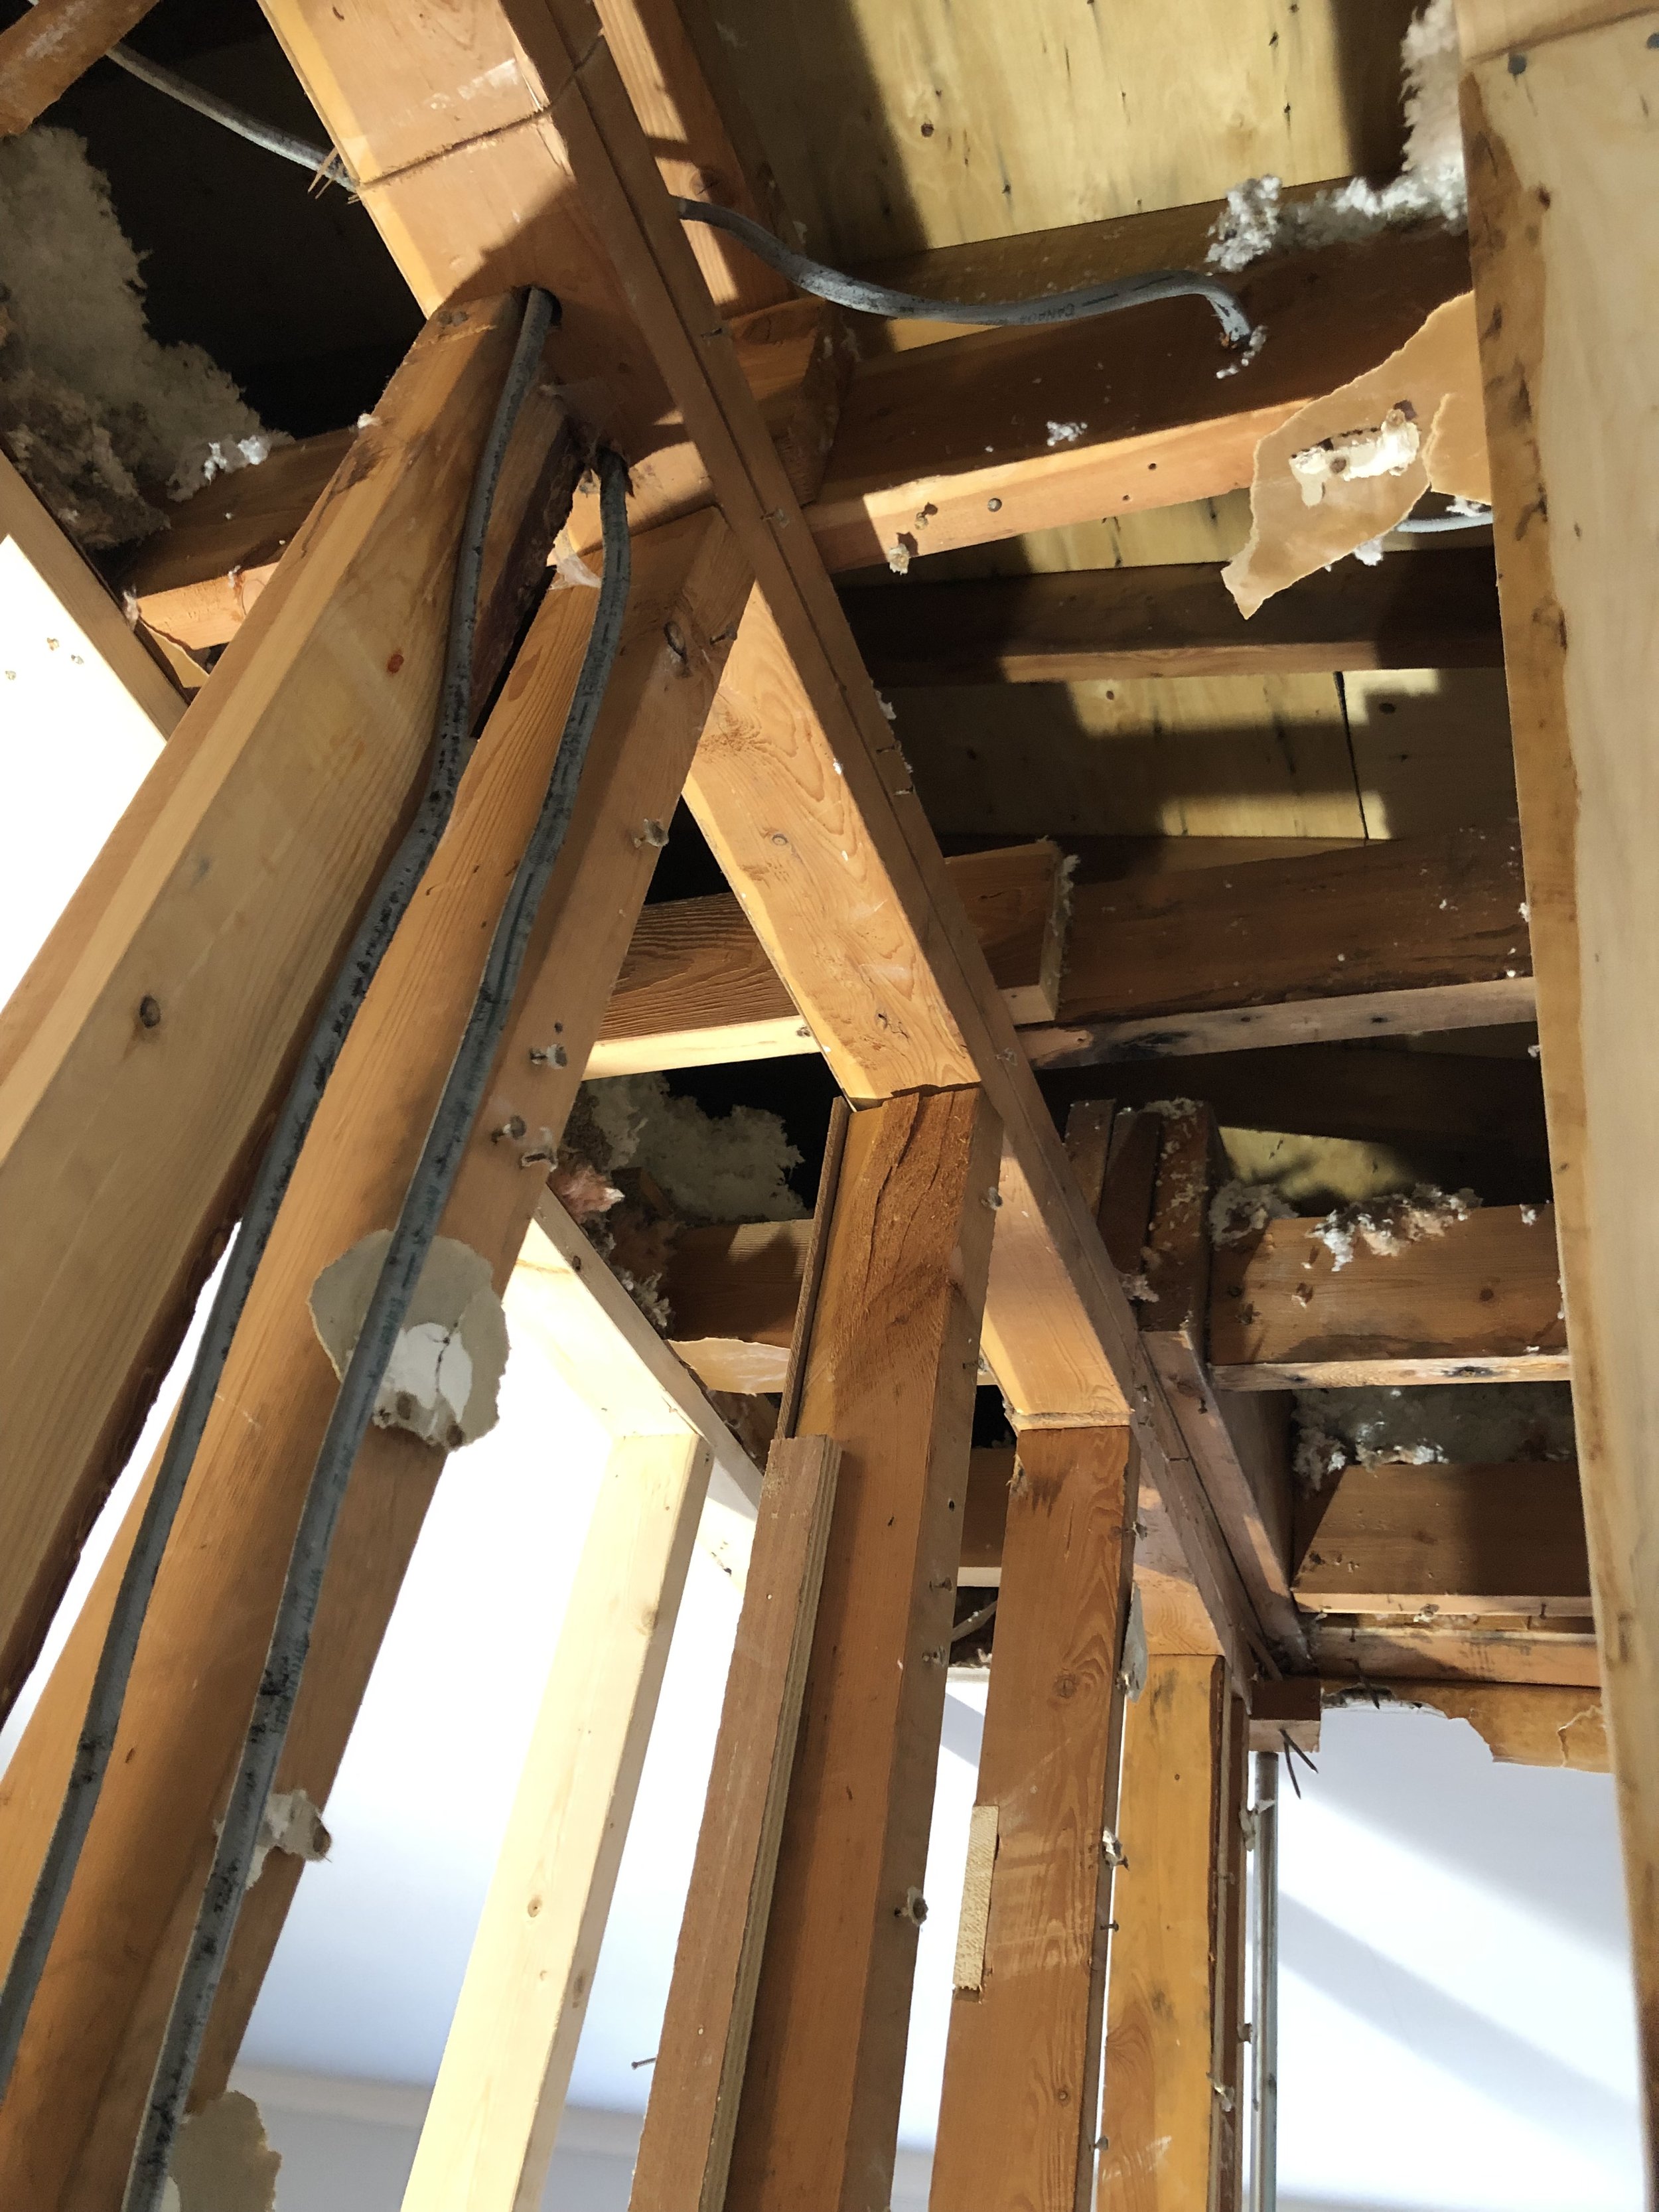
While the structural work was being completed, the ventilation, plumbing and electrical teams were hard at work. The new hood fan was vented through the newly closed in window. The sink was moved from under the window that was removed to under the remaining window. Extensive electrical work was completed both inside and outside the home to upgrade the service. New potlights, pendants, and flush mount fixtures were roughed in along with outlets. The opening of the ceiling for structural work allowed the electrical team easy access to the attic above for rewiring.
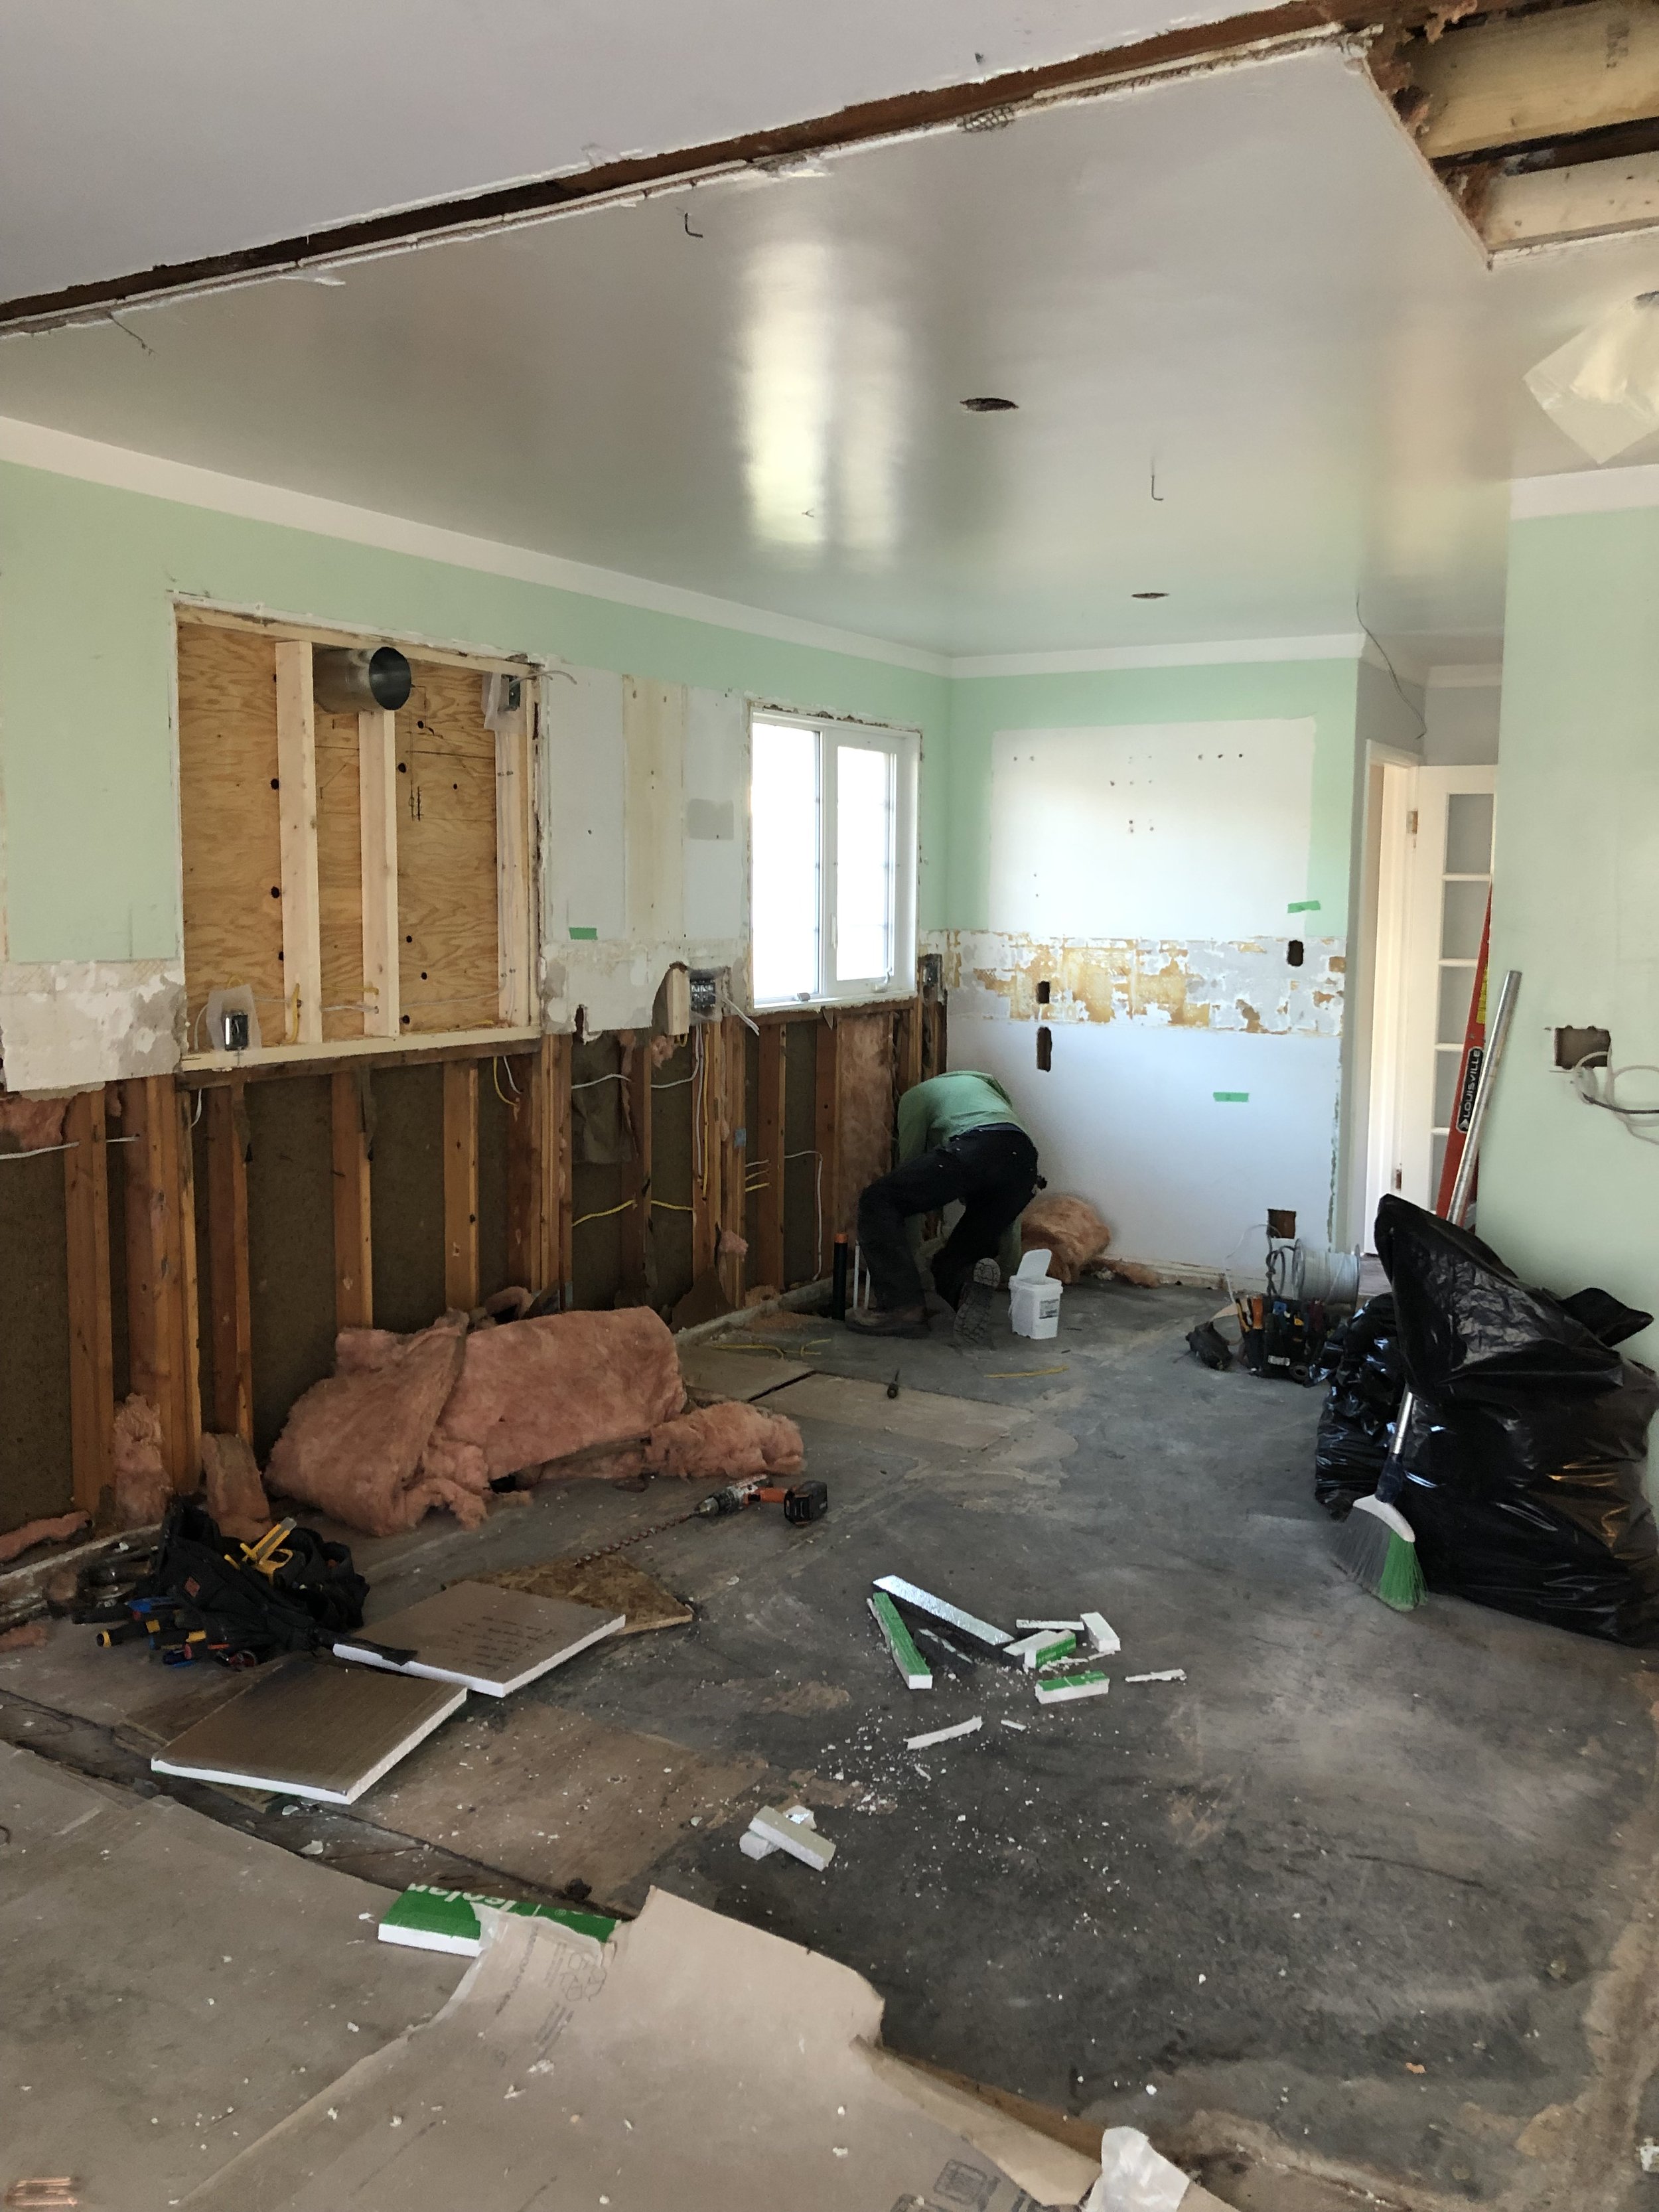
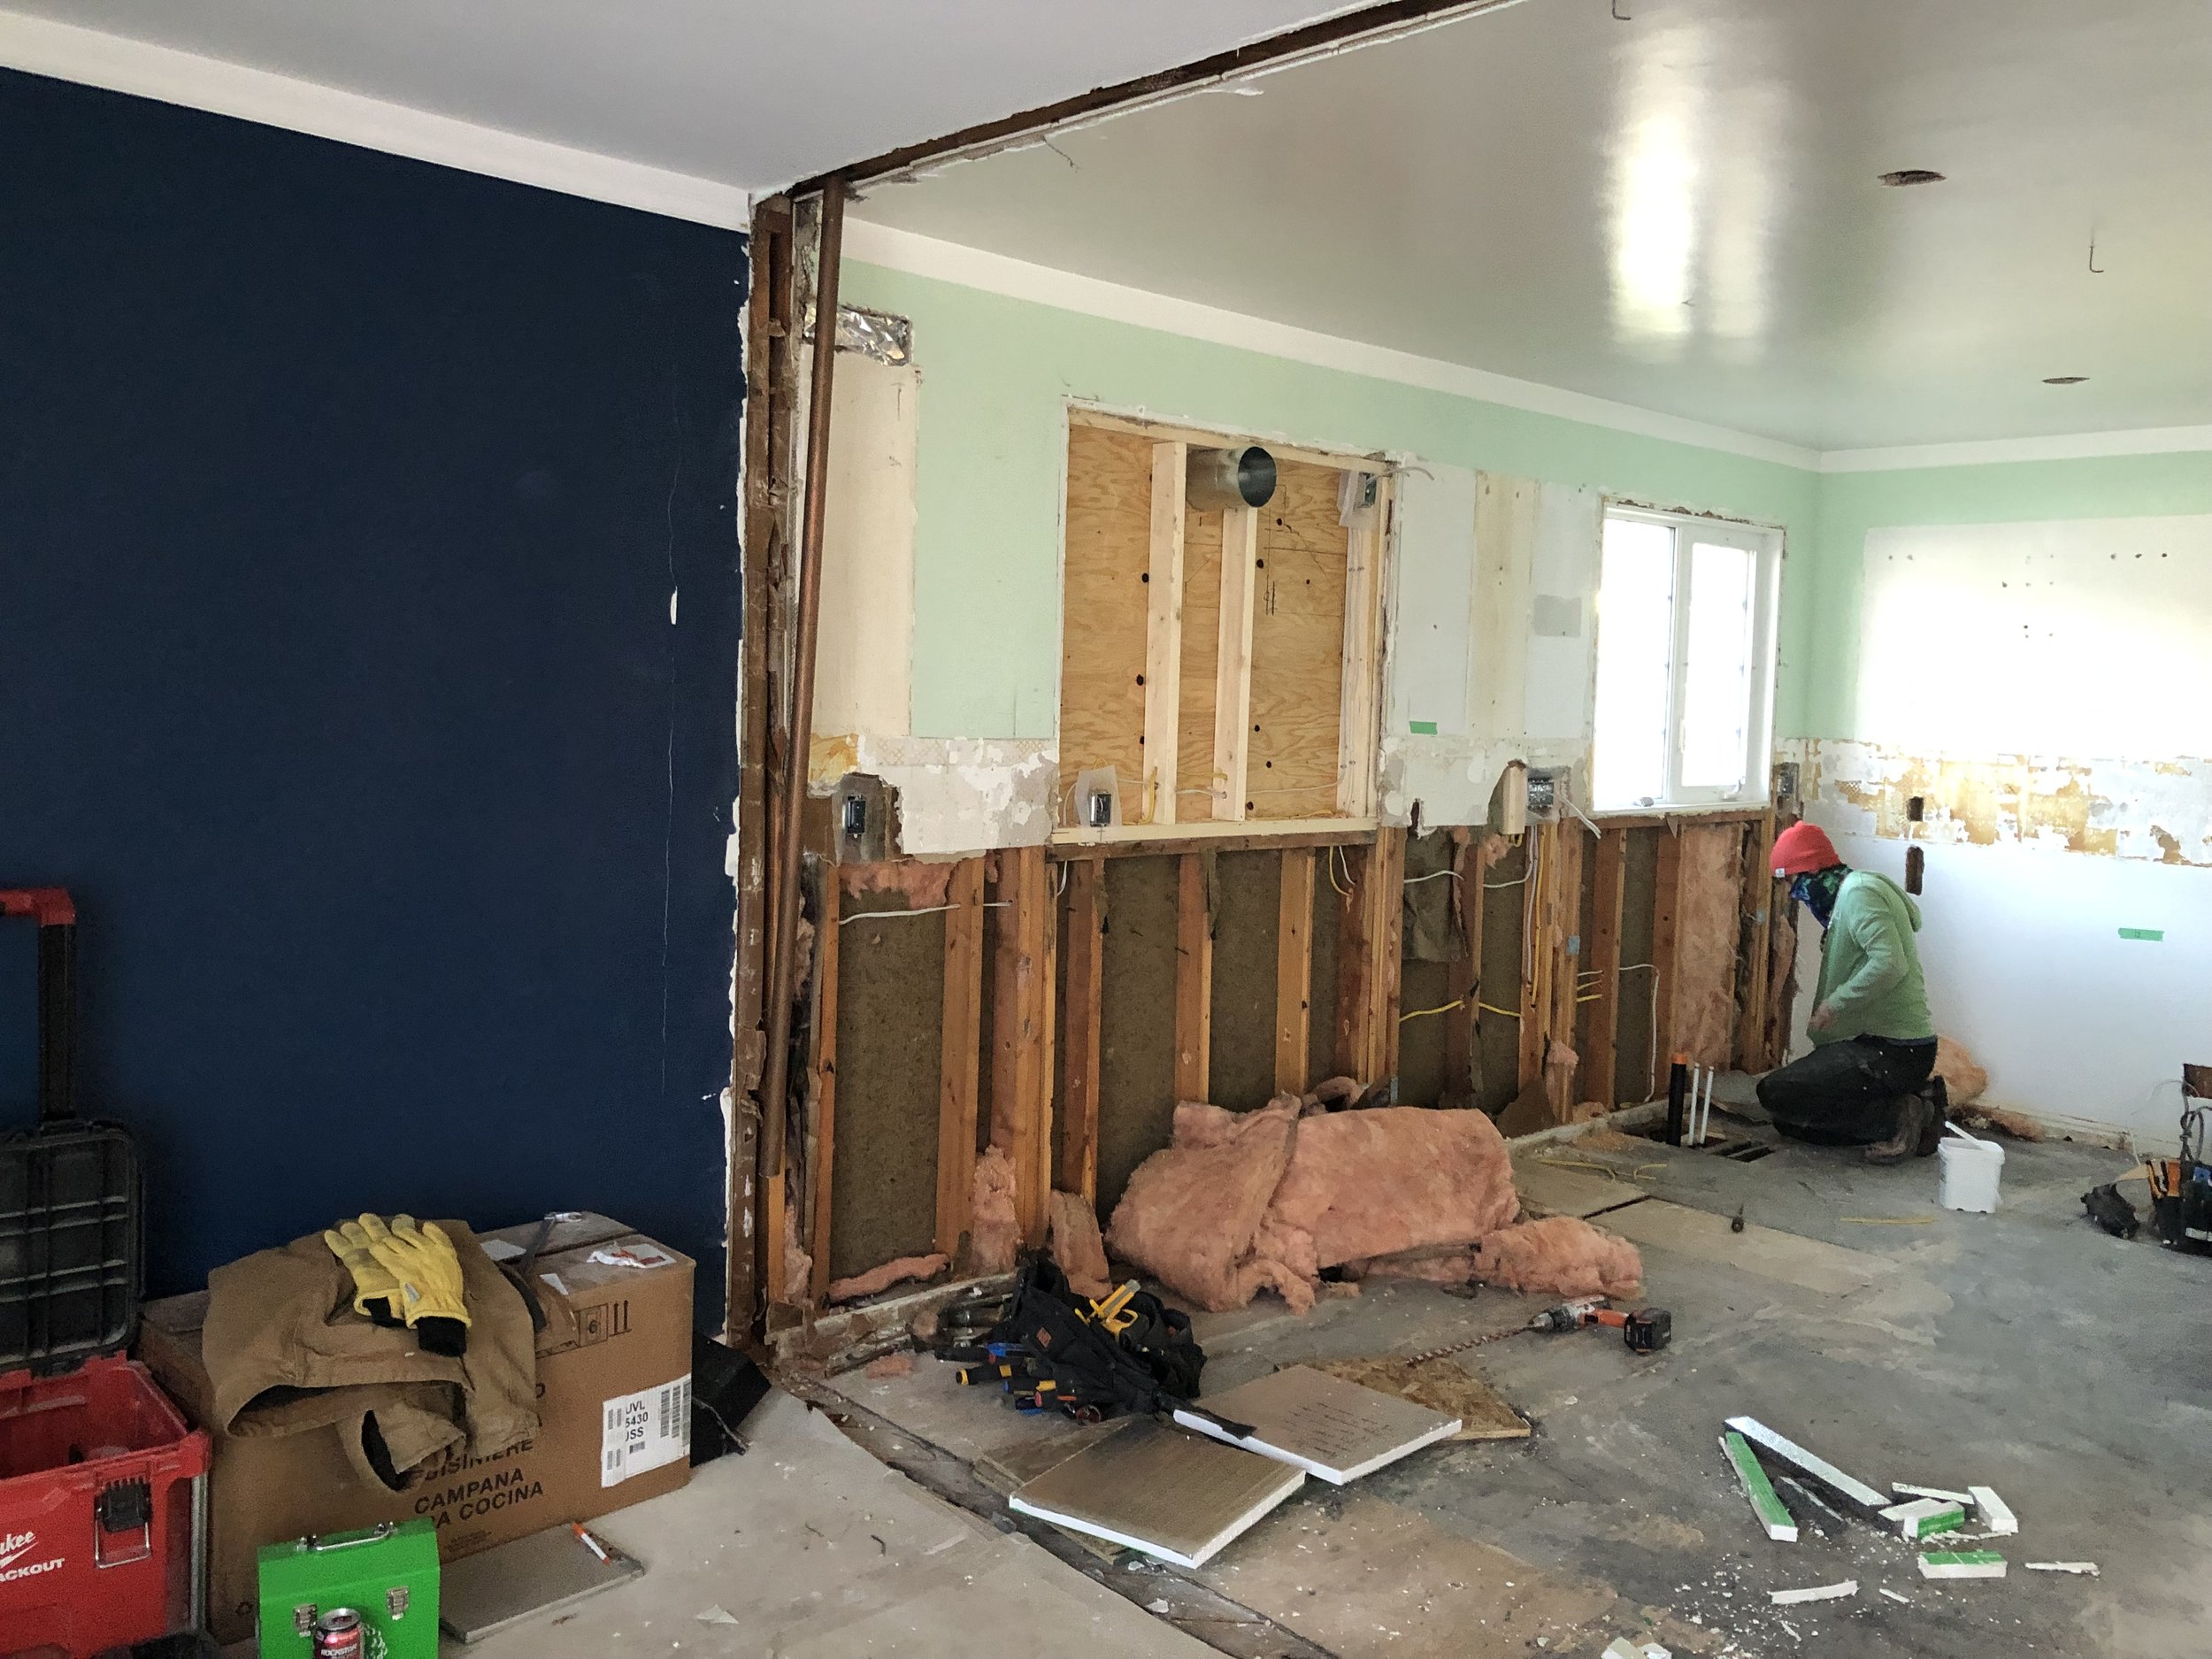

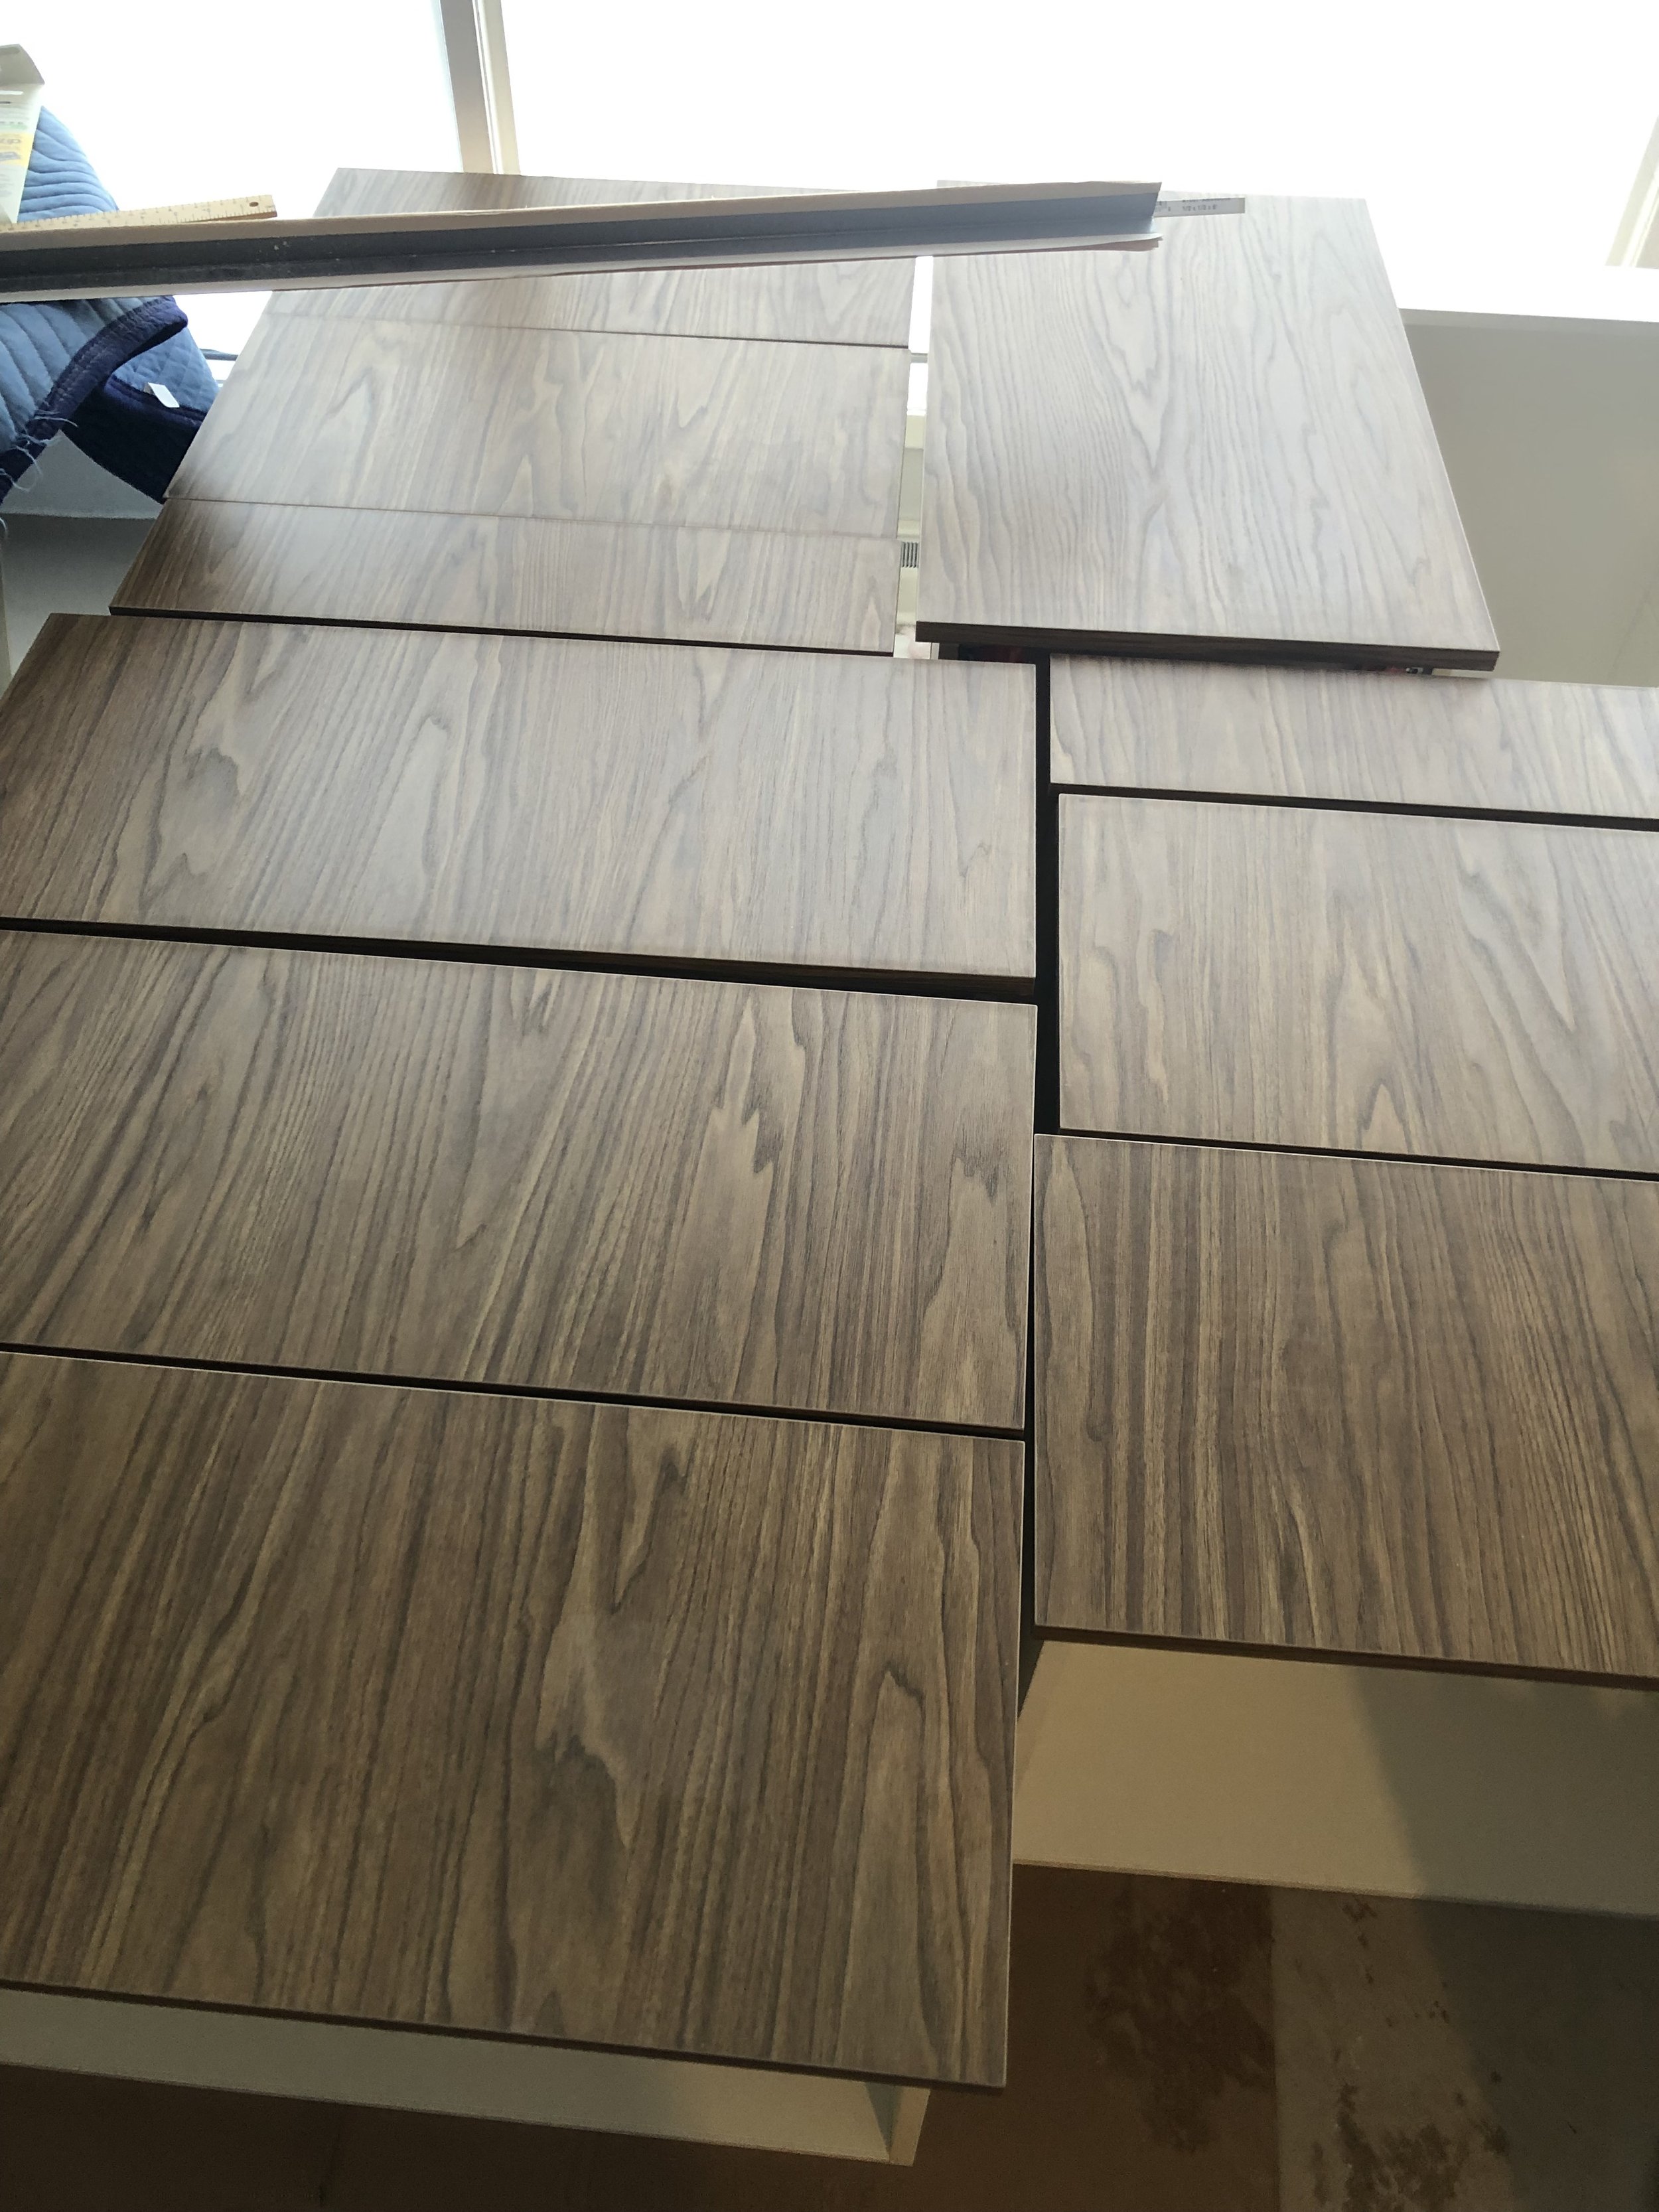
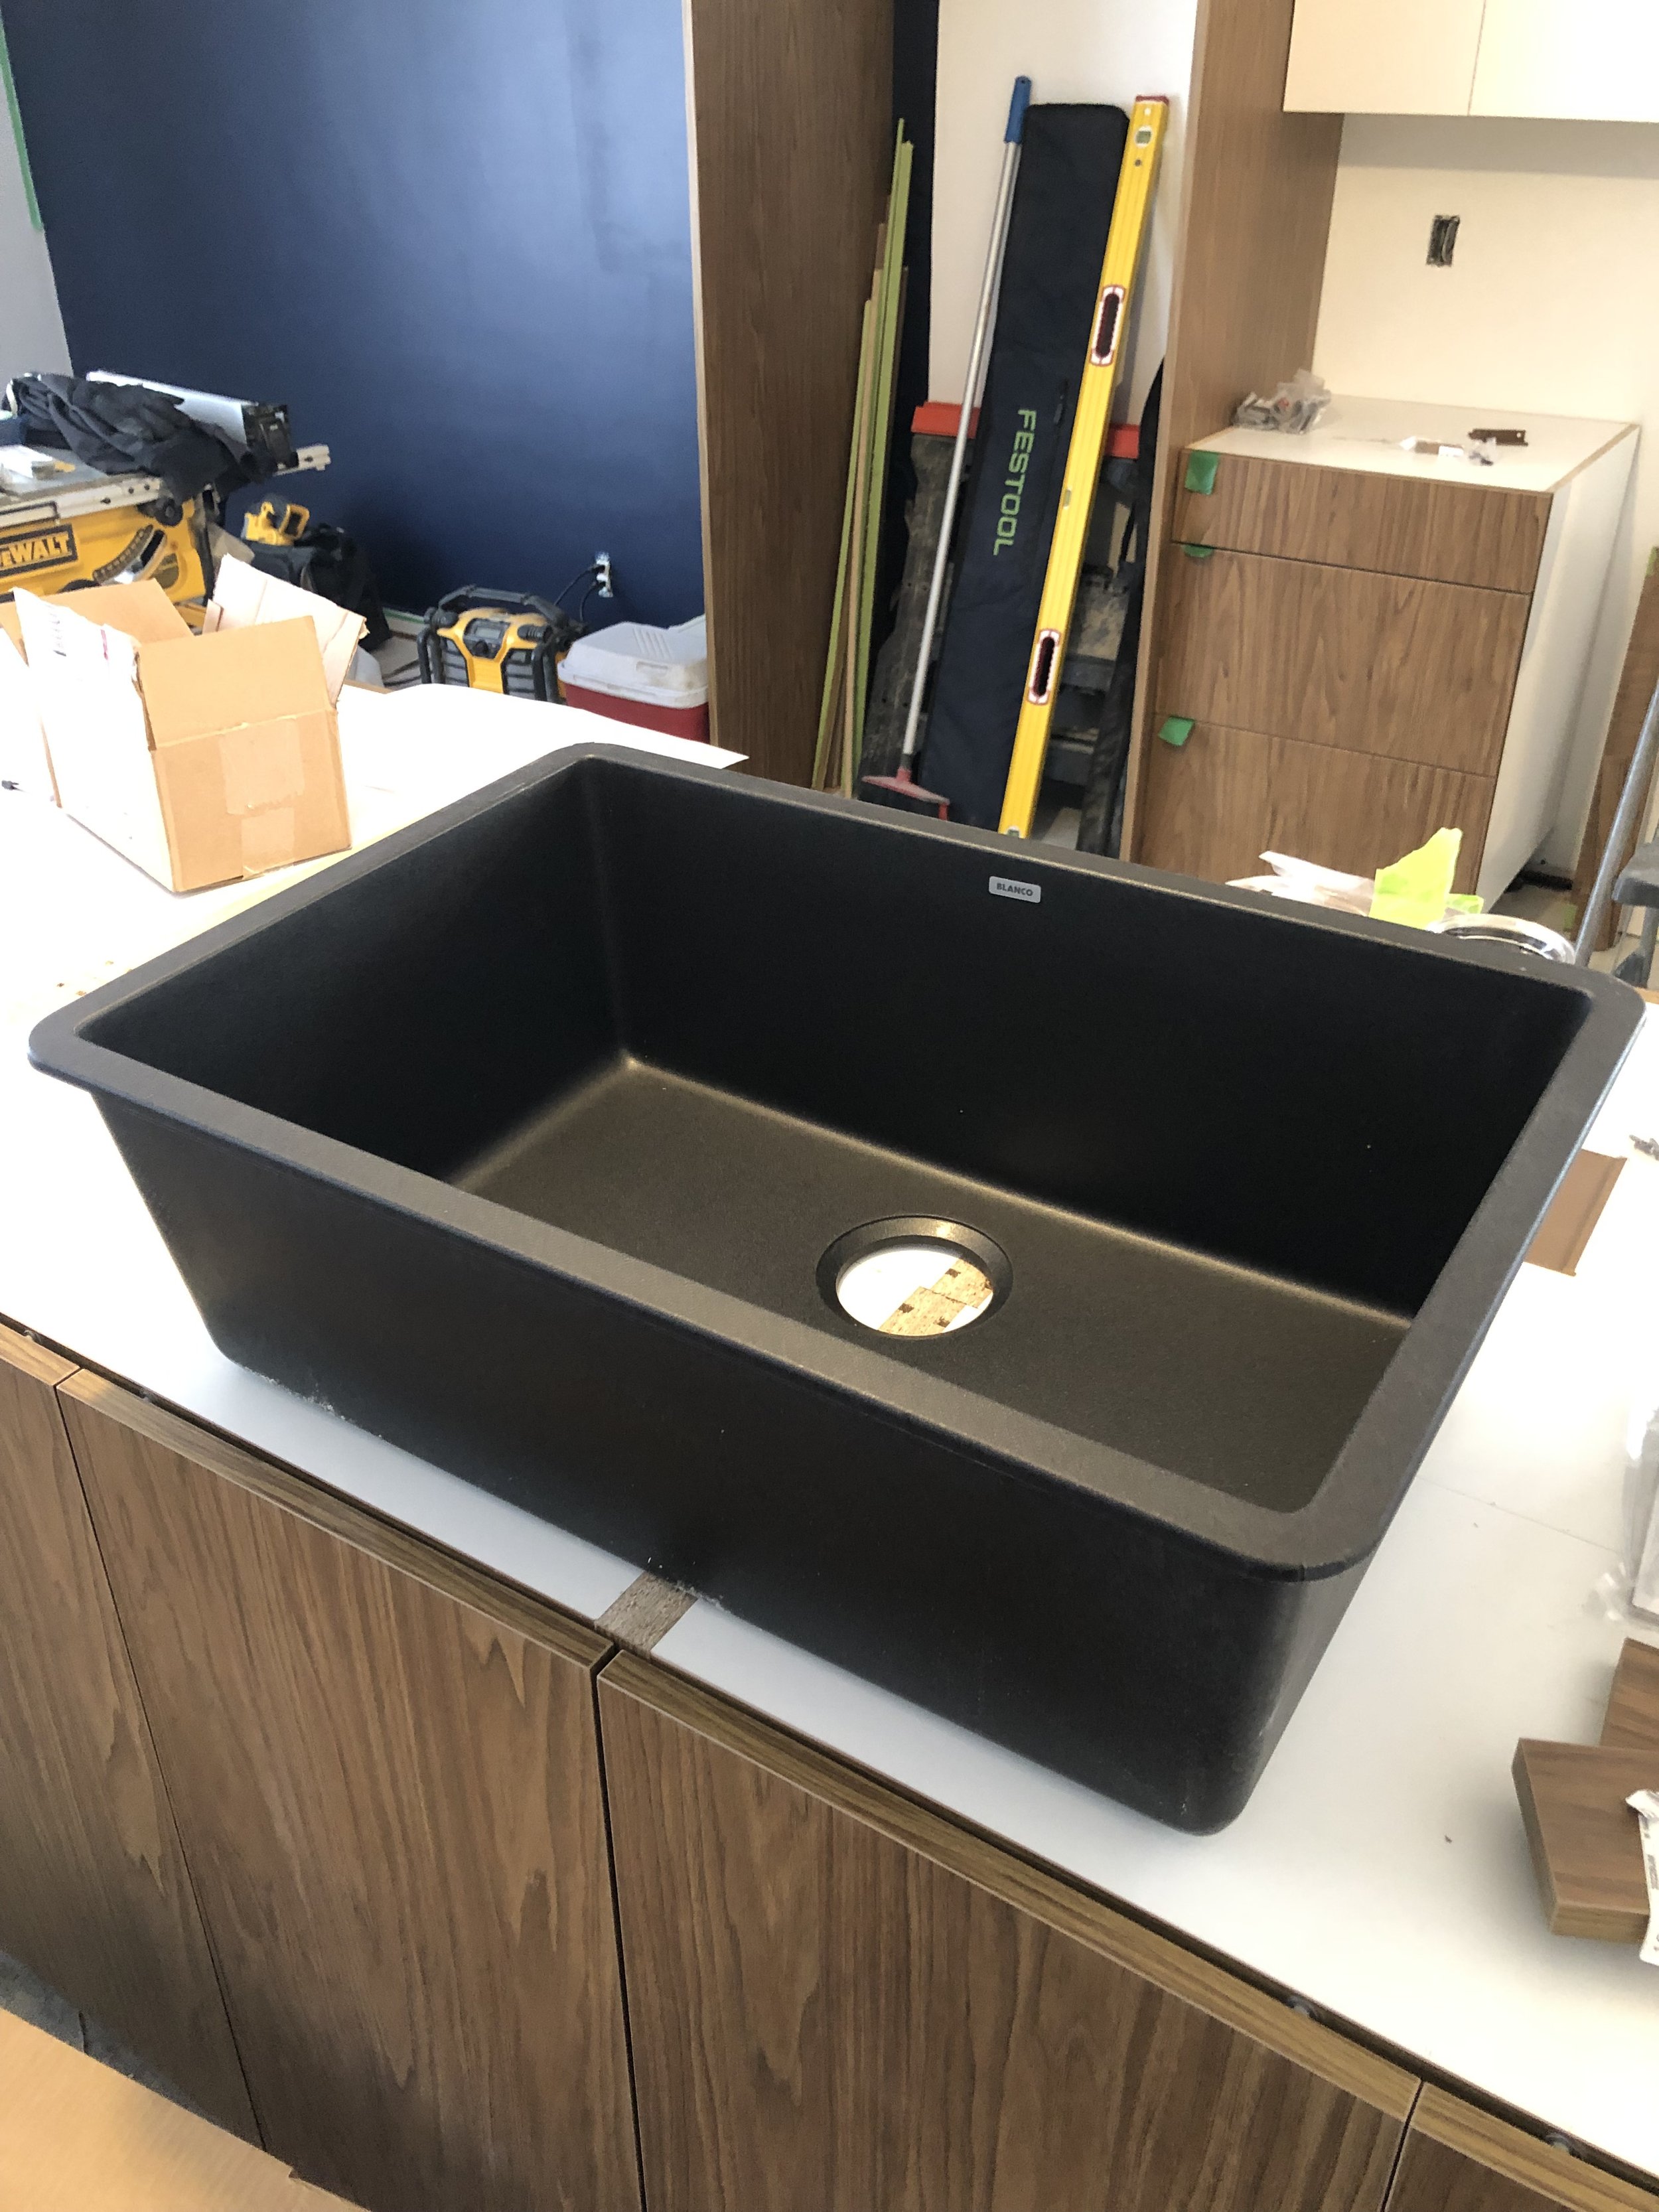
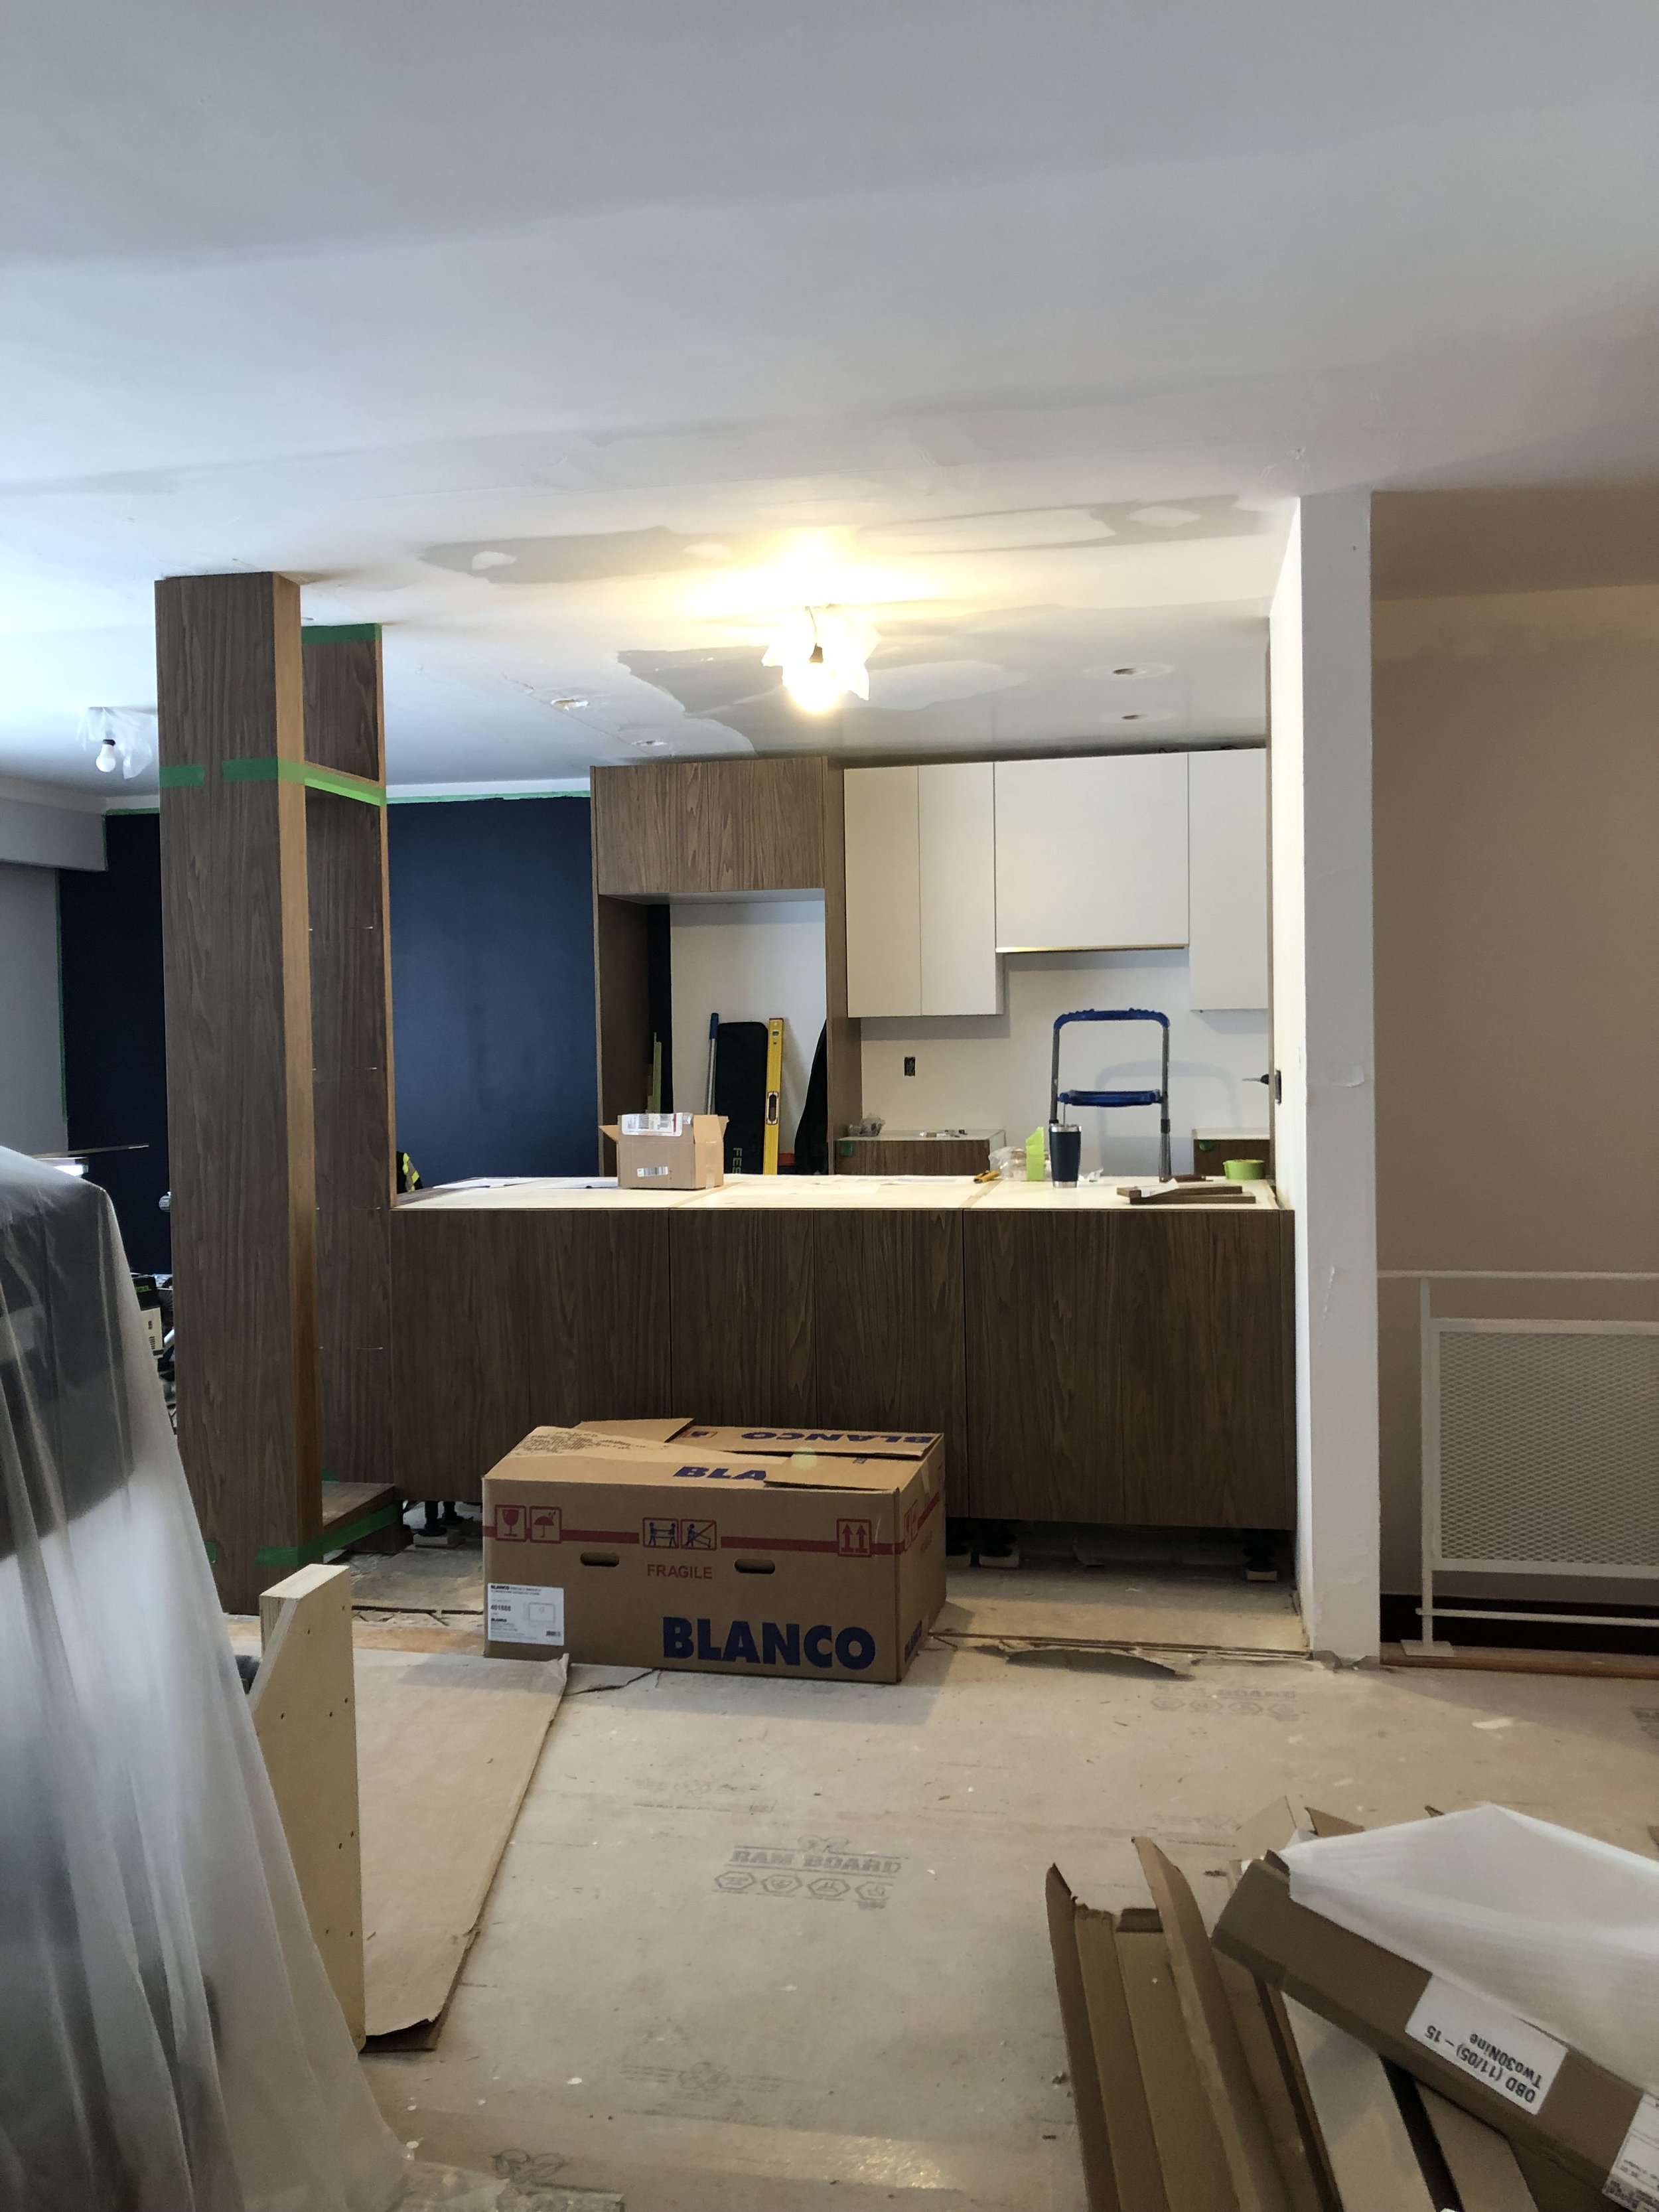
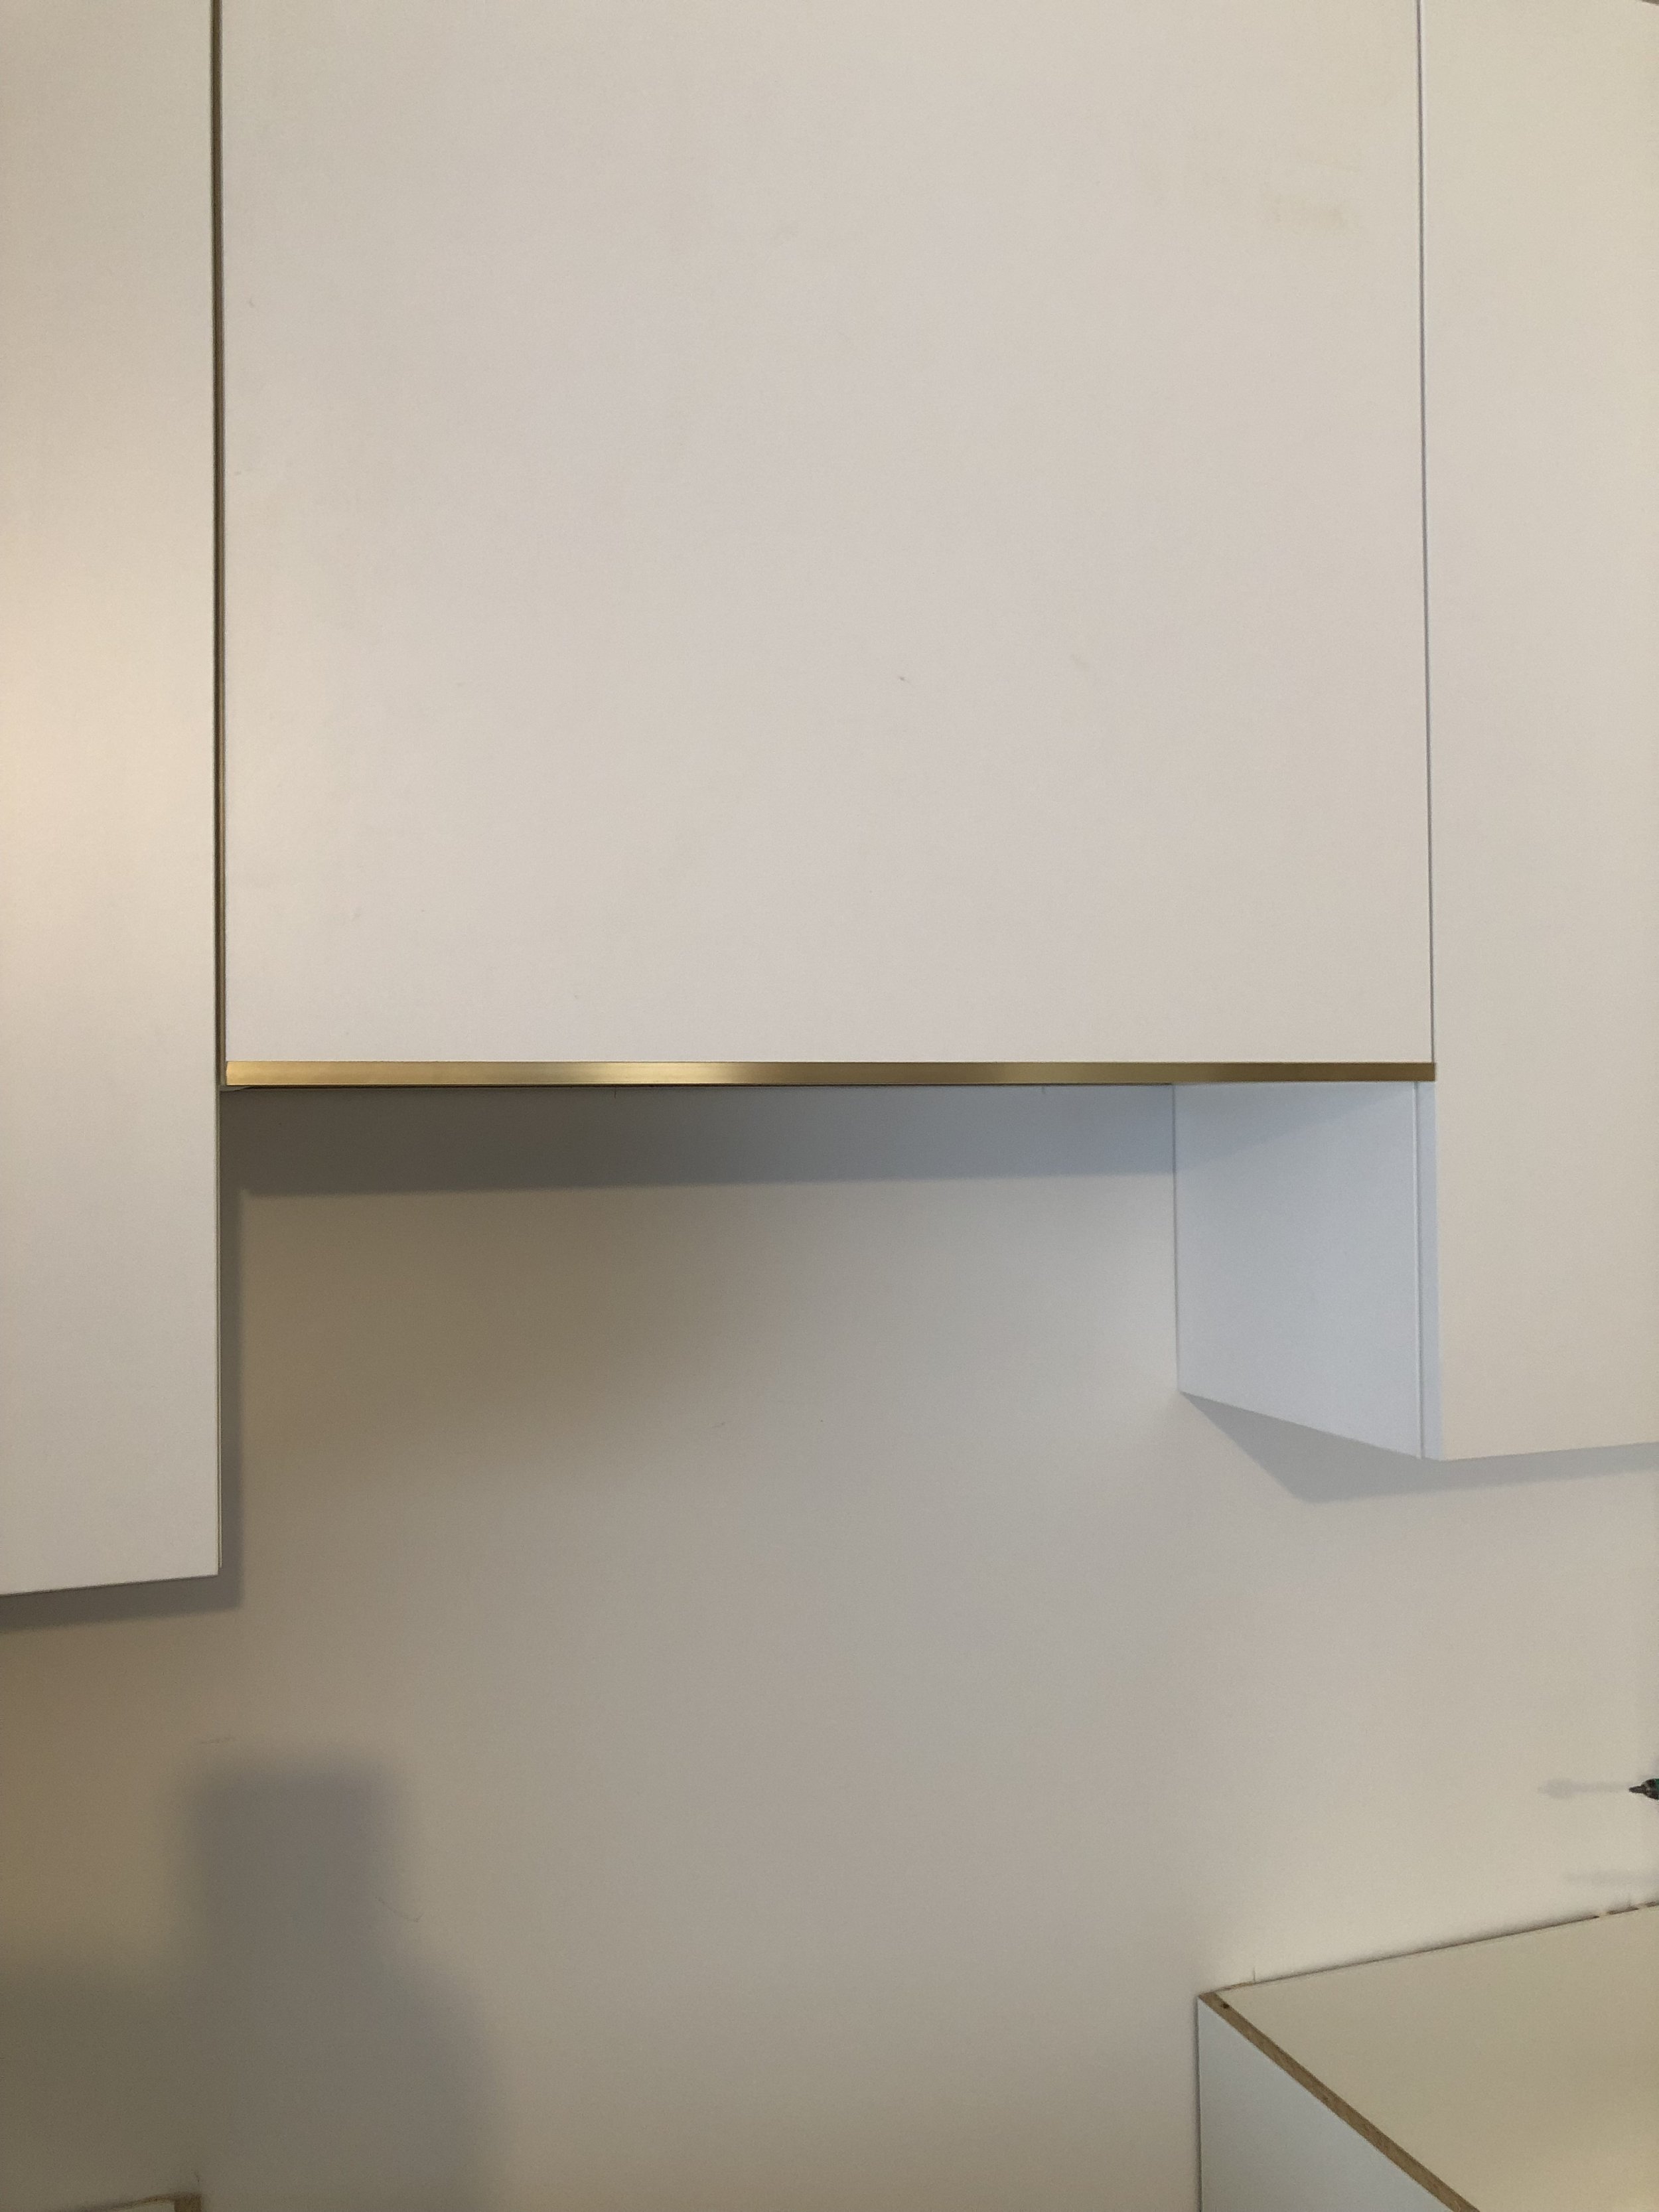
Then the finishing could begin! New insulation and vapour barrier was applied, drywall was hung on the walls, patching was done on the ceiling, and everything was mudded, taped, and painted. Shortly after, the new cabinets arrived and were meticulously installed. Some adjustments needed to be made to the hood fan box during installation to create a flush appearance and highlight the brass detailing. Additionally, the centrepiece of the room, the walnut shelving, came in 1/8” too large and needed to be reordered to fit exactly. This meant adjusting the schedule in other areas of the project such as the countertops so that everything could be properly installed.


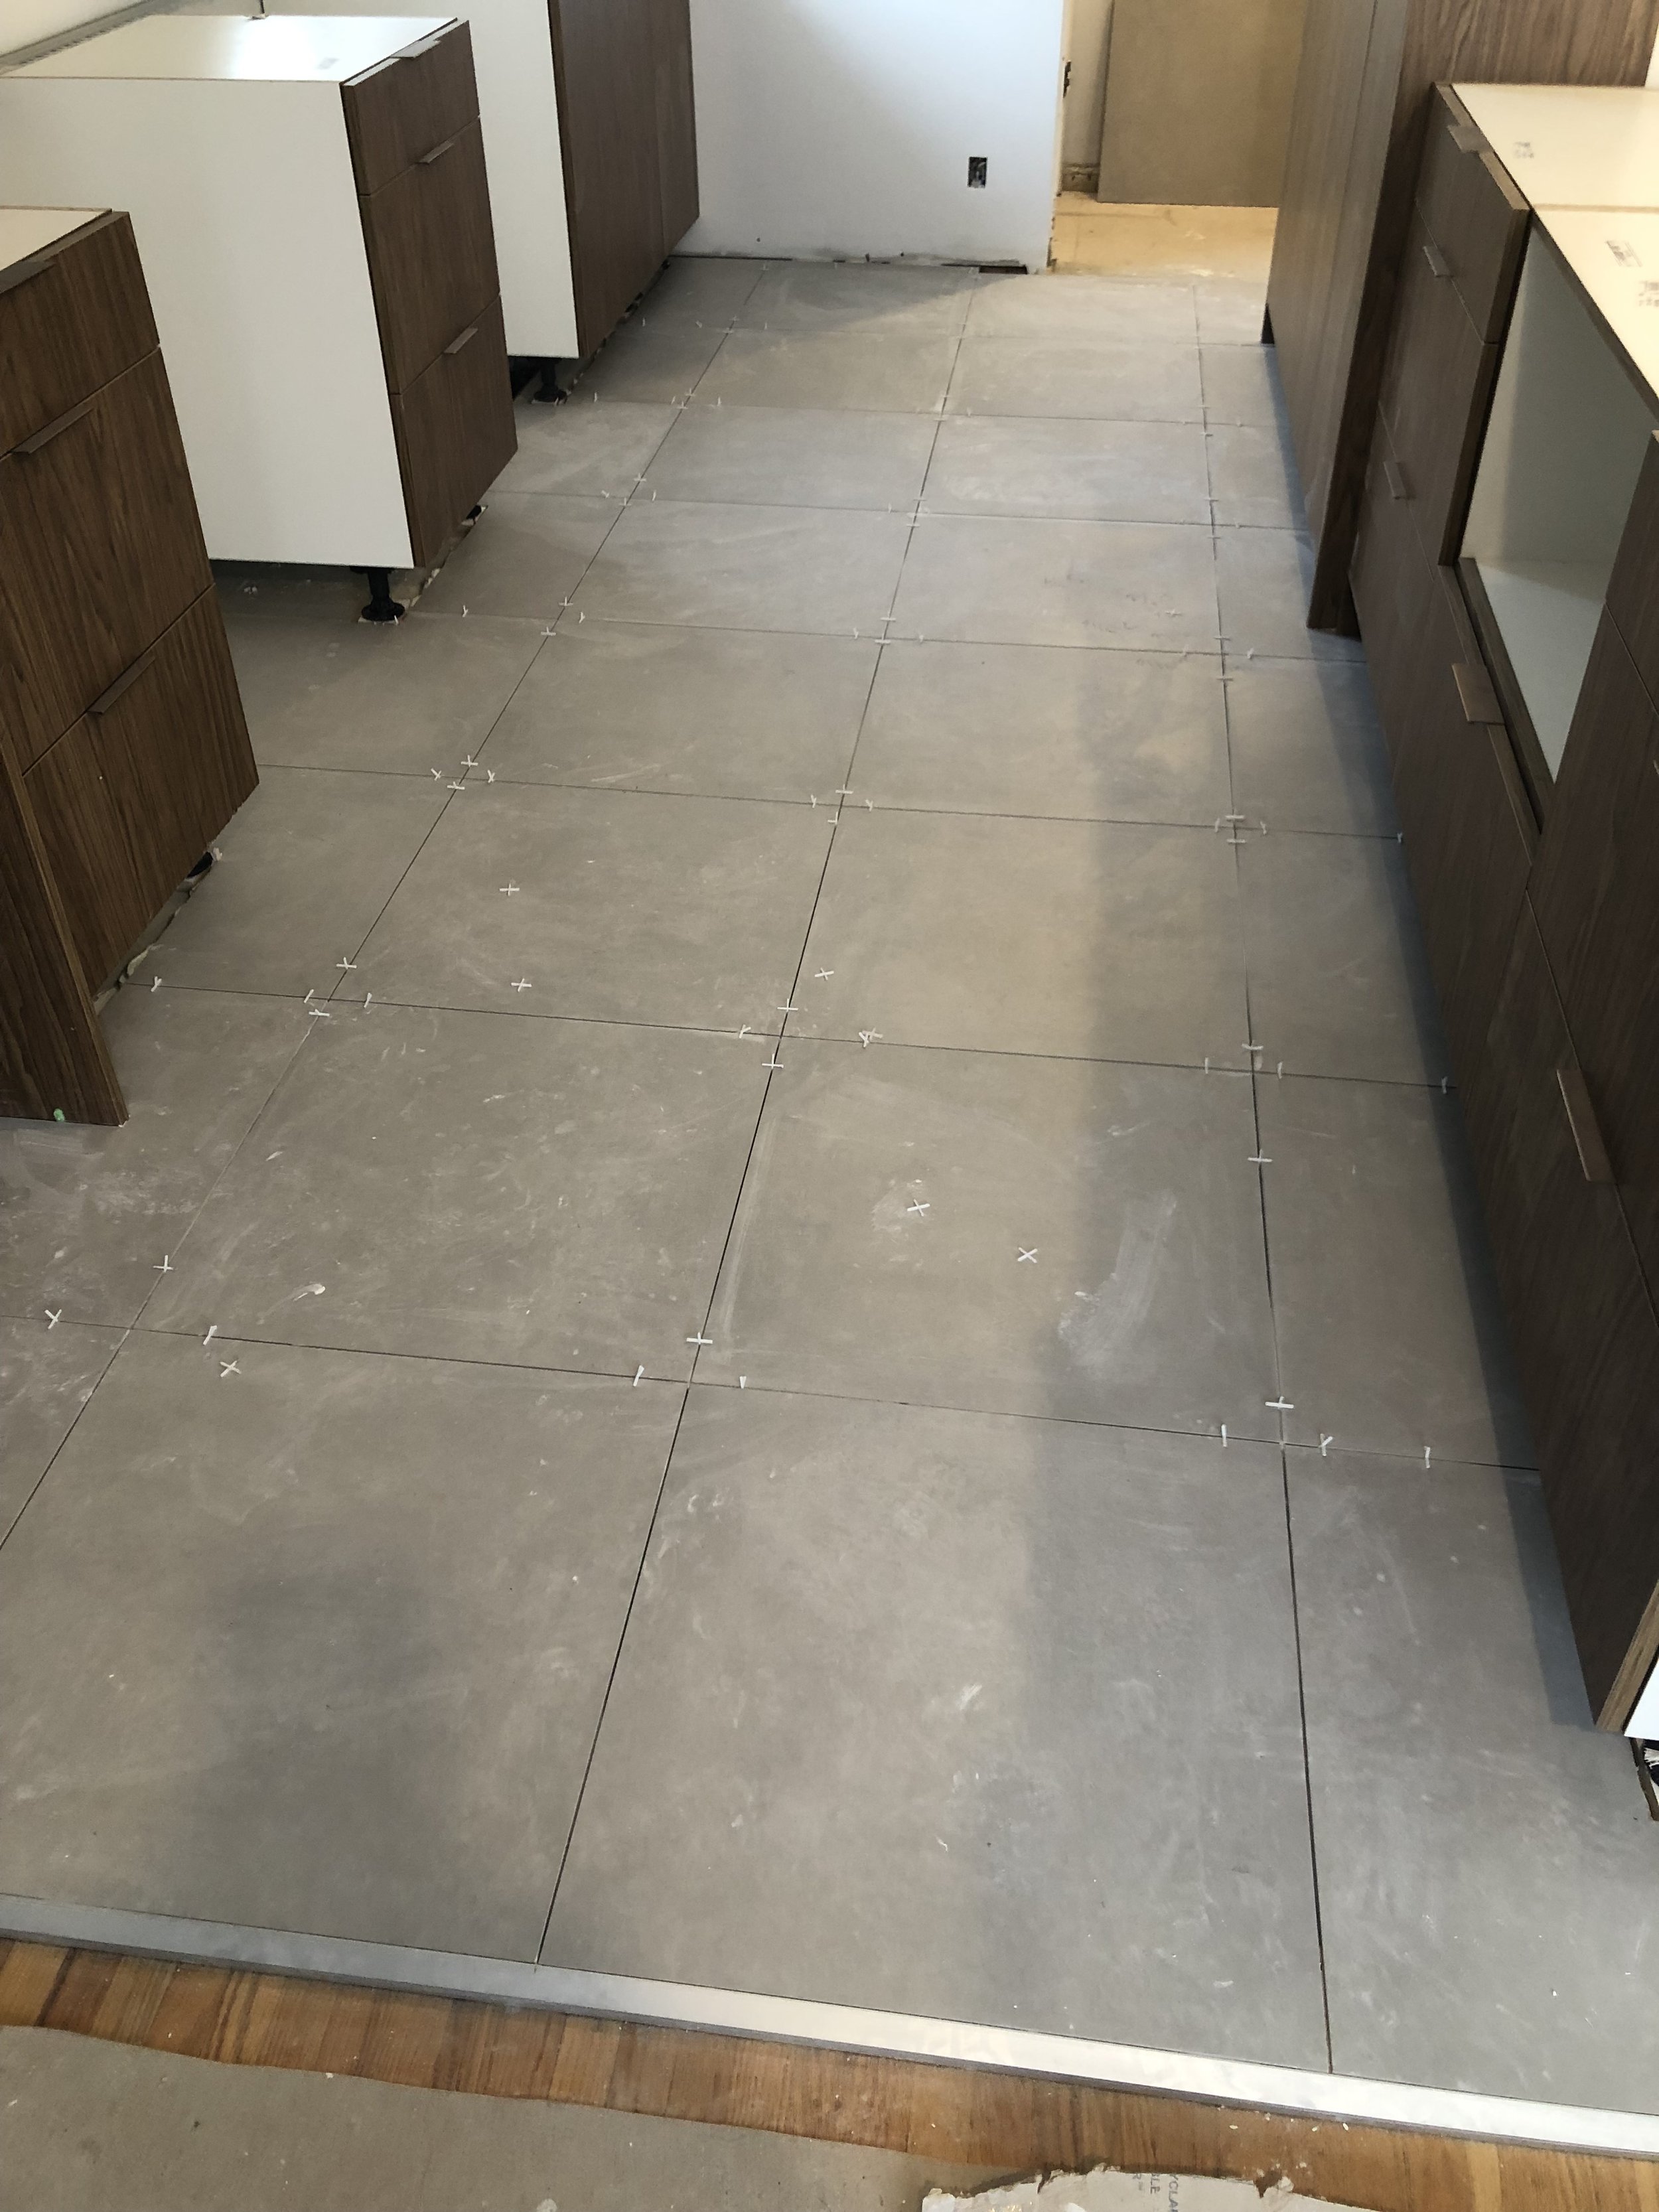
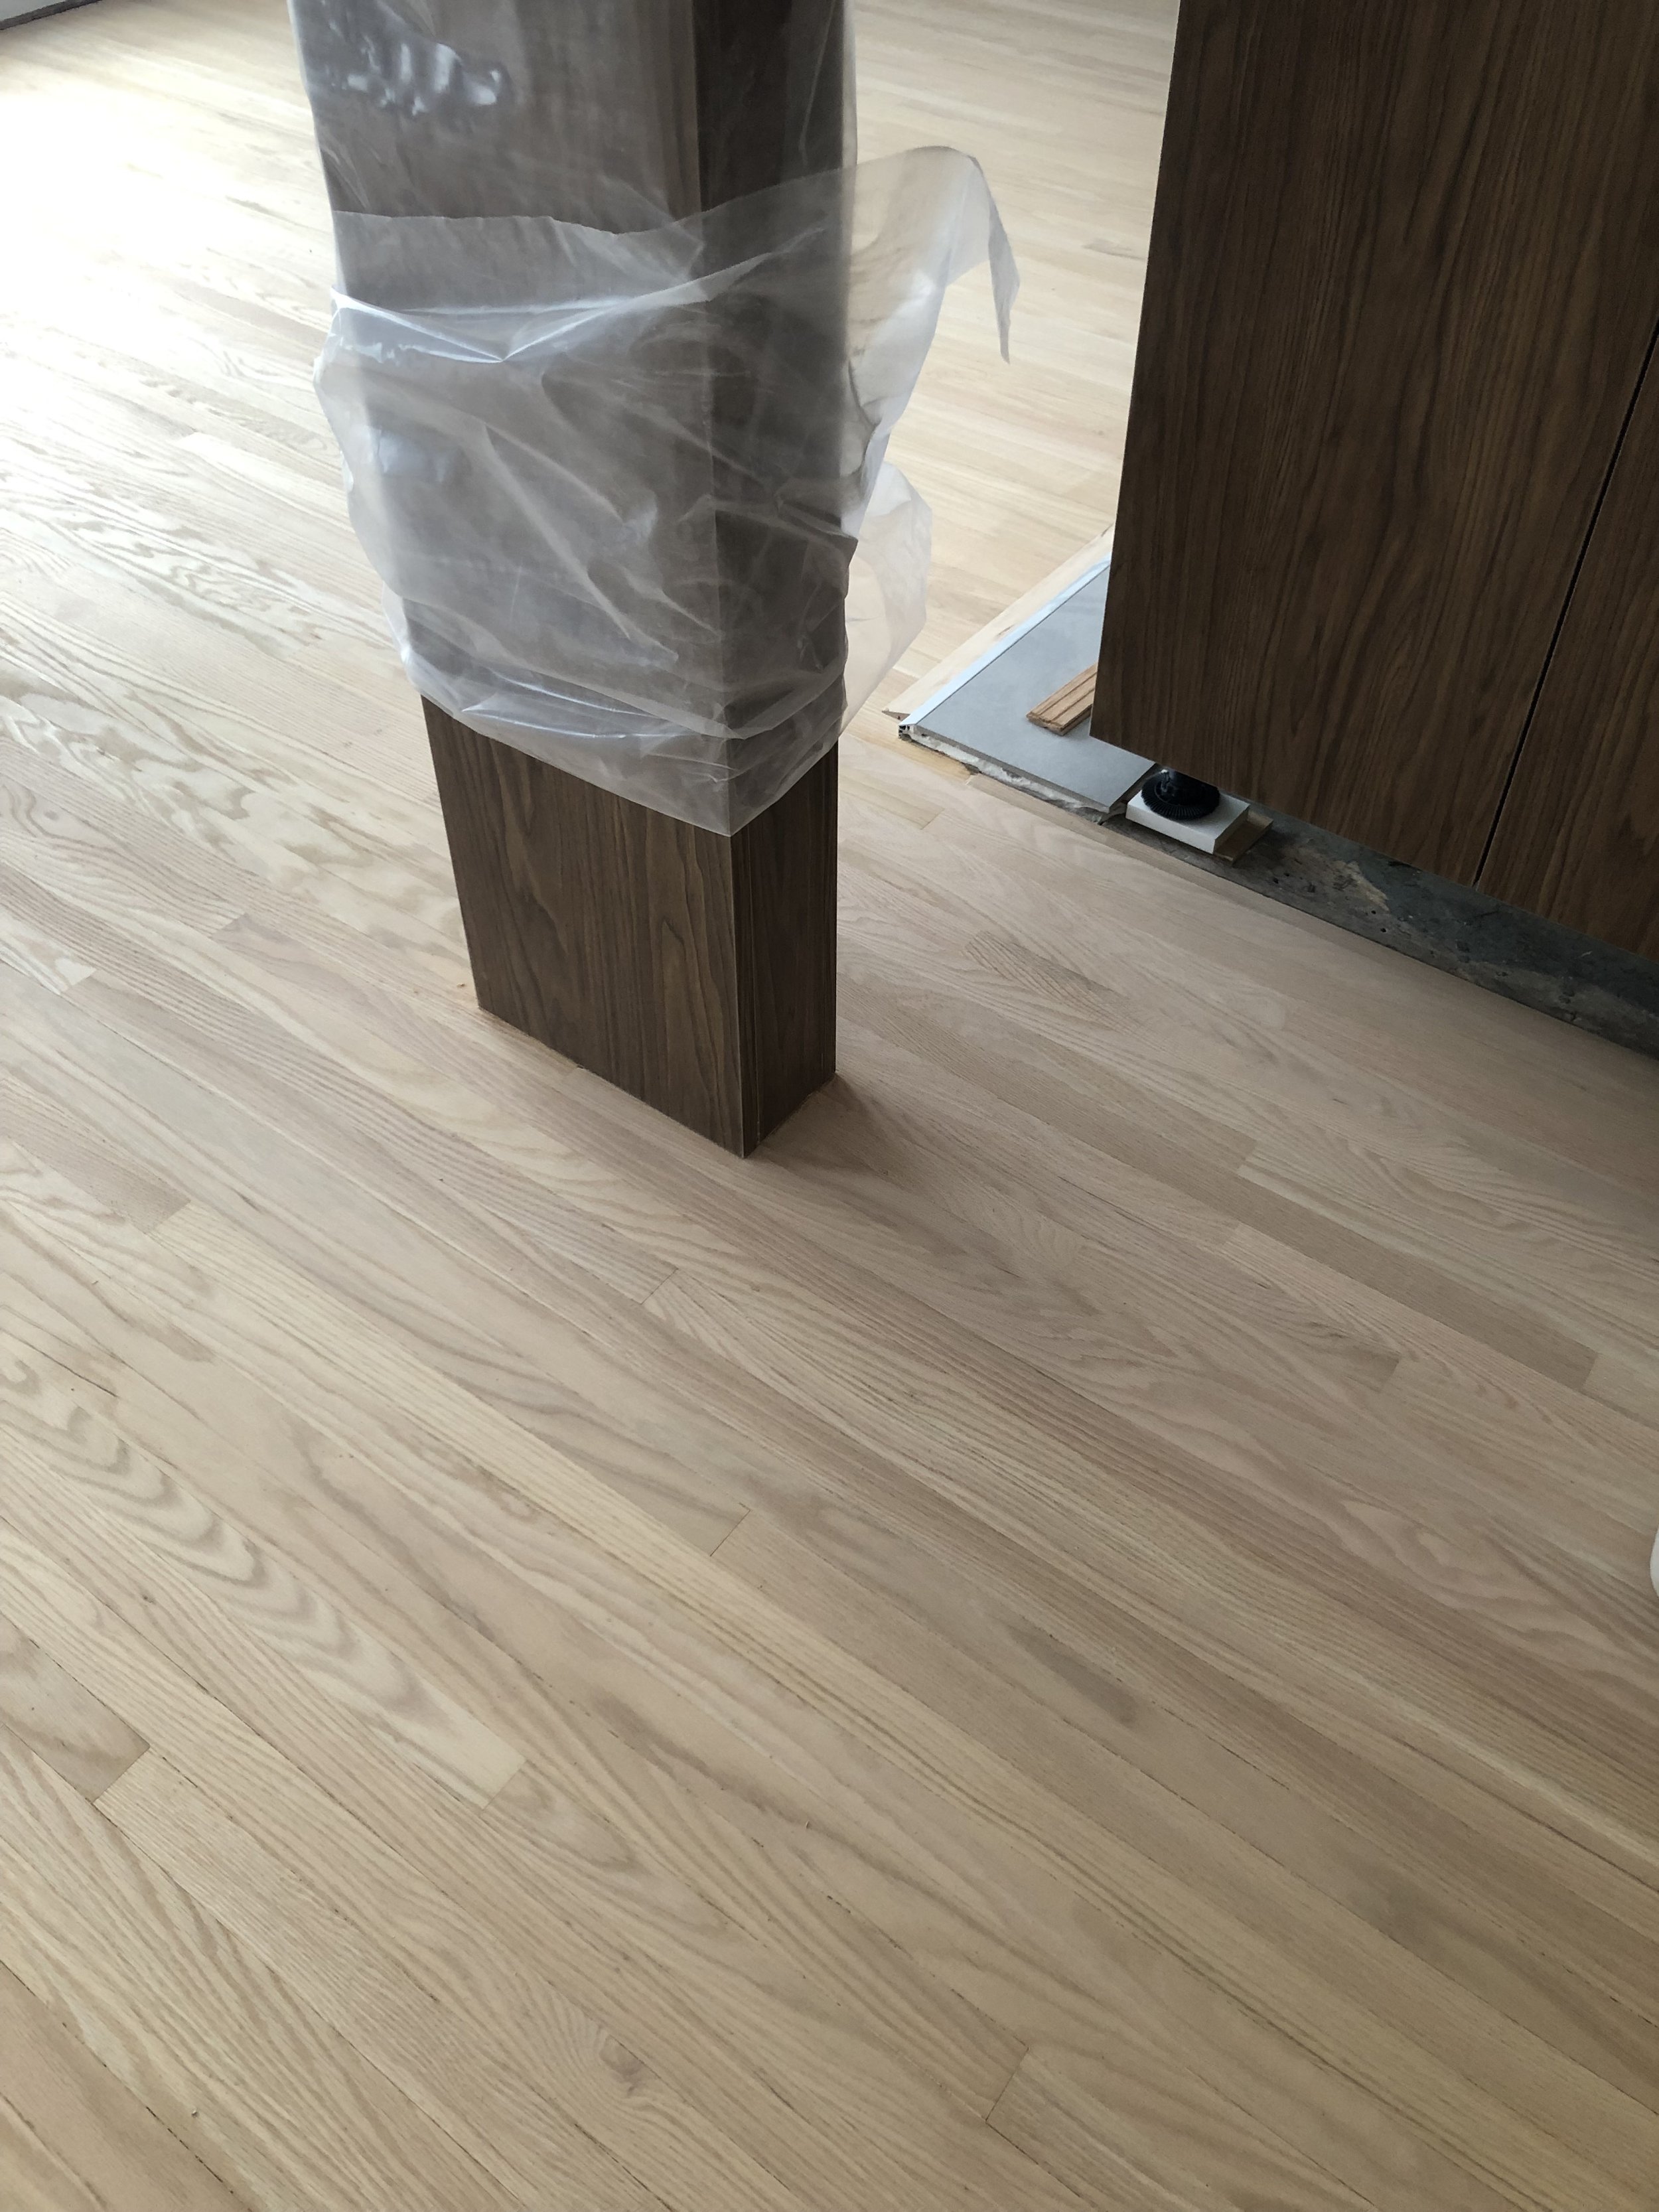
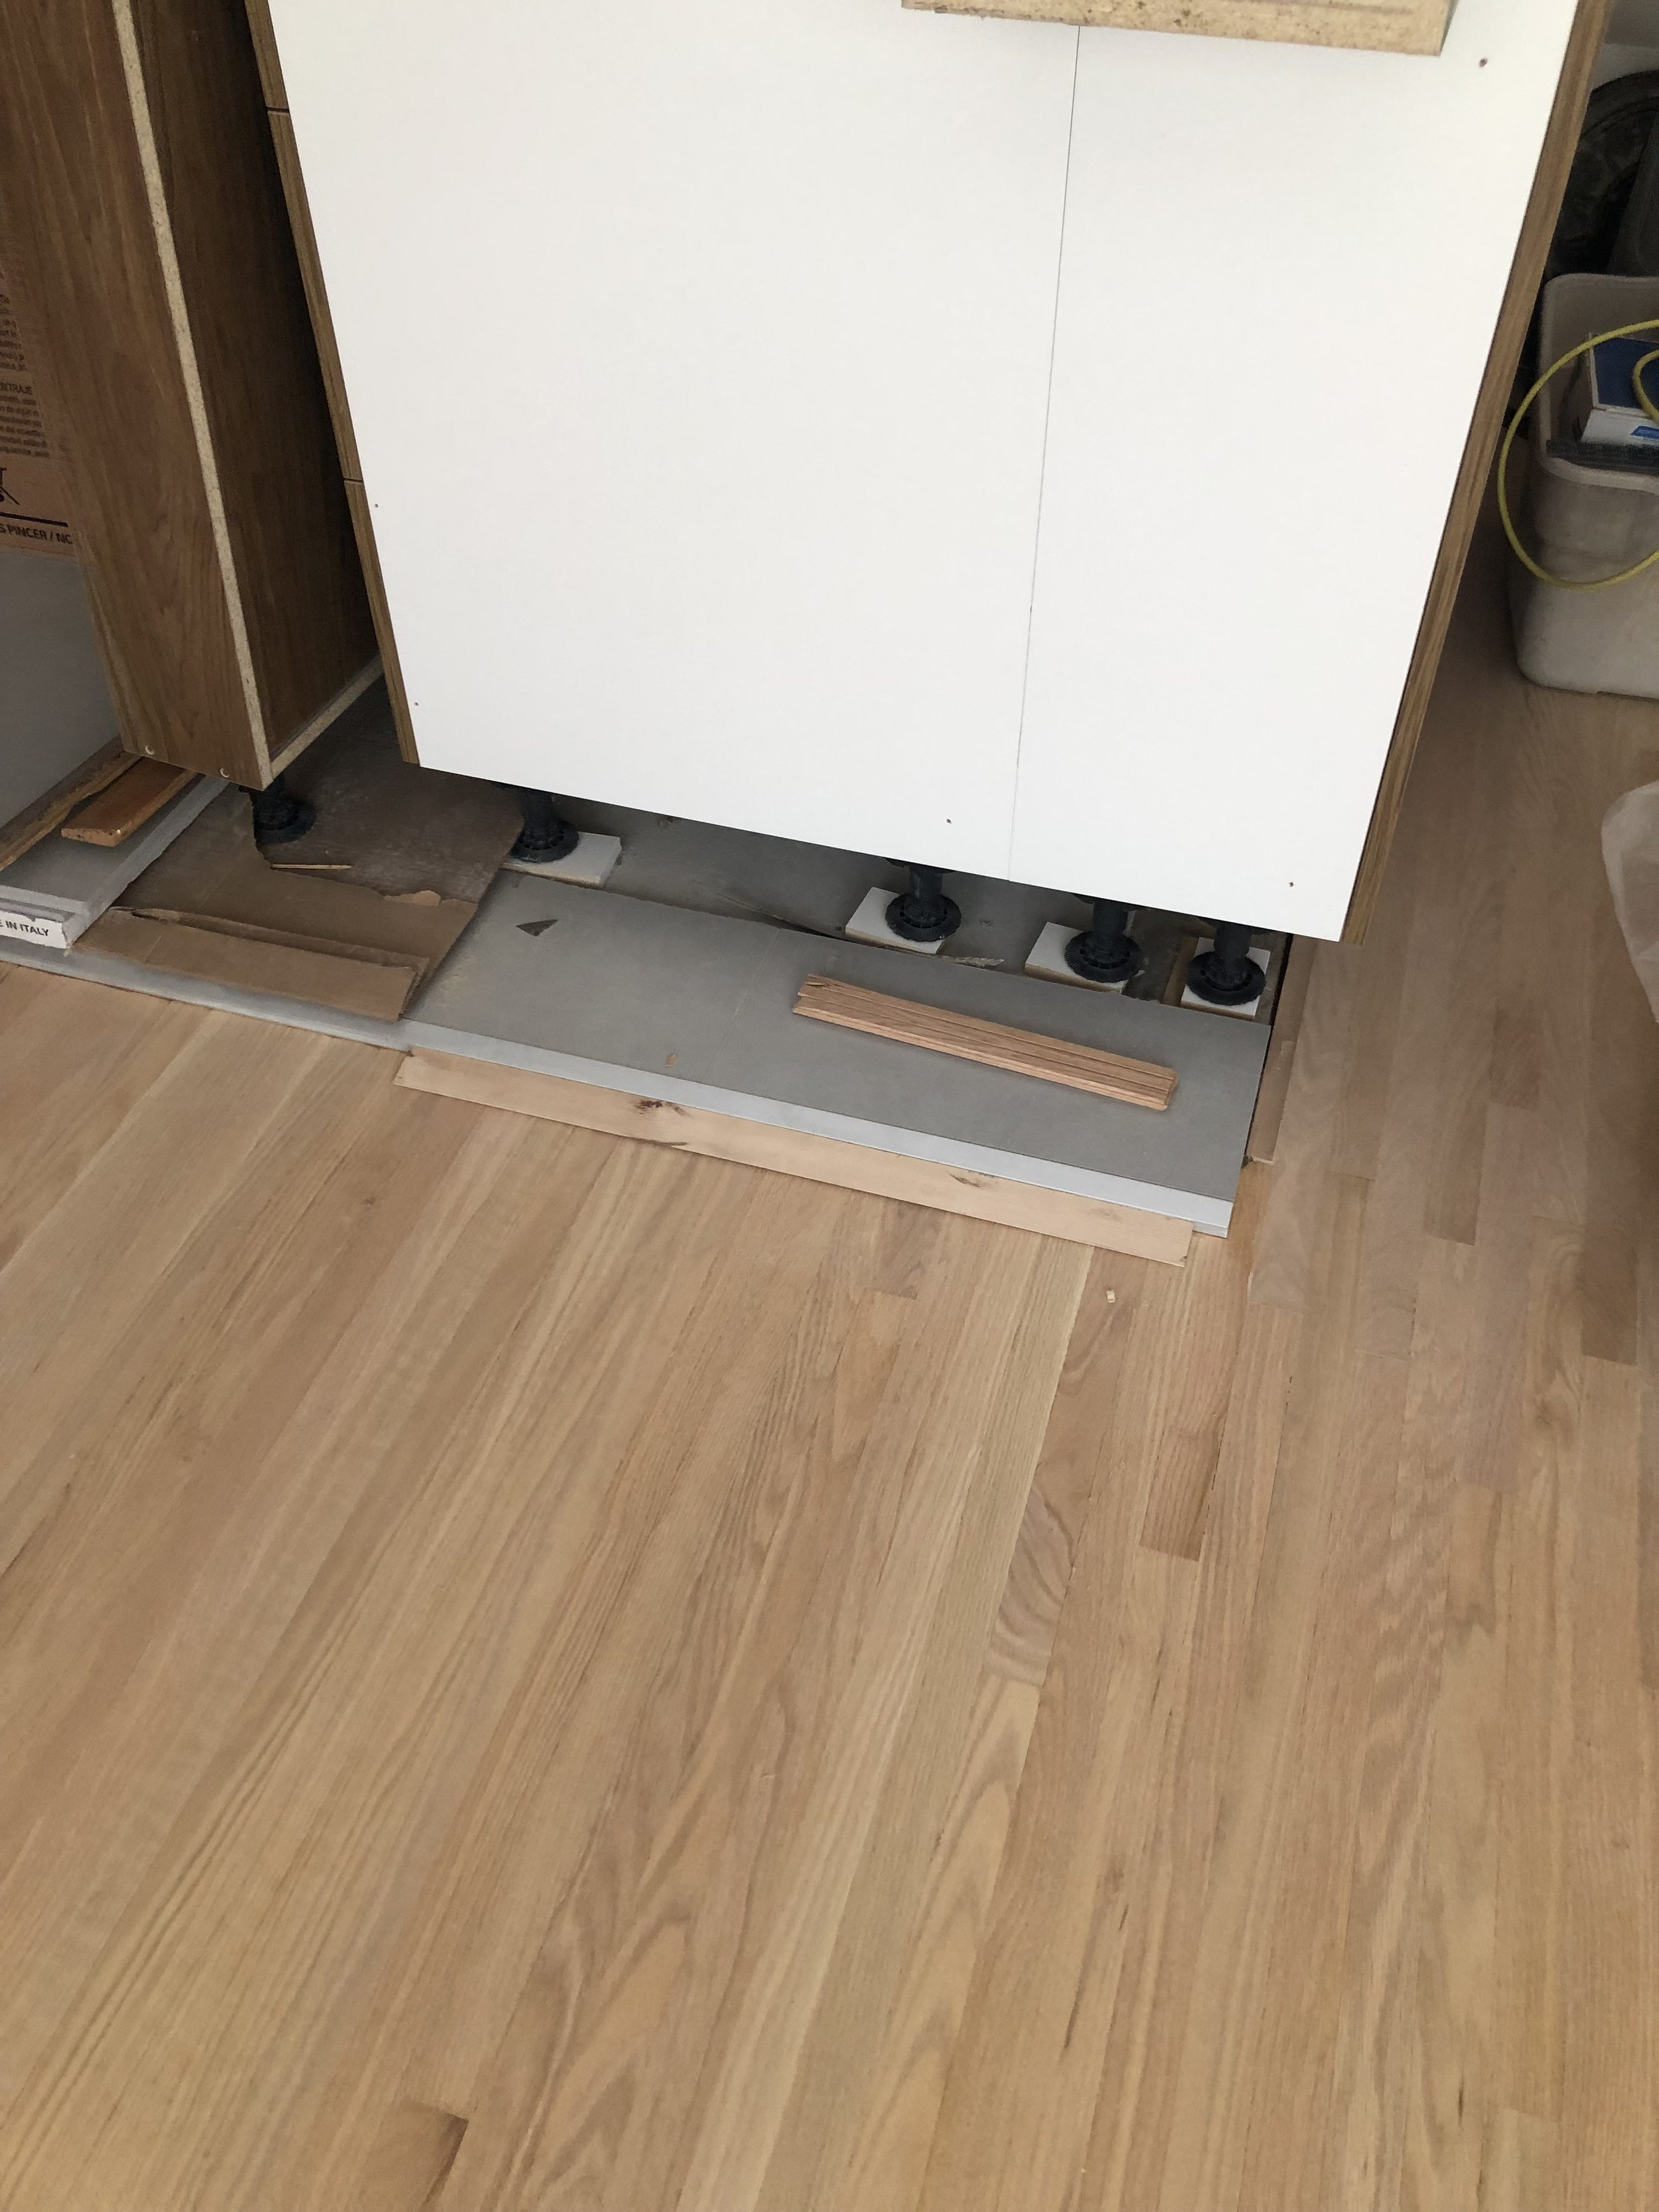
Occasionally the flooring is installed before the cabinetry, however a conscious decision was made to install the flooring after the cabinetry on this project. We needed the cabinetry to be installed first so that the floor tile was perfectly aligned with the corners of the space, particularly the centrepiece shelving unit. The tile also created a difference in height between the kitchen and the hardwood flooring spaces so installing the tile before refinishing the hardwood meant that our hardwood team could create custom height transitions between the flooring.
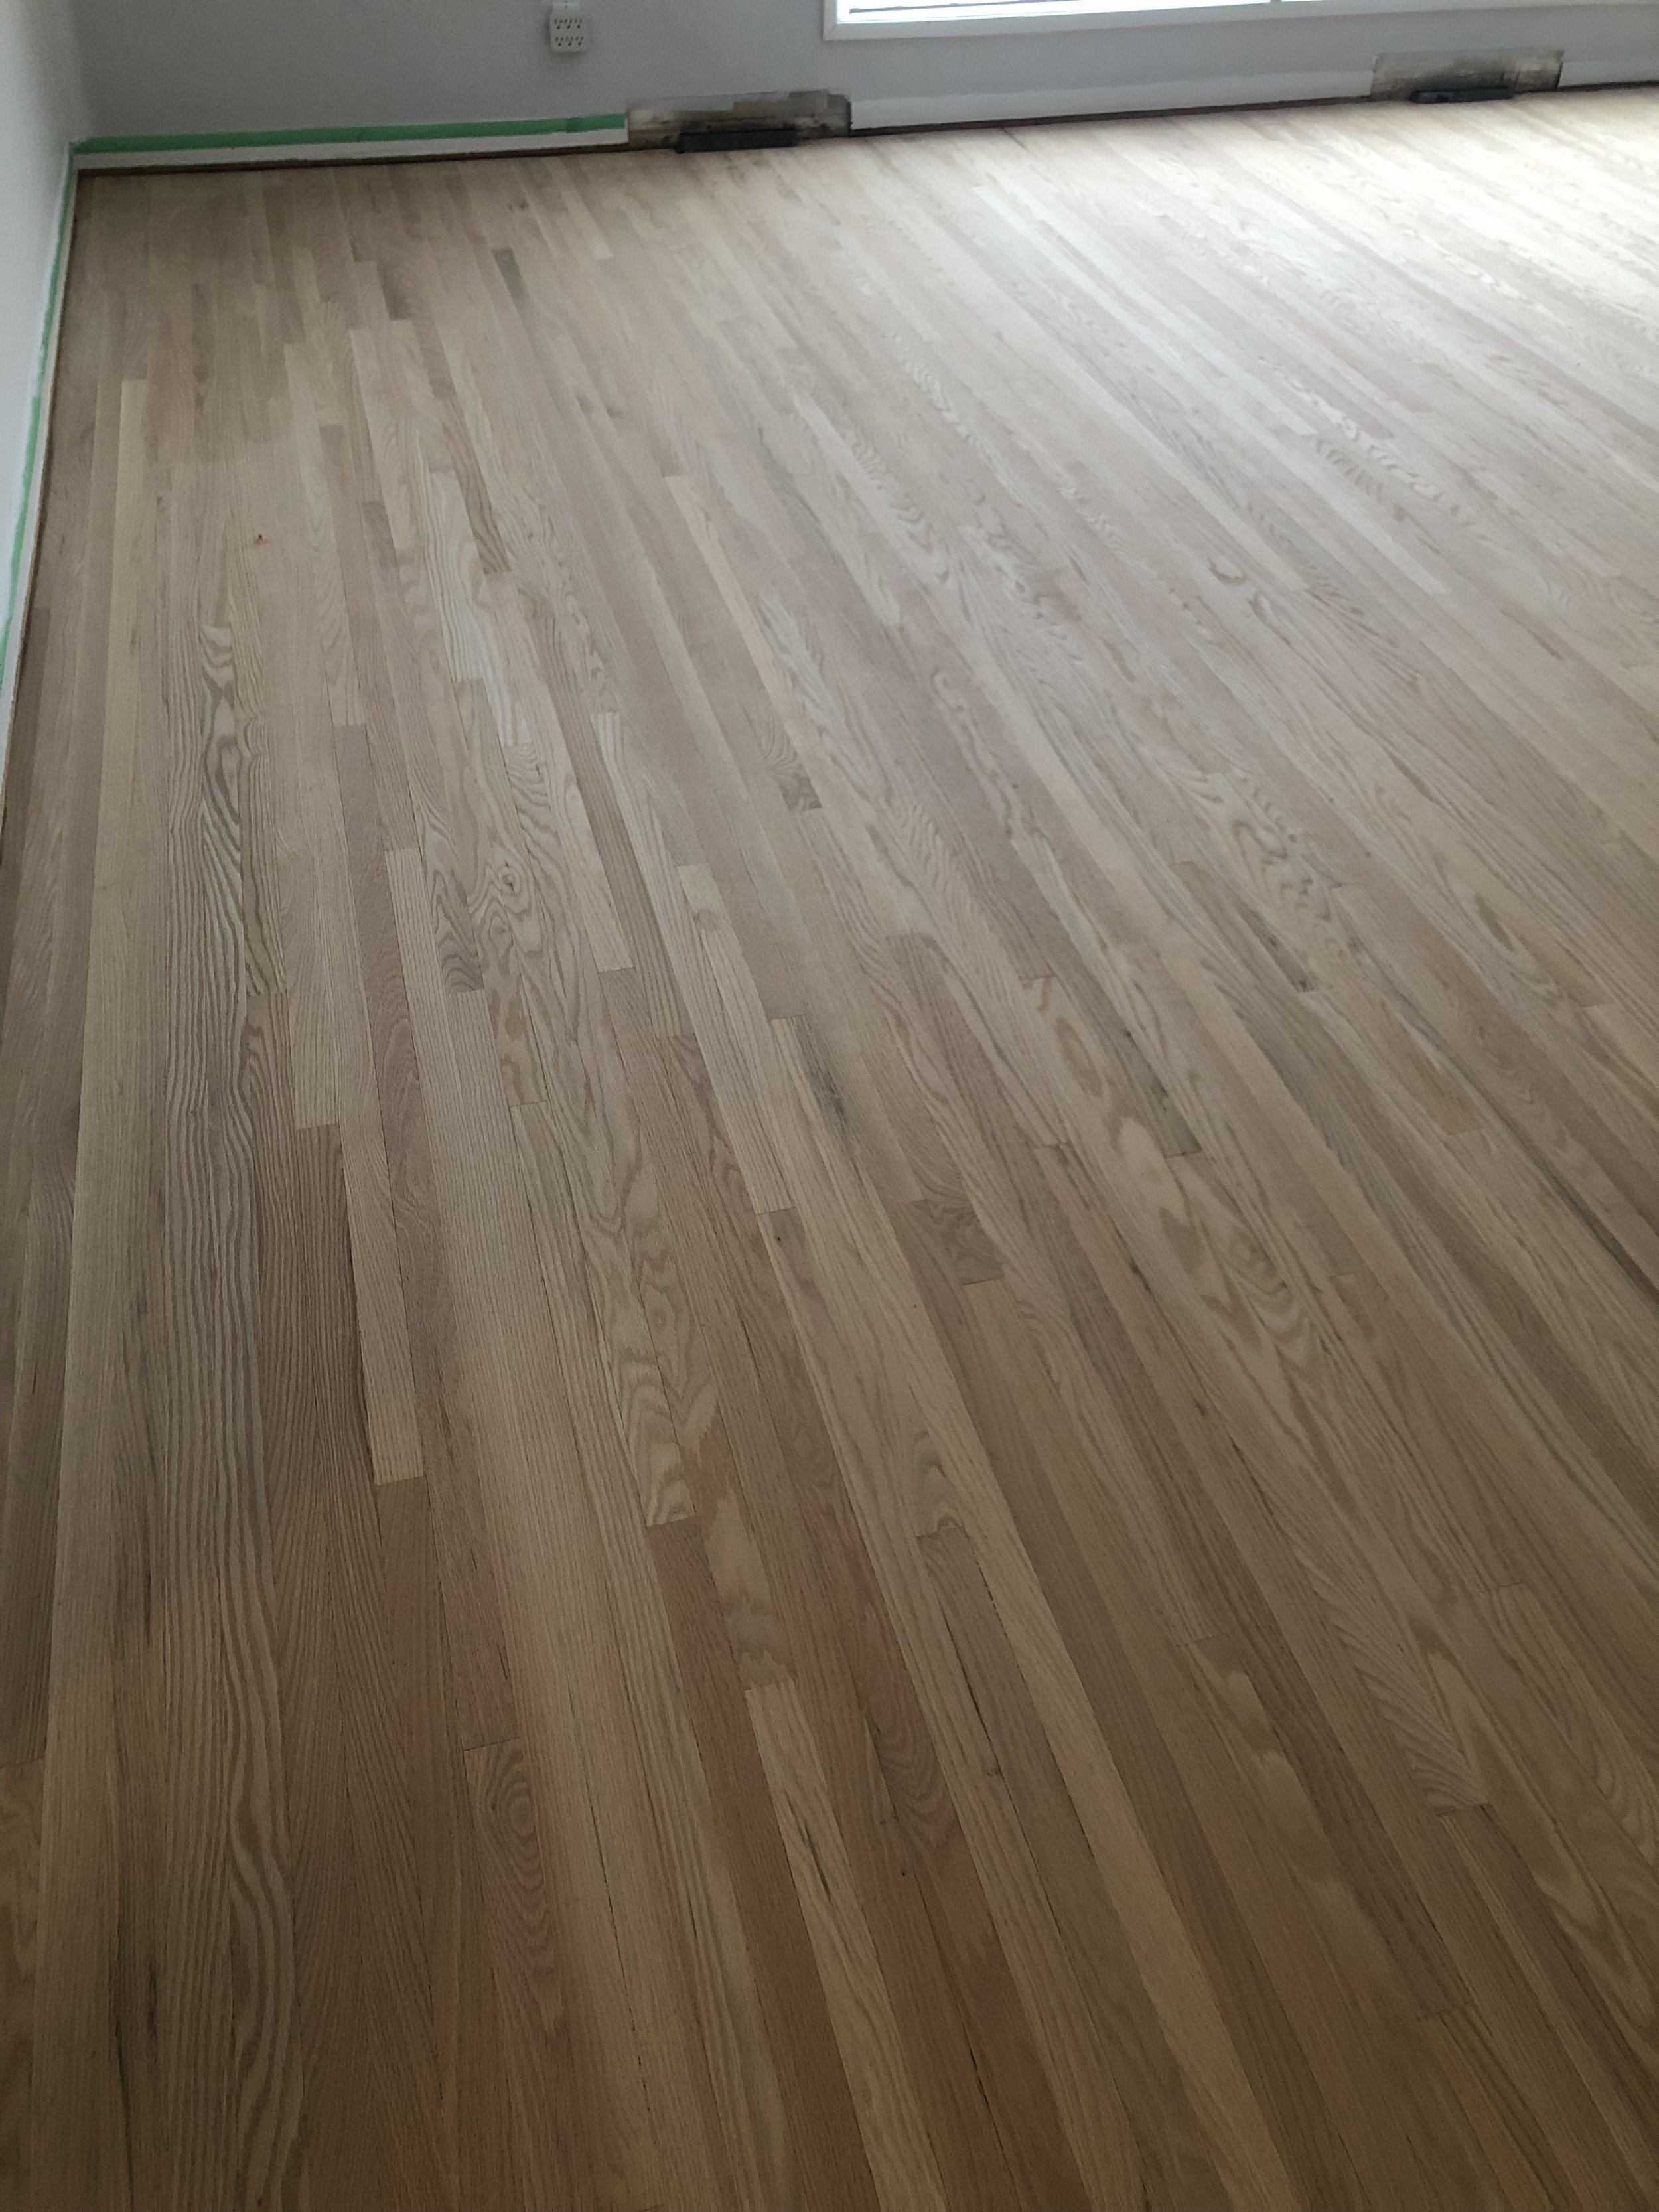
Installing the cabinetry first also ensured that our hardwood team could come and fill the gaps in the flooring between the cabinetry and existing spaces by threading in new hardwood with the old. This was done where the bearing wall was removed and where the linoleum was removed at the top of the basement stairs. The original oak hardwood flooring was sanded down throughout the entire main floor and refinished with a clear stain giving it a spectacular new lease on life! The newly threaded in hardwood flooring now looks like it was always there due to the meticulousness of our hardwood team, the transitions between the tile, hardwood, and new carpeting on the basement stairs are seamless, and the flooring is a beautiful backdrop for the rest of the home.

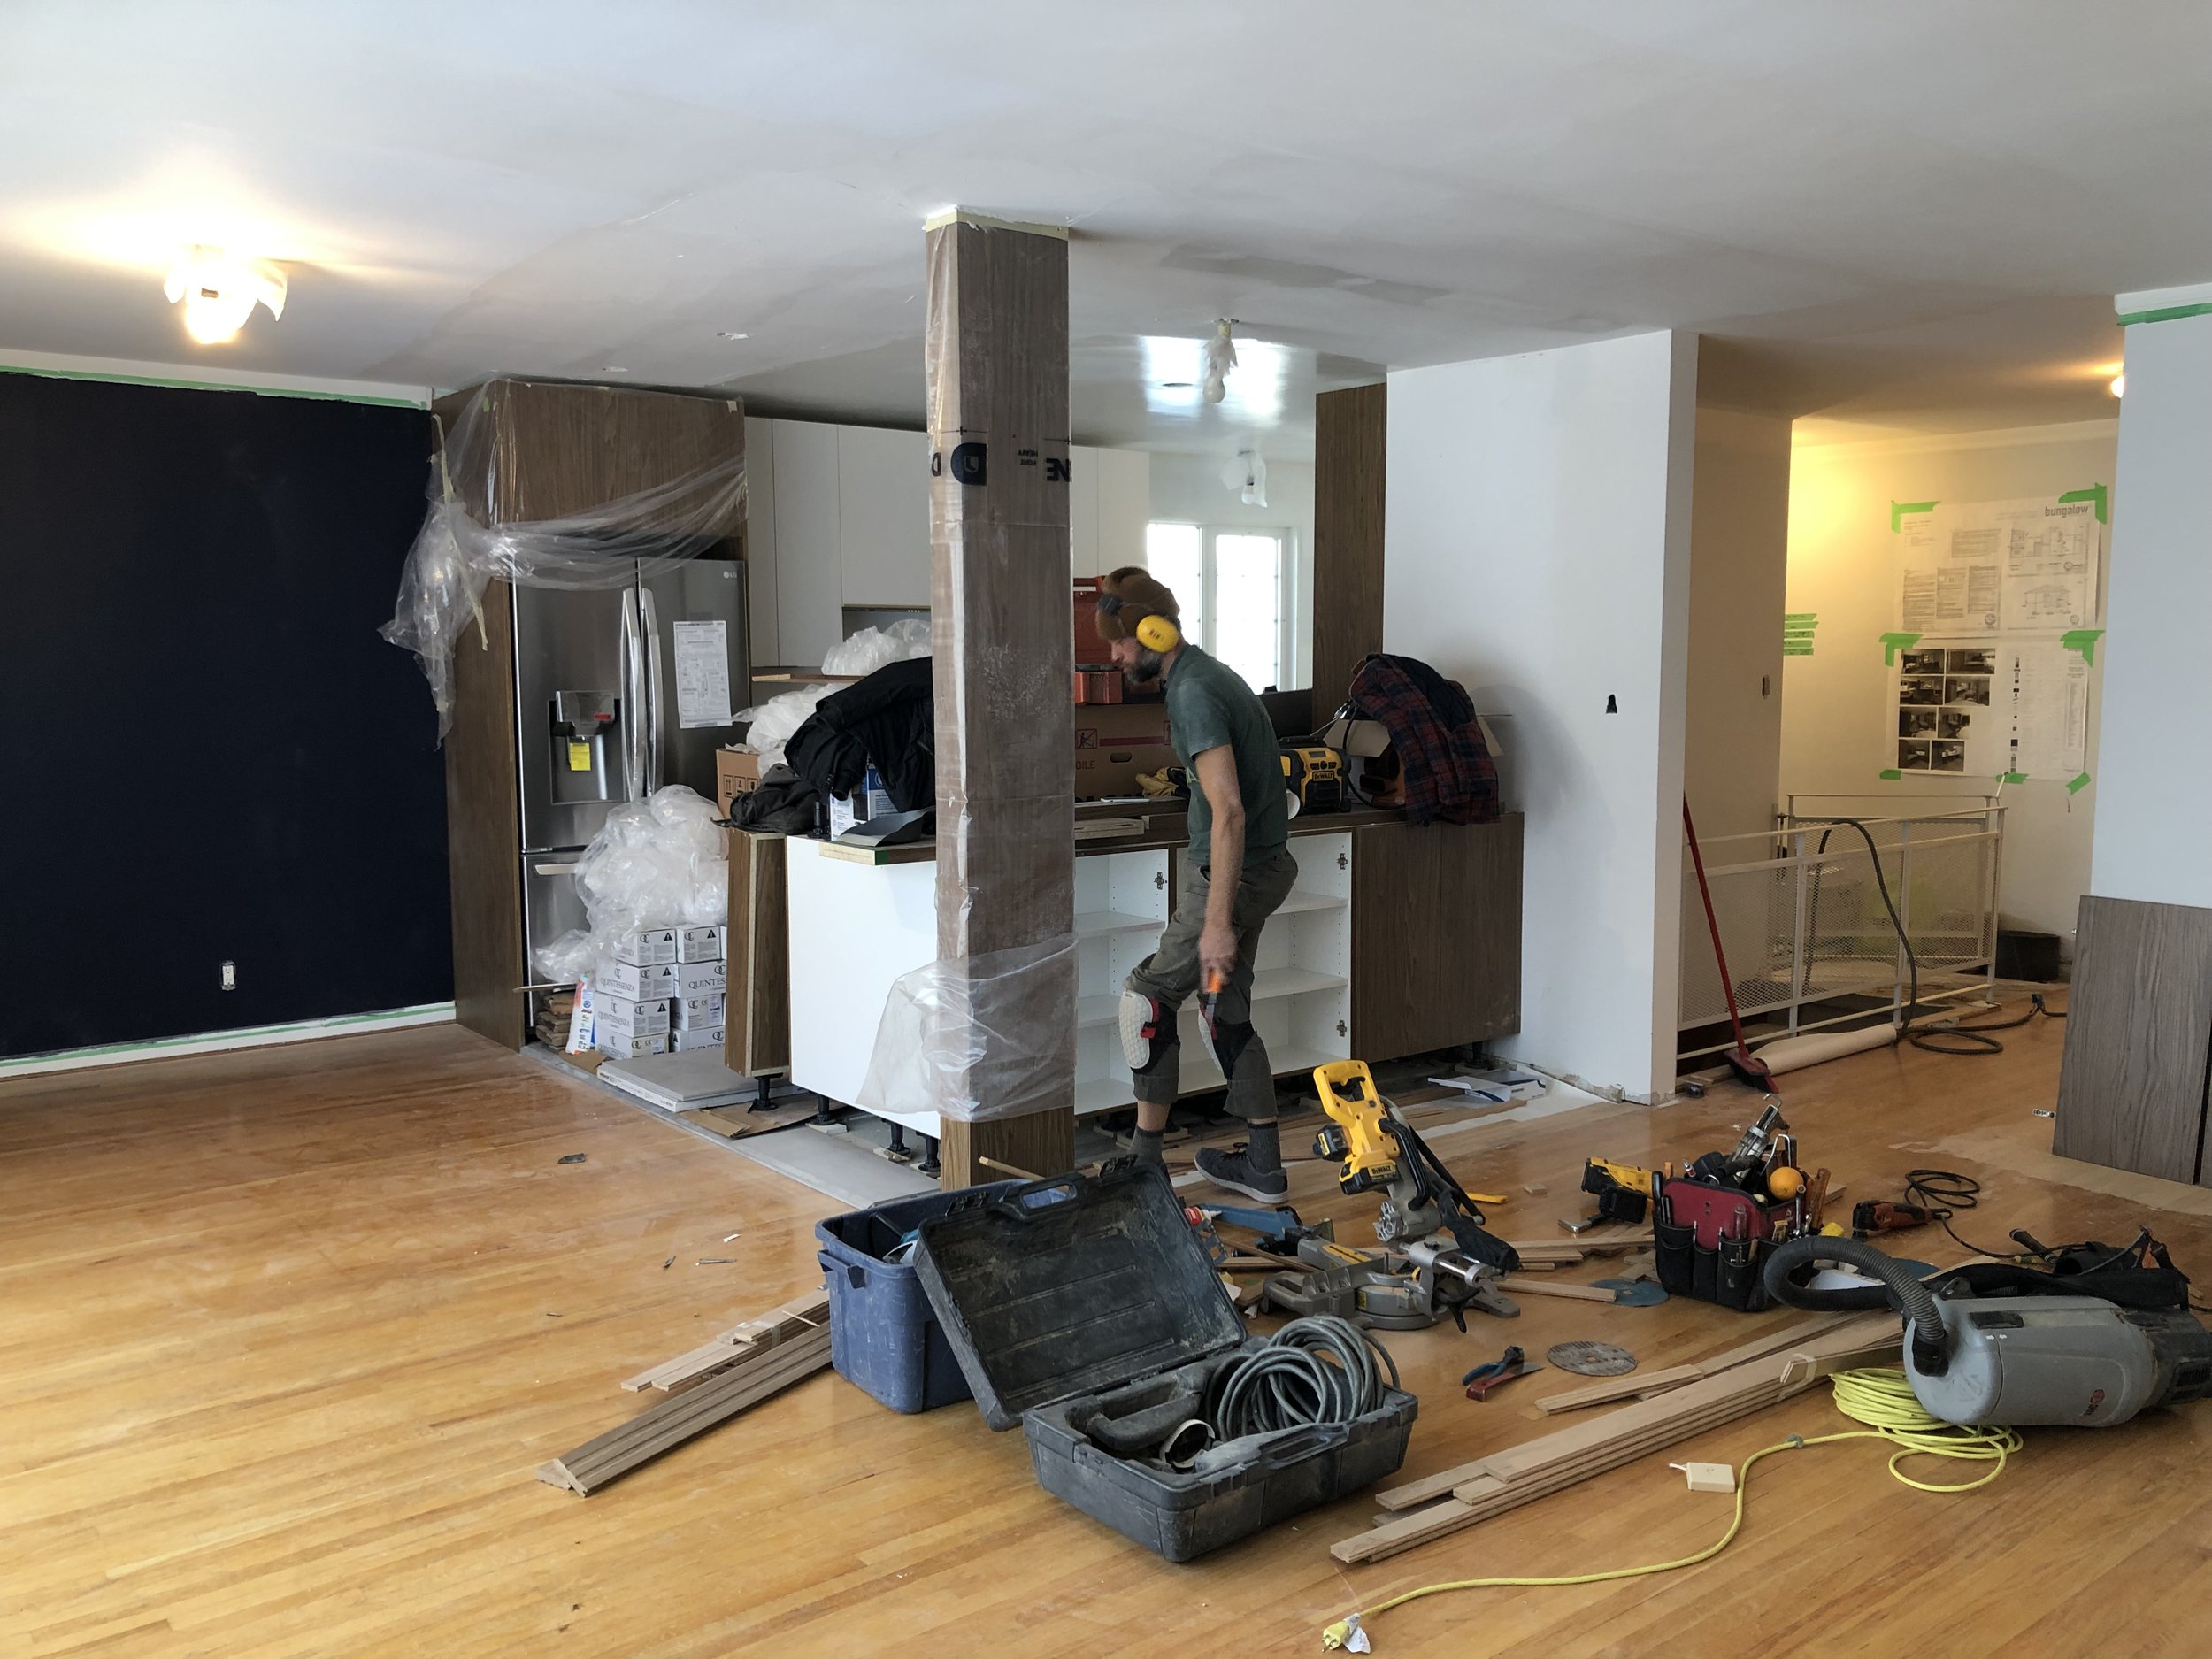


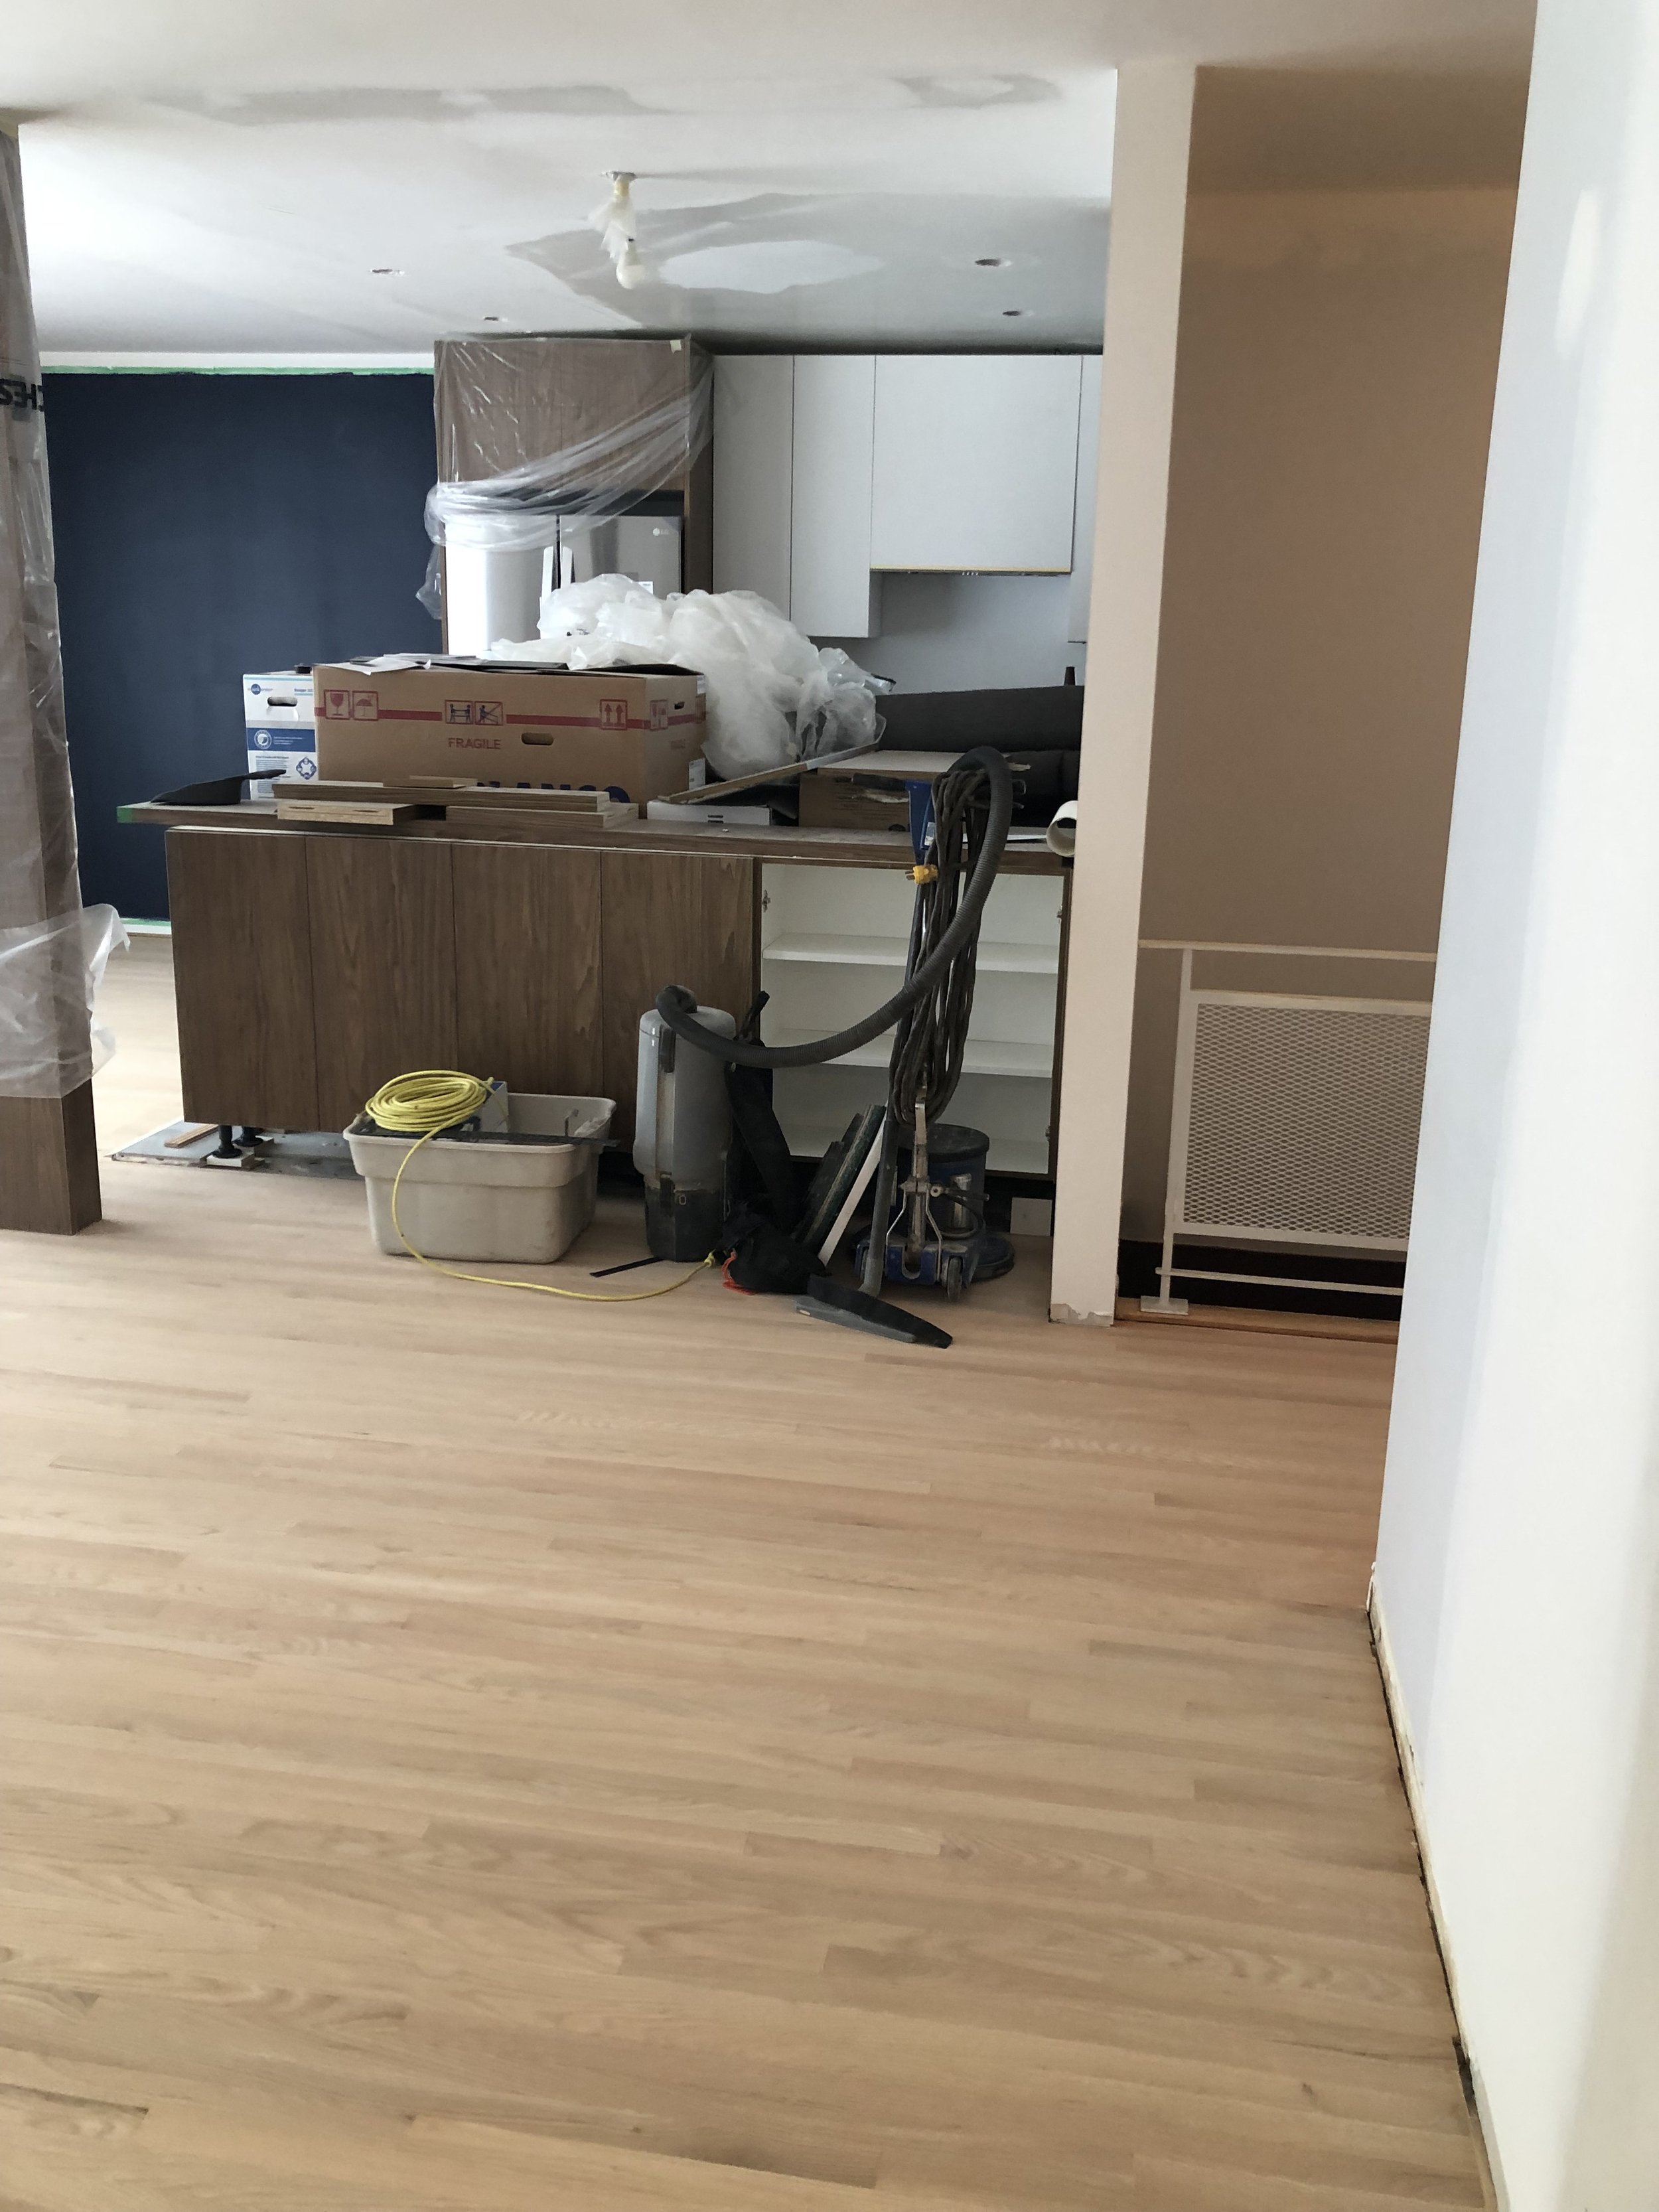
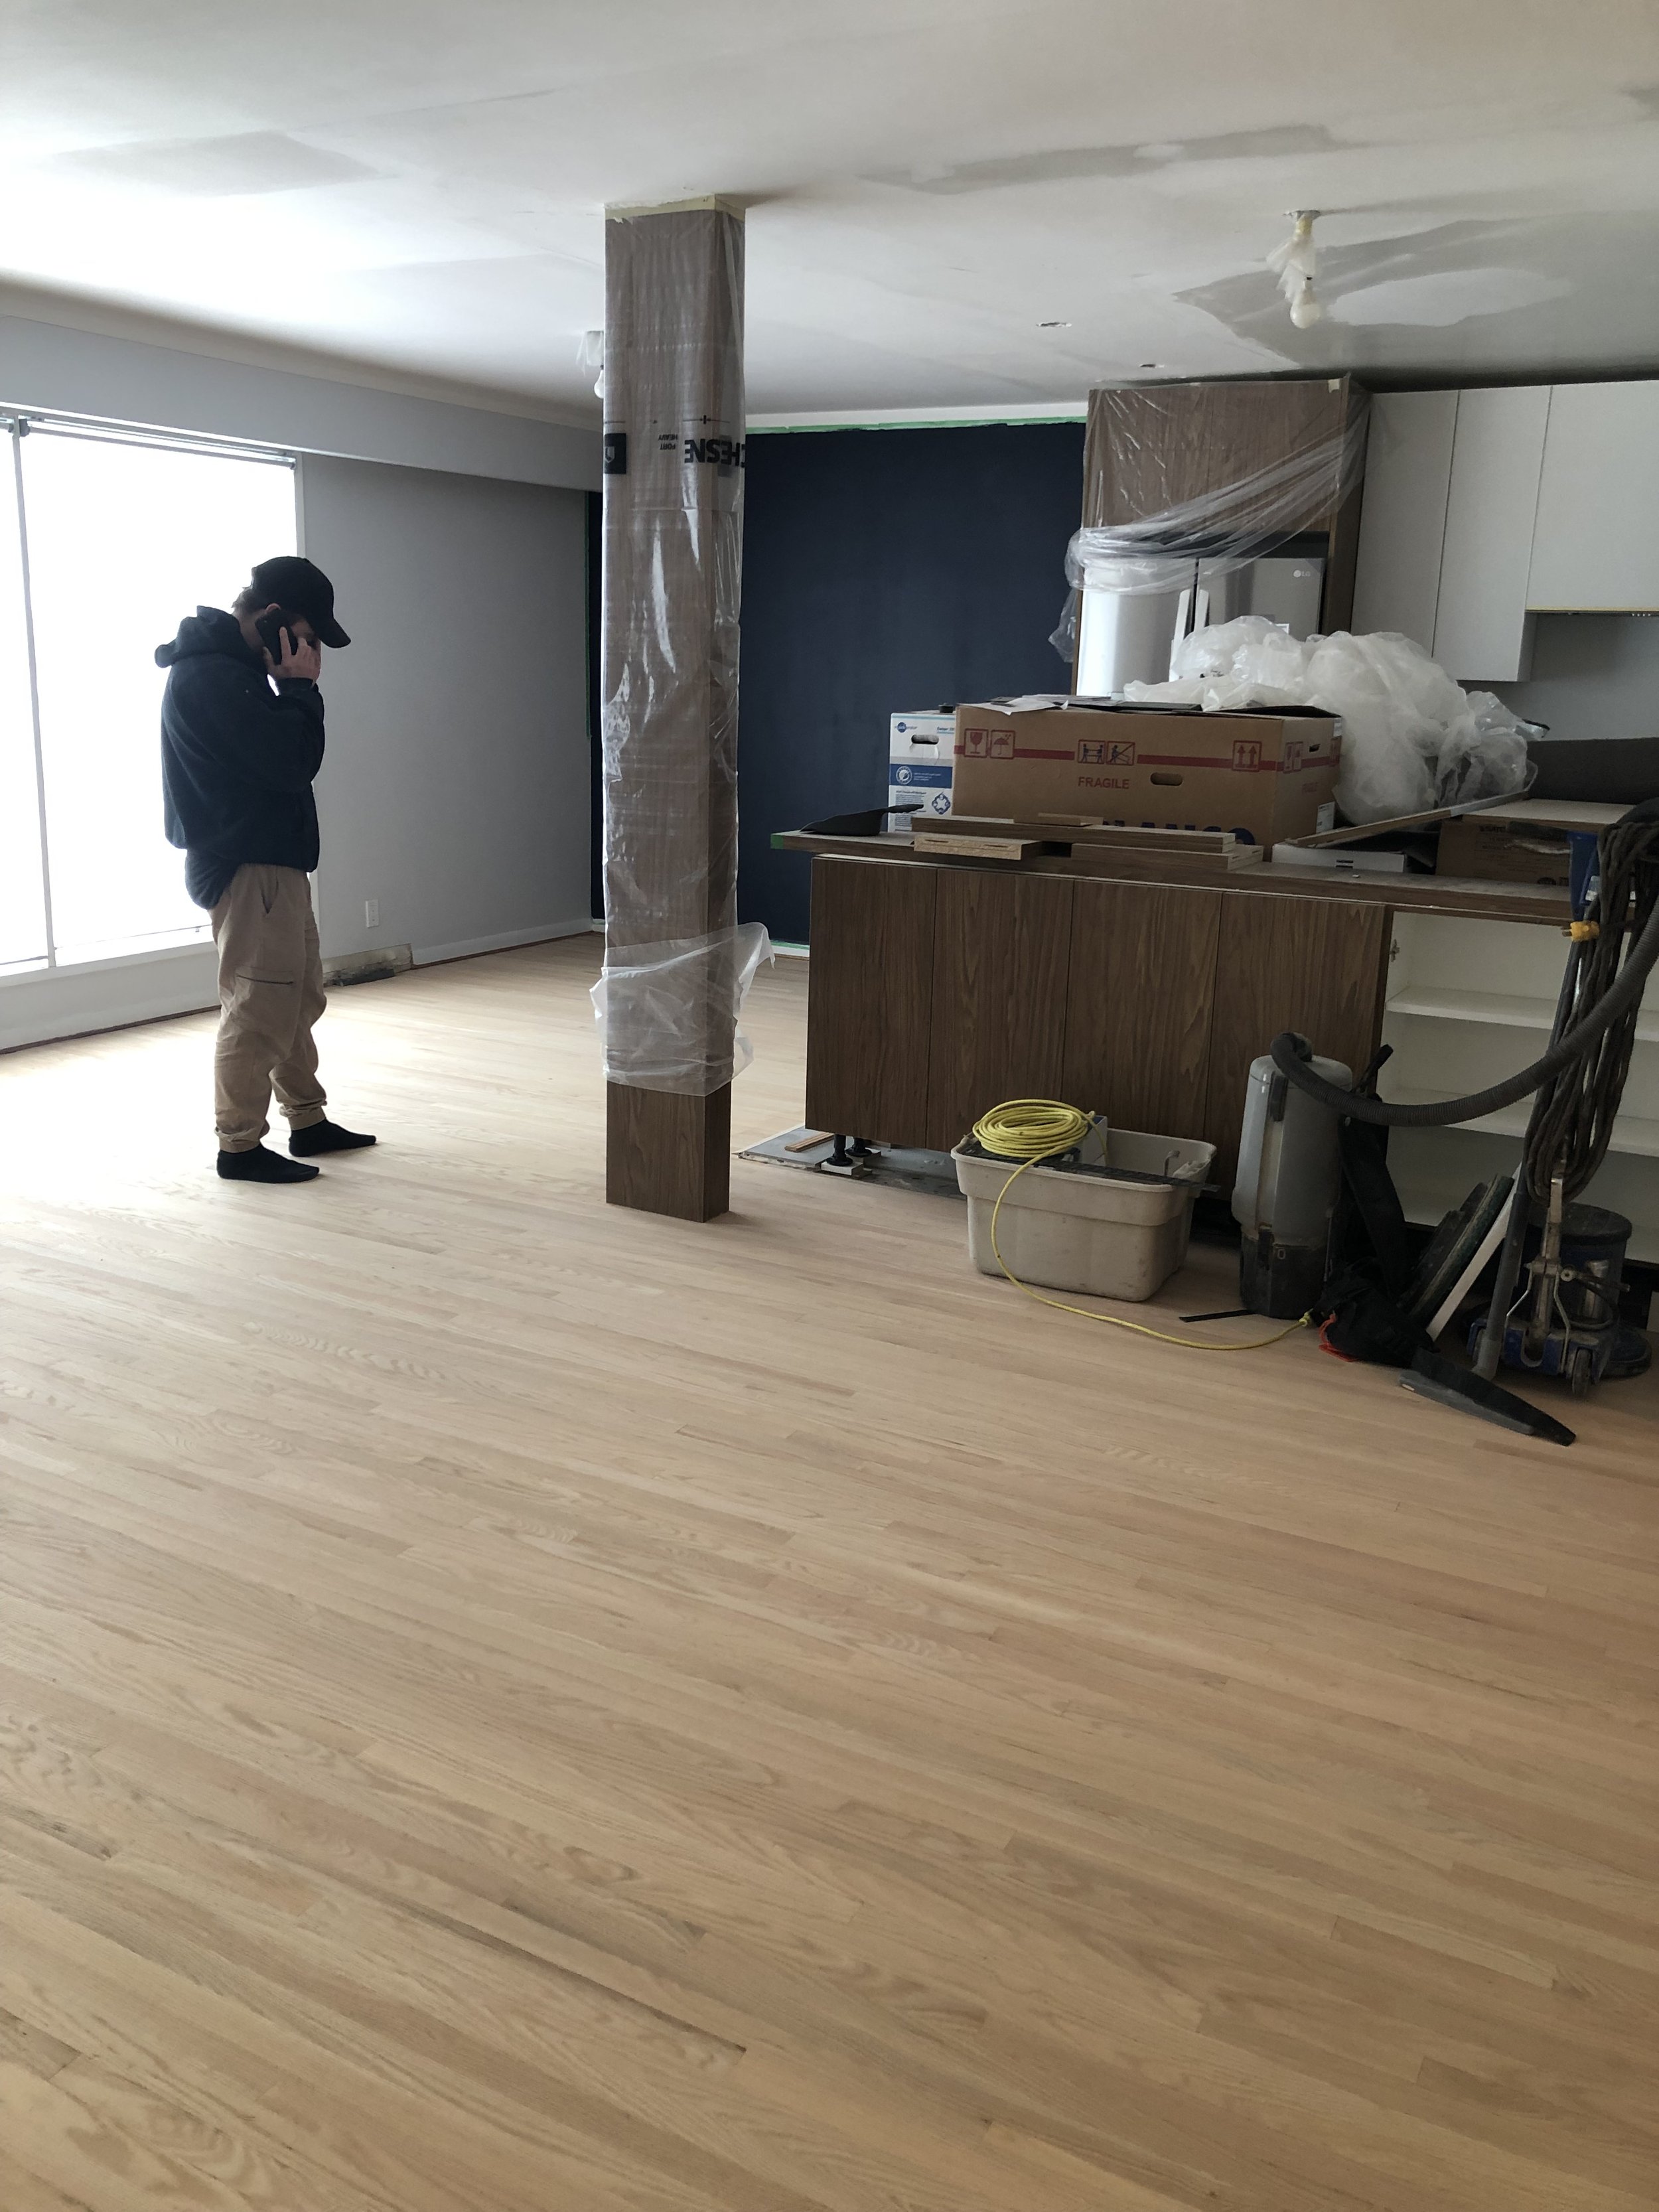
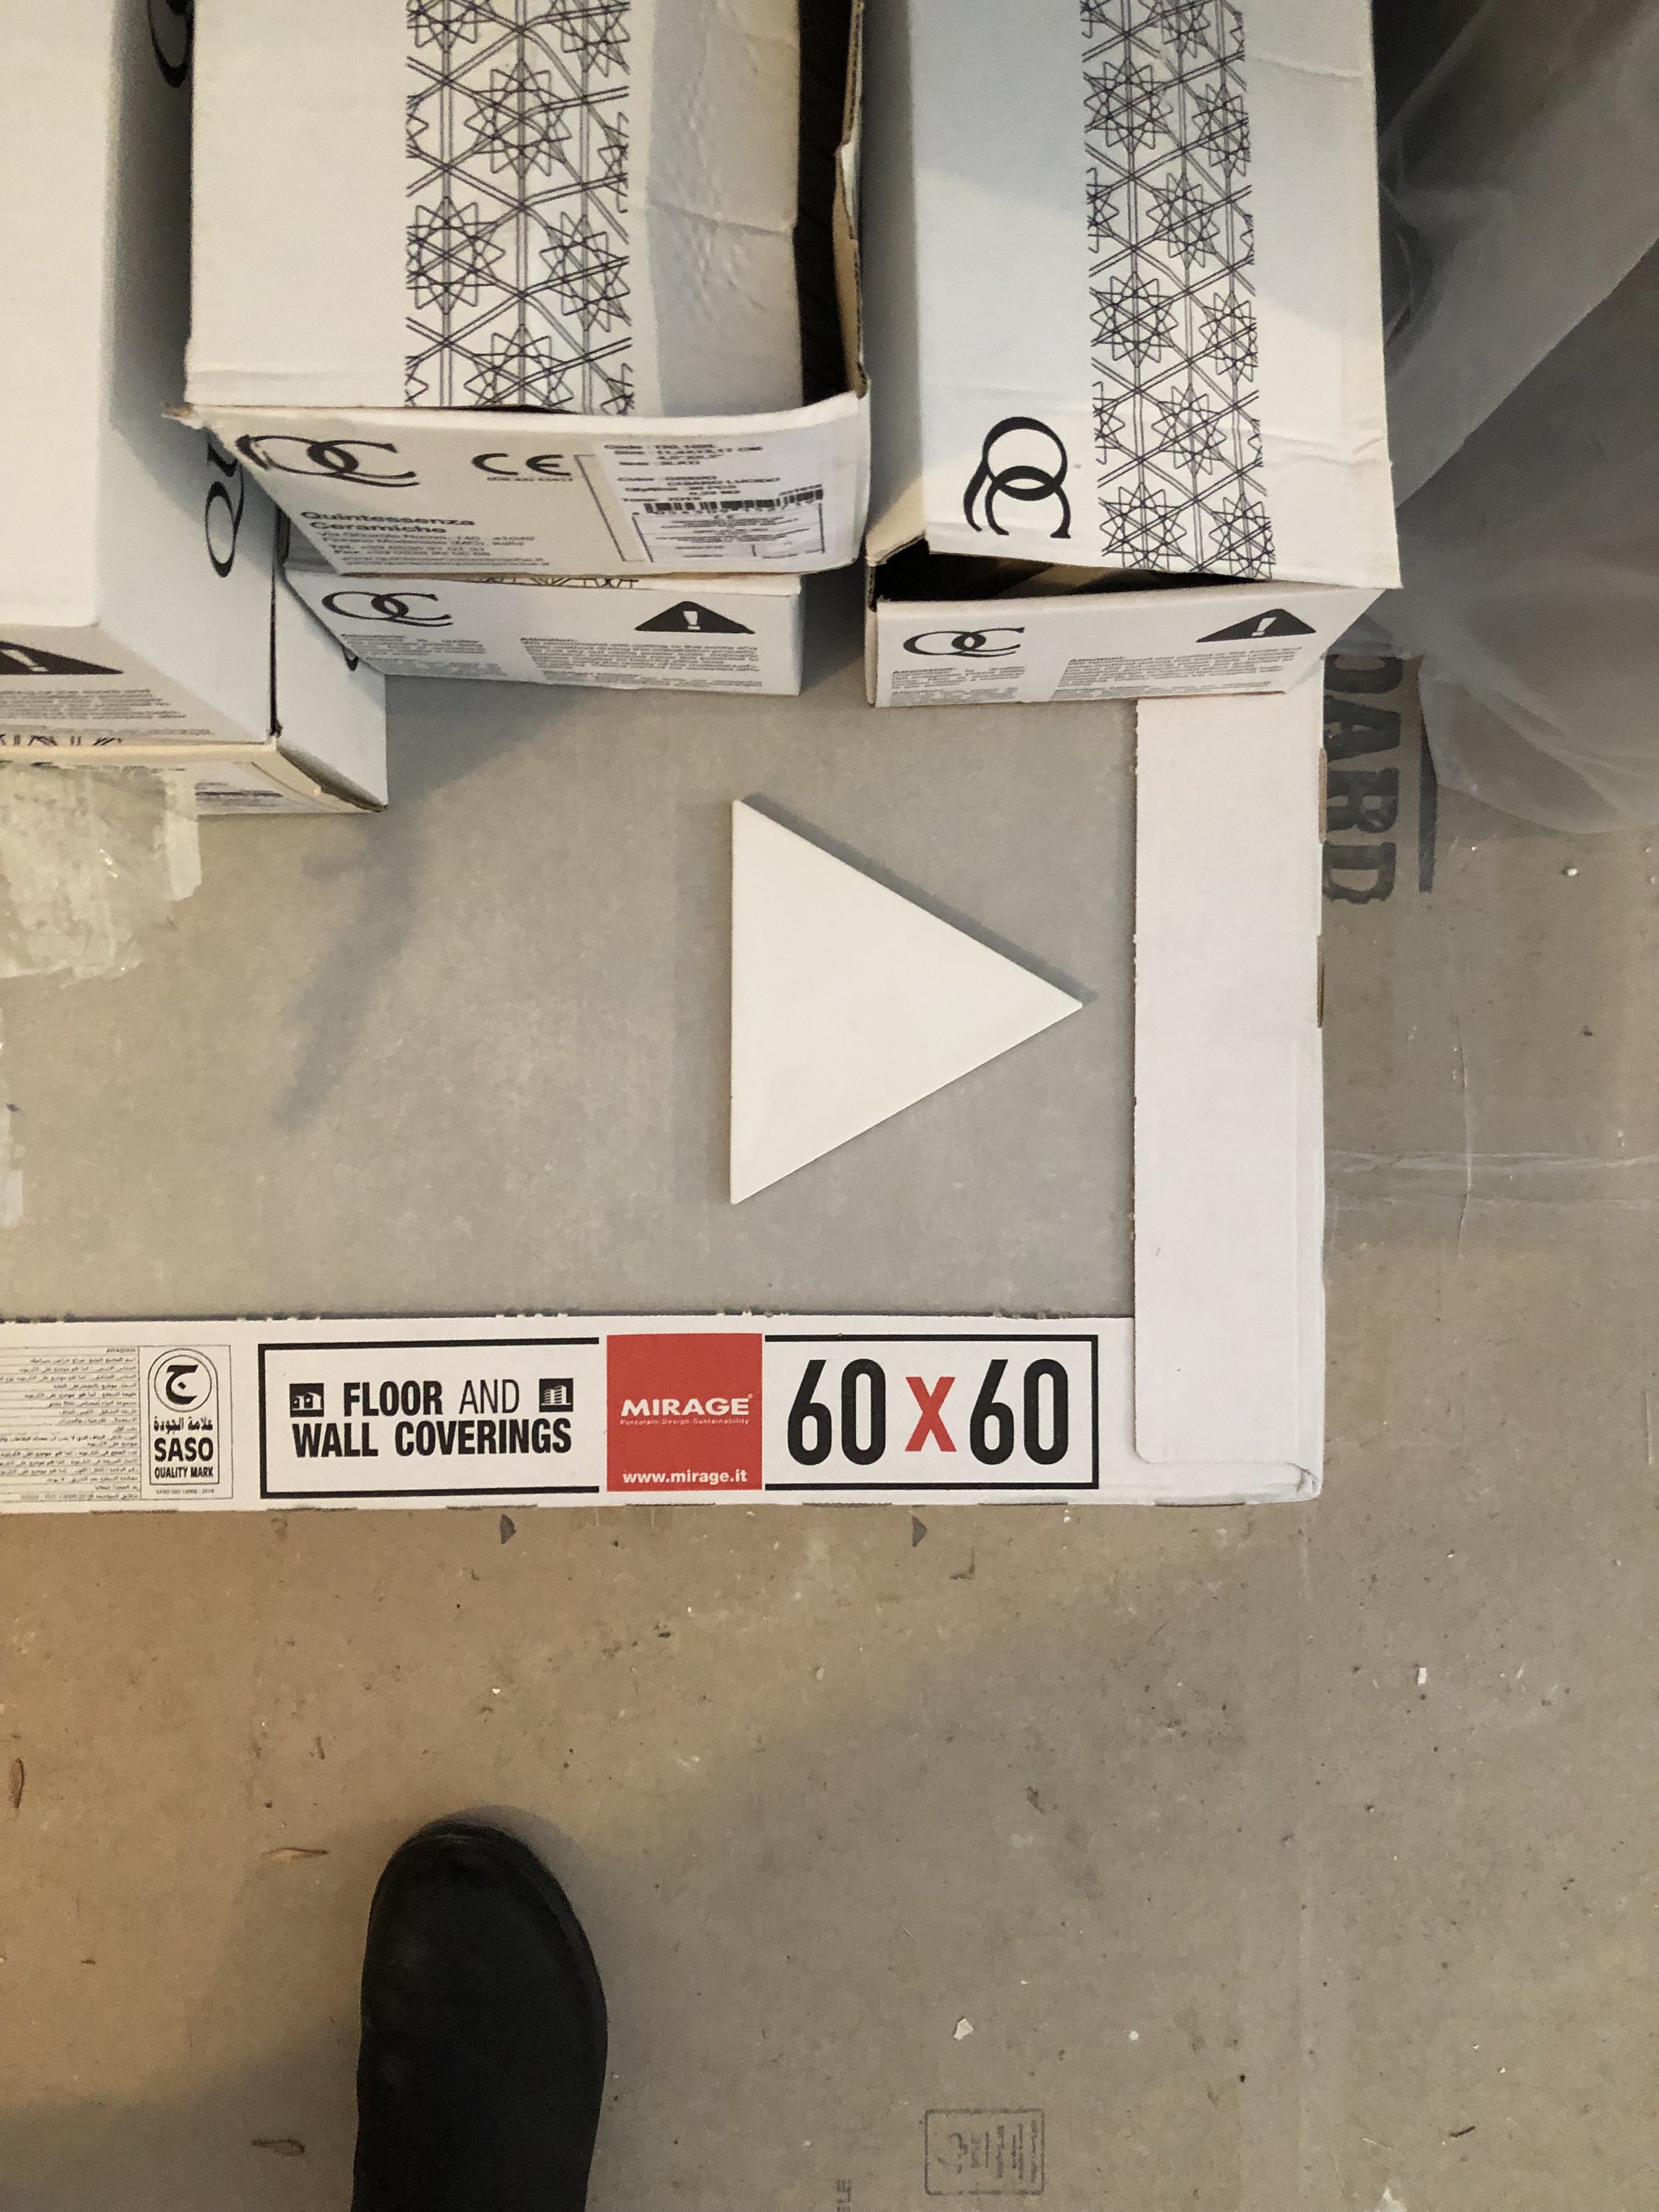
Finally, the last of the finishing touches were applied. The countertops were installed along with the sink and faucet. Our tile setter returned to install the beautiful triangular backsplash. Lighting was installed throughout and the reordered shelves arrived. Appliances were carefully slipped into place, the basement railing was painted black, and touchups were done where necessary.
A F T E R

Completed in January 2022, this mid-century modern kitchen is everything the homeowners were hoping for. They now enjoy creating pizzas and calzones (and much more!) together on the peninsula and look forward to hosting their friends and family in the space in the future.
For all of the after photos, click here.
T I M E L A P S E
Check out the timelapse of the construction of this project!
A N O T E F R O M T H E H O M E O W N E R S:
“Thank you so much for all your time and for making us a kitchen (and home) that we love. We appreciate that you were considerate of our budget, worked hard to solve issues, were organized, and communicative. We’re proud of our kitchen now and are excited to tell everyone we worked with Bungalow ID, a local company run by strong and talented women leaders. Keep up the amazing work.”
FURTHER READING


