
5 Ways to Maximize Storage in your Renovation
Spring is just around the corner, and you know what that means – it's almost time for the annual deep cleaning and decluttering.
As we gear up to tackle overstuffed closets and cluttered corners, it's not uncommon to come face to face with the age-old dilemma: there's just never enough storage space. But fear not, if you've ever found yourself drowning in a sea of belongings, fretting over where to stow your essentials, you're not alone. At Bungalow, we love turning storage woes into storage wonders. Through creativity and strategic planning, we've helped countless clients unlock the hidden potential of their spaces.
So, grab your favourite beverage (ours is Pepsi!) and get ready to be inspired as we unveil five ways we've maximized storage for our clients over the years. From clever closet configurations to under-utilized nooks and crannies, we've got you covered. Let's dive in!
I N C O R P O R A T E L E D G E S
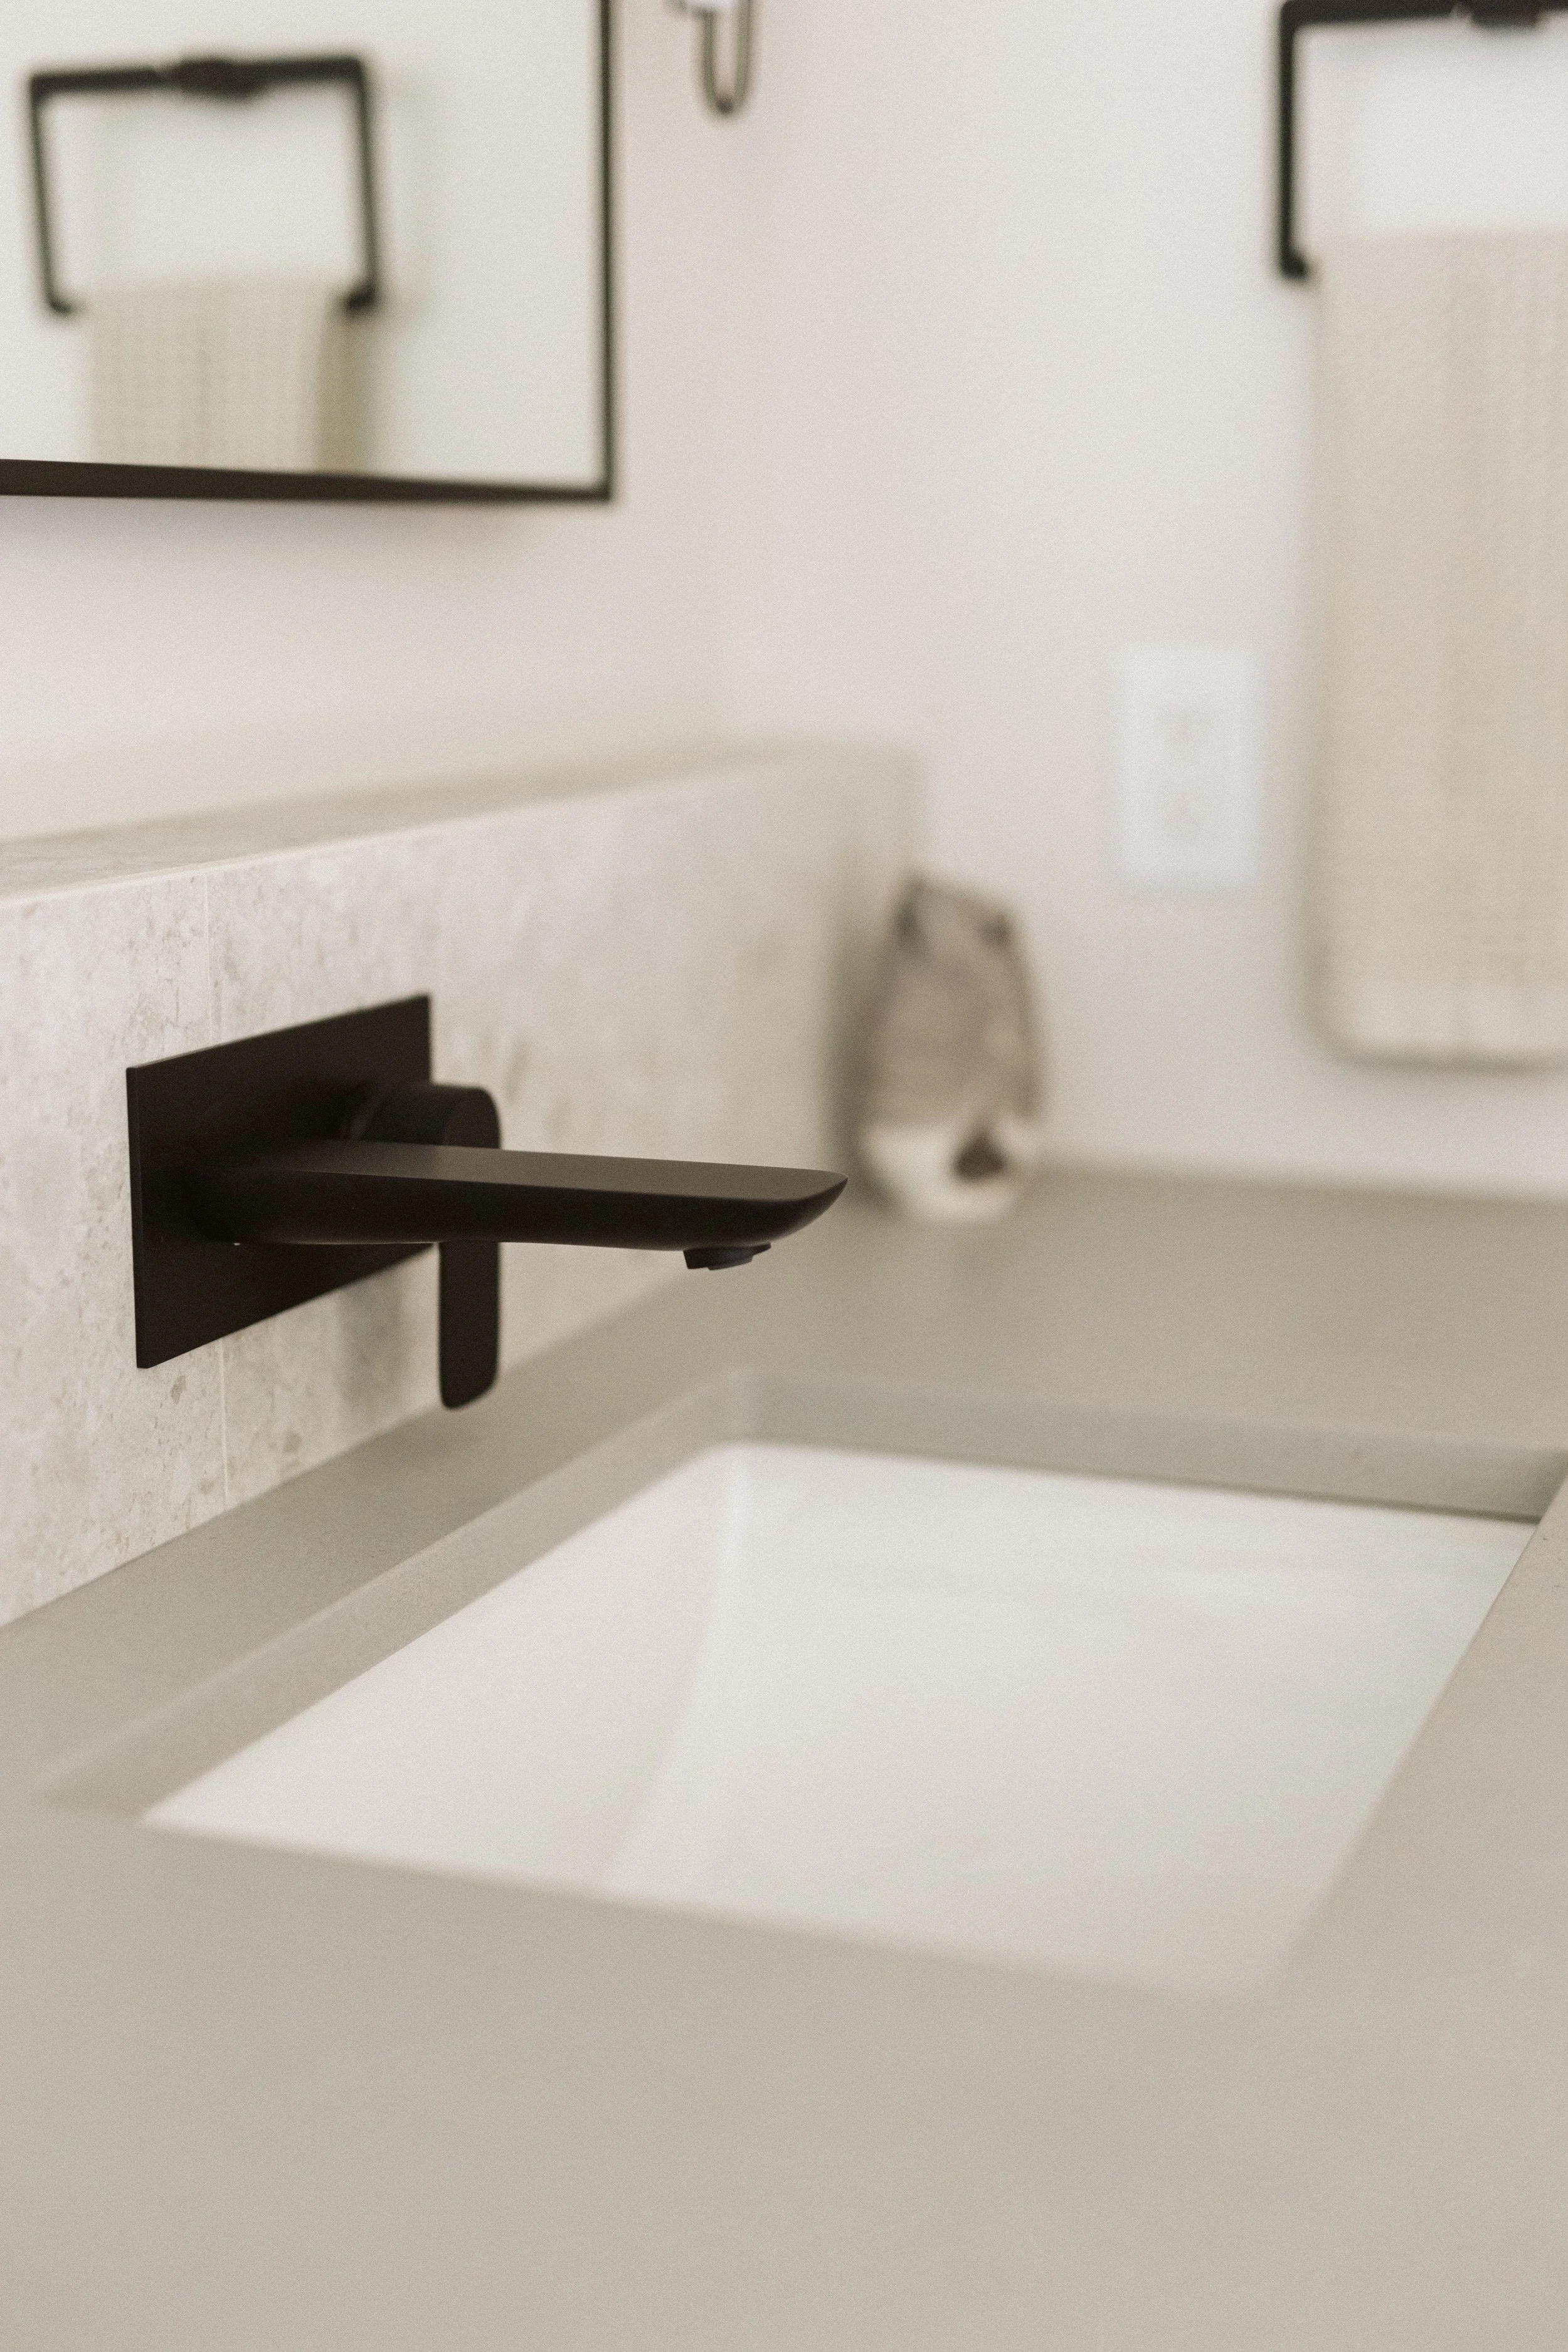
One of our favourite things to do in bathrooms is to add ledges. Ledges are framed in to be the same depth as a standard wall, are usually clad in tile, and offer a multitude of uses.
In the Edgewater bathroom seen below we designed a ledge wall integrated into both the shower and vanity to maximize storage and surfaces. In the shower, the ledge acts as a place to store shampoo, keep a plant, or display a small vase. Next to the window we built out the wall to house the shower; the ledge on the other side of the glass partition serves as a place to incorporate the flush built-in medicine cabinet. Finally, the ledge behind the sink allows the countertop to remain clean and clutter free while allowing necessities to be within an arm’s reach.
Things to consider when adding a ledge:
The width of your bathroom. You need at least 5-6” of extra width to make a ledge work. Often, the tub will determine the width of the bathroom and if you don’t plan on moving walls it can be difficult to maintain necessary clearances and floor space.
The type of storage needed. Do you like having things accessible all the time or do you like to keep things behind closed doors? It’s good to have a mixture of both and a ledge can serve as your open storage option.
Your plumbing. Ledge walls are a great opportunity to install unique plumbing such as your sink faucet or a wall-hung toilet as you have more creative leeway with the additional wall space


T U R N C L O S E T S I N T O M I L L W O R K
We can’t tell you how many times we’ve heard, “this closet just doesn’t work. Things get lost at the back, there’s not enough space, and it’s just chaos all the time”. One of the best things you can do for your home organization is to gut those awkward closets and install custom millwork aimed at the specific items you plan to store there.
In our Downtown project we did this in two places: the entry closet and the hall closet. Both closets formerly had double bi-fold doors, a hanging bar, an upper shelf, and were under-utilized. The entry closet (black millwork) was outfitted with pantry drawer inserts and now acts as such as it’s adjacent to the kitchen. Down the hall (white millwork), we adjusted the depth of this closet to accommodate both hanging and shelf storage.
Things to consider when changing a closet:
What do you need this space for? For instance, if the space was a linen closet before, what type of storage would suit your needs best? Shelves? Drawers? Hanging bar? Cubbies? Peg board?
Carefully consider depth. The minimum depth for hanging is 24” but we always try to allot 25” or more for hanging to give you flexibility just in case you want to hang bulky items.


P L A N F O R E L E C T R O N I C S
We always advocate for a clean look around electronics. With TVs and other devices in almost every room of the house now, cords are inevitable, but planning in advance can limit or even eliminate their appearance.
In our Gabrielle Roy project below we installed the Samsung Frame TV and sound bar above the fireplace with zero cords showing. To make this possible we installed PVC pipe behind the drywall from the back of the TV to the wood insert shelf to the left of the fireplace. You can’t see it in the photo (which is kind of the point!) but there’s a grommet in the wood that closes off the PVC pipe. Additionally, we added electrical outlets into the left side of the wood shelf. Both of these electrical solutions allow cords to pass through undetected to the TV in case you want to set up an Apple TV, cable box, or game console and be plugged in discreetly.
Things to consider when planning for electronics:
Plan for the electronics you have now. History has shown us that in most cases we’re plugging fewer items in over time, not more. As technology evolves to be increasingly wireless, planning based on what you need right now means that you’ll likely have more than enough outlets in the future.
Recessing the TV mount. The TV mount that comes with the Samsung Frame TV is made so that the TV can be flush against the wall, however our clients wanted to have the option of pulling out and swivelling the TV. So, to make this happen we created a recessed section in the wall and installed a different TV mount. We were able to maintain the “framed” picture look by recessing it just enough for the TV to hang like a picture frame.
Consider the future. Know you want to install surround sound at some point? Use this opportunity to plan out a layout for the sound system so that there aren’t other ceiling or wall components in the way in the future. You can also use plywood blocking (for secure attachment of fittings) behind the drywall in both the walls and ceiling in these pre-planned areas so that you don’t have to tear the drywall out again in the future (just make sure you mark down where the blocking was installed!). Alternatively, you can also use the opportunity of having the walls and ceiling opened up to create standard openings for the future system. Ceiling speaker cutouts are often similar in size to potlights and can be closed off with an access panel insert until you’re ready to install the sound system.


S H A L L O W S T O R A G E
Customizing your storage solution to the contents allows you to use space effectively so that you can have extra space where it matters.
Bathrooms often have medicine cabinets but they can be catchalls for small items instead of useful storage spaces. Instead of purchasing a ready-made medicine cabinet we will often construct one in the same materials as the vanity so that it not only integrates well with the rest of the bathroom, but also so that it’s customized to the homeowner’s needs.
In our Buckingham project (below left), we not only integrated a medicine cabinet with open and closed storage, we also recessed it into the wall to ensure that it project too far into the space above the toilet. In our Downtown project (below right), the client wanted more closed storage for her various products so we chose not to incorporate an open shelf into the design plan. Instead, we rested a full-depth custom medicine cabinet, matching the vanity with full height slab doors, on the ledge wall.
Things to consider when incorporating shallow storage:
Make a list of the things you want to store in your bathroom. Then divide the list into vanity, medicine cabinet, and linen storage (if you have room). This will give you a good grasp of how much storage you need for various items and where extra storage might be needed in the future.
The size of your space. If you have a very small space you need to get creative with your storage. Are there opportunities for you to recess storage between the wall framing?


D I S P L A Y S P A C E
We’re big believers in spaces being both functional AND beautiful. The items you display in your home are a reflection of your personality and your life and you should be able to proudly show them off.
At our Ash project below we incorporated a floor to ceiling open shelf so that this couple could display their books, LPs, vases, and other knick knacks. In addition to it’s function as a shelf, this unit also concealed a structural post in the middle of the space, a cost saving decision made during the final design and quoting stages of the design plan. We carefully lined up the one fixed shelf to be flush with the peninsula countertop to create a seamless transition. Instead of lining up the lower shelving integrated into the peninsula with the tall shelving, we stepped it back to facilitate better navigation through the space and to allow each set of shelves to have their individual moments.
Things to consider when incorporating display space:
The size of the items you wish to display. For the Ash project we knew we wanted the shelves to be equally spaced but we were also mindful of the items the homeowners wished to display. Because of this we only made one of the shelves truly fixed, while the others are all adjustable, allowing for flexibility today and in the future.
Aesthetics only or heavy use? Sometimes we want to have certain items out because we use them every day. We suggest considering which category the items you want to display are in. If the item is something you use every day then it should be within reach and not stored below the counter. If the item is something you simply want to display make sure it fits with the rest of the decor and display away!


FURTHER READING


